
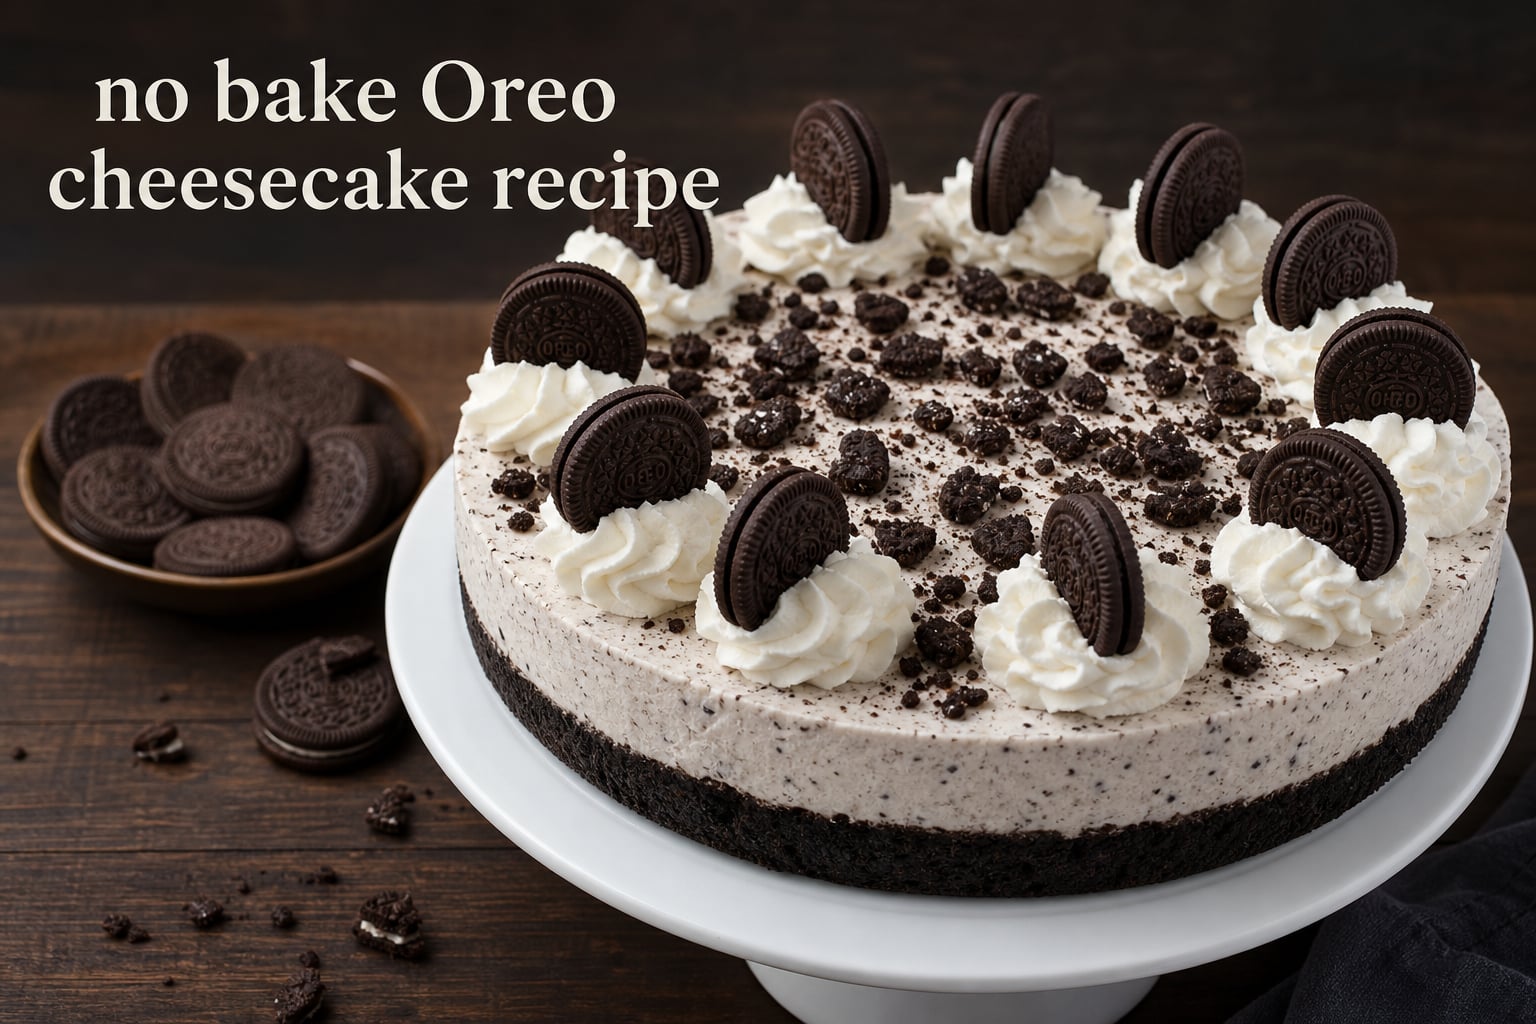
If you want a show-stopping dessert that takes less than 30 minutes of hands-on time, this no bake Oreo cheesecake recipe is exactly what you need. It has a crunchy Oreo crust, a silky cream cheese filling loaded with crushed cookies, and a whipped cream topping that makes every slice look bakery-worthy. No oven required, no water bath, no cracked tops to worry about.
Our team has tested this recipe over a dozen times in the 7ate9 Bakery kitchen. We have served it at birthday parties, holiday gatherings, and casual weeknight dinners. Every single time, it disappears fast and people ask for the recipe.
This no bake Oreo cheesecake recipe uses Oreos three different ways — in the crust, folded into the filling, and scattered on top. That triple-hit of chocolate cookie flavor is what makes it stand out from other no bake cheesecakes you may have tried. The best part is that you can make it a full day ahead, so you are not scrambling when guests arrive.
Table of Contents
Ingredients You Will Need
You do not need anything fancy for this recipe. Every ingredient is available at a regular grocery store. The trick is getting the right type of each ingredient, which I will explain below.
For the Oreo Crust
25 Oreo cookies (about 1 standard package) — you will use the whole cookie, cream filling and all
5 tablespoons unsalted butter, melted
That is it for the crust. The cream filling inside the Oreos acts as a binder along with the butter, so you do not need to remove it. I have tested both ways and leaving the cream in gives you a richer, more cohesive crust that holds together beautifully when sliced.
For the Cheesecake Filling
16 oz (2 bricks) full-fat cream cheese, softened to room temperature
1/2 cup (100g) powdered sugar, sifted
1 teaspoon vanilla extract
1 cup (240ml) cold heavy whipping cream
2 tablespoons powdered sugar (for whipping the cream)
12-15 Oreo cookies, coarsely chopped (for folding into the filling)
Optional Garnishes
1 cup heavy whipping cream + 2 tablespoons powdered sugar (for whipped topping)
8-10 Oreo cookies, crushed or halved
Chocolate syrup or hot fudge for drizzling
The garnishes are optional but they take this dessert from homemade to bakery-level. A piped ring of whipped cream around the edge with a whole Oreo standing in each dollop is my go-to presentation for parties.
How to Make No Bake Oreo Cheesecake
Here is the complete step-by-step guide for this no bake Oreo cheesecake recipe. Follow these steps in order and you will get a perfectly set, creamy cheesecake every time.
Quick overview: Crush Oreos into crumbs and mix with melted butter for the crust. Press into a springform pan and chill. Beat softened cream cheese with powdered sugar and vanilla. Separately whip cold heavy cream to stiff peaks. Fold the whipped cream and chopped Oreos into the cream cheese mixture. Spread over the crust and refrigerate for at least 6 hours.
Step 1: Prepare the Oreo Crust
Place 25 Oreo cookies into a food processor and pulse until you have fine crumbs. If you do not have a food processor, put the cookies in a large zip-top bag and crush them with a rolling pin or the bottom of a heavy drinking glass. You want the crumbs to be fine but a few small chunks will not hurt.
Transfer the crumbs to a medium bowl and pour in the 5 tablespoons of melted butter. Mix with a fork until all the crumbs are evenly moistened — the mixture should feel like damp sand and hold together when you squeeze a handful.
Pour the crumb mixture into a 9-inch springform pan. Use the bottom of a measuring cup or drinking glass to press the crumbs firmly and evenly across the bottom. I also like to press the crumbs about halfway up the sides of the pan for a taller crust edge. Press firmly — a loose crust is one of the most common problems people report.
Place the crust in the refrigerator to chill while you make the filling. At minimum, give it 15-20 minutes. A cold crust firms up the butter so it holds its shape when you add the filling.
Step 2: Whip the Heavy Cream
Pour 1 cup of cold heavy whipping cream into a large mixing bowl. The cream needs to be cold — if it is warm, it will not whip properly. I sometimes pop my bowl and beaters in the freezer for 10 minutes before whipping, especially in summer.
Using a hand mixer or stand mixer fitted with a whisk attachment, whip the cream on medium-high speed. Add the 2 tablespoons of powdered sugar about halfway through. Continue whipping until you reach stiff peaks — when you lift the beaters, the cream should stand straight up with a sharp point that does not fold over.
Stop the moment you reach stiff peaks. If you keep going, the cream will turn grainy and eventually separate into butter. Set the whipped cream aside.
Step 3: Beat the Cream Cheese Mixture
In a separate large bowl, place the 16 oz of softened cream cheese. Add 1/2 cup of sifted powdered sugar and 1 teaspoon of vanilla extract. Beat with a hand mixer on medium speed until completely smooth and creamy.
This step depends entirely on your cream cheese being at room temperature. If your cream cheese is cold, you will get lumps that no amount of mixing will remove. I take mine out of the fridge 2 hours before starting. If you forget, cut it into small cubes and microwave in 10-second intervals until soft but not melted.
Scrape down the sides of the bowl with a rubber spatula and beat for another 15 seconds to make sure everything is fully incorporated. The mixture should be silky smooth with zero lumps.
Step 4: Fold in the Whipped Cream and Chopped Oreos
Add about one-third of the whipped cream to the cream cheese mixture. Fold it in gently with a rubber spatula using a sweeping motion — cut down through the center, scrape along the bottom, and lift up and over. This first addition lightens the cream cheese and makes it easier to fold in the rest.
Add the remaining whipped cream and continue folding gently until no white streaks remain. The key word here is gently. If you stir aggressively, you will deflate the whipped cream and your filling will be dense instead of light and airy.
Fold in the 12-15 coarsely chopped Oreo cookies. Distribute them evenly through the filling. I chop them fairly large because the chunks give great texture contrast against the smooth cream.
Step 5: Assemble and Chill
Remove the chilled crust from the refrigerator. Pour the cheesecake filling over the crust and spread it out evenly with an offset spatula or the back of a spoon. Smooth the top.
Cover the pan loosely with plastic wrap — do not let it touch the surface of the cheesecake or it will stick. Refrigerate for at least 6 hours, but overnight is even better. The cheesecake needs this time for the cream cheese and whipped cream to set into a firm, sliceable texture.
When you are ready to serve, run a thin knife around the edge of the pan to loosen the cheesecake, then release the springform ring. Add your garnishes, slice with a hot, clean knife (dip it in hot water and wipe dry between cuts for clean slices), and serve.
Tips for Success
After making this no bake Oreo cheesecake recipe many times, I have learned what separates a good result from a great one. Here are the tips that matter most.
Use full-fat brick-style cream cheese. This is the single most important tip. Brick cream cheese (the kind in a foil wrapper) has less moisture than the tub variety. Tub cream cheese is whipped with air and contains added stabilizers that can prevent your cheesecake from setting properly. I use Philadelphia brand full-fat cream cheese and have never had a setting failure.
Softened does not mean melted. Room temperature cream cheese should yield when you press it but still hold its shape. If you microwave it too long, the fat separates and you get a greasy filling. Let it sit on the counter for 2 hours, or cut into cubes and microwave in short 10-second bursts.
Whip the cream to stiff peaks, not beyond. Stiff peaks mean the cream holds its shape when you lift the beaters. If the peak flops over, keep going. If the cream looks grainy or curdled, you have gone too far. Under-whipped cream will make the filling loose; over-whipped cream will make it lumpy.
Fold, do not stir. Folding keeps the air in the whipped cream, which is what gives the filling its light, mousse-like texture. Use a wide spatula and a gentle hand. Think of it as tucking the cream into the mixture rather than mixing it.
Line your pan with parchment paper. Cut a circle of parchment to fit the bottom of your springform pan before adding the crust. This guarantees the cheesecake will release cleanly when you unmold it. I learned this the hard way after losing half a crust to a sticky pan.
Give it enough chill time. Four hours is the absolute minimum but the filling will still be soft. Six hours gives you a proper set. Overnight gives you the best texture and cleanest slices. If you are making this for a party, prepare it the night before and you are done.
Use a springform pan. You can use a pie plate in a pinch, but a springform pan lets you remove the sides for a clean, professional presentation. A 9-inch pan is the right size for this recipe.
Recipe Variations
One of the things I love about this no bake Oreo cheesecake recipe is how easy it is to customize. Here are some of my favorite variations.
Mini Oreo Cheesecakes
Instead of a springform pan, line a standard 12-cup muffin tin with paper liners. Press about 1 tablespoon of the Oreo crumb mixture into each liner. Fill each cup about three-quarters full with the cheesecake filling. Chill for 4 hours. This recipe makes about 12 mini cheesecakes. They are perfect for potlucks, kids’ parties, or portion-controlled treats.
Golden Oreo Cheesecake
Swap the regular Oreos for Golden Oreos (the vanilla cookie version). The crust becomes a buttery vanilla base, and the filling has a lighter, sweeter flavor. This version is gorgeous for spring and summer gatherings. You can also try Mint Oreos for a refreshing twist or Birthday Cake Oreos for a fun, colorful dessert.
Cool Whip Substitution
If you want to skip whipping heavy cream, substitute 1 container (8 oz) of Cool Whip for the homemade whipped cream. Thaw the Cool Whip first, then fold it into the cream cheese mixture the same way. The result is slightly sweeter and a bit softer in texture. Many bakers in forums report excellent results with this shortcut. The trade-off is that Cool Whip contains less fat than heavy cream, so the cheesecake may not set quite as firmly.
Chocolate Drizzle Version
Melt 4 oz of semi-sweet chocolate and drizzle it over the chilled cheesecake before serving. You can also fold 1/4 cup of mini chocolate chips into the filling along with the chopped Oreos for extra chocolate intensity.
No-Bake Oreo Cheesecake Without Gelatin
This recipe naturally contains no gelatin. The setting power comes from the combination of cold temperature, full-fat cream cheese, and whipped cream. You do not need gelatin, agar-agar, or any other setting agent.
Troubleshooting Common Issues
Based on questions I see in baking forums and comments on competitor recipes, here are the most common problems and how to fix them.
My Cheesecake Did Not Set
This is the number one complaint, and it almost always comes down to three causes. First, the cream cheese was not full-fat brick style — tub cream cheese or low-fat versions have too much moisture and will not firm up. Second, the whipped cream was under-whipped or deflated during mixing. Third, the chill time was too short. Make sure you hit the 6-hour minimum, and remember that overnight is always better.
The Filling Is Watery or Runny
A liquidy filling usually means the cream cheese was too warm when you mixed it, or the heavy cream was not cold enough to whip properly. If this happens, you can try refrigerating the filling for 30 minutes before spreading it in the crust — sometimes a short chill helps it firm up. If the filling is beyond saving, add an extra half cup of freshly whipped cream and fold it in to give the mixture more structure.
The Texture Is Grainy or Lumpy
Grainy filling means the cream cheese was not fully softened before beating. Lumps of cold cream cheese will not dissolve no matter how long you mix. The fix is prevention: always let cream cheese come to room temperature for 2 hours before starting. If you are in a rush, cut it into small cubes to soften faster.
The Crust Is Falling Apart
A crumbly crust means there is not enough butter binding the crumbs together. Next time, add an extra tablespoon of melted butter. You can also press the crust more firmly into the pan — a measuring cup with a flat bottom works great for this. Make sure the crust chills for at least 20 minutes before adding the filling.
Not Enough Oreo Flavor
If you want a stronger Oreo punch, add more chopped cookies to the filling. You can also crush a few Oreos into a fine powder and fold that in along with the chunks — the fine crumbs distribute flavor more evenly. Some bakers brush the chilled crust with a thin layer of melted chocolate before adding the filling for extra intensity.
Storage and Make-Ahead Instructions
This no bake Oreo cheesecake recipe is one of the best make-ahead desserts you can make. Once chilled and set, cover it tightly with plastic wrap or store it in an airtight container. It will keep in the refrigerator for up to 5 days.
You can also freeze this cheesecake. Wrap the whole cheesecake (or individual slices) tightly in plastic wrap, then in aluminum foil. Freeze for up to 2 months. To serve, thaw overnight in the refrigerator. I do not recommend refreezing after thawing.
For parties, I typically make this the day before. The extra chilling time actually improves the texture — the flavors meld together and the filling firms up to that ideal dense-but-airy consistency.
FAQs
What are common no-bake cheesecake mistakes?
The most common mistakes are using tub or low-fat cream cheese instead of full-fat brick style, not letting cream cheese reach room temperature before mixing, under-whipping the heavy cream, stirring instead of folding the whipped cream into the filling, and not chilling the cheesecake long enough (at least 6 hours is required).
What type of cream cheese is best for no-bake cheesecake?
Full-fat brick-style cream cheese is the best choice for no-bake cheesecake. The kind sold in foil wrappers (like Philadelphia original) has less moisture and more fat than tub-style cream cheese, which helps the filling set properly. Avoid low-fat, whipped, or spreadable cream cheese as these contain added air and moisture that prevent proper setting.
Do you need to remove cream from Oreos for cheesecake?
No, you do not need to remove the cream filling from Oreos. The cream filling actually adds flavor and helps bind the crust together. Simply crush the whole cookies (cream and all) in a food processor or with a rolling pin. The same applies for the Oreos you fold into the filling — use the whole cookie.
Can you use Cool Whip instead of whipped cream?
Yes, you can substitute one 8 oz container of Cool Whip for the homemade whipped cream in this recipe. Thaw the Cool Whip completely before folding it into the cream cheese mixture. The result will be slightly sweeter and a touch softer in texture, but many bakers report excellent results with this shortcut.
How long can no-bake Oreo cheesecake last in the fridge?
No-bake Oreo cheesecake will last up to 5 days in the refrigerator when stored in an airtight container or tightly covered with plastic wrap. For best texture and flavor, consume within 3 days. The crust may soften slightly over time but the filling holds well.
Can you freeze no-bake cheesecake?
Yes, you can freeze no-bake cheesecake for up to 2 months. Wrap the whole cheesecake or individual slices tightly in plastic wrap, then in aluminum foil to prevent freezer burn. Thaw overnight in the refrigerator before serving. Do not refreeze after thawing.
Final Thoughts
This no bake Oreo cheesecake recipe proves that you do not need an oven or advanced baking skills to make a dessert that looks and tastes like it came from a bakery. With just a handful of ingredients and a little patience while it chills, you get a creamy, cookie-packed cheesecake that works for any occasion. Make it the night before your next gathering and watch it disappear.