
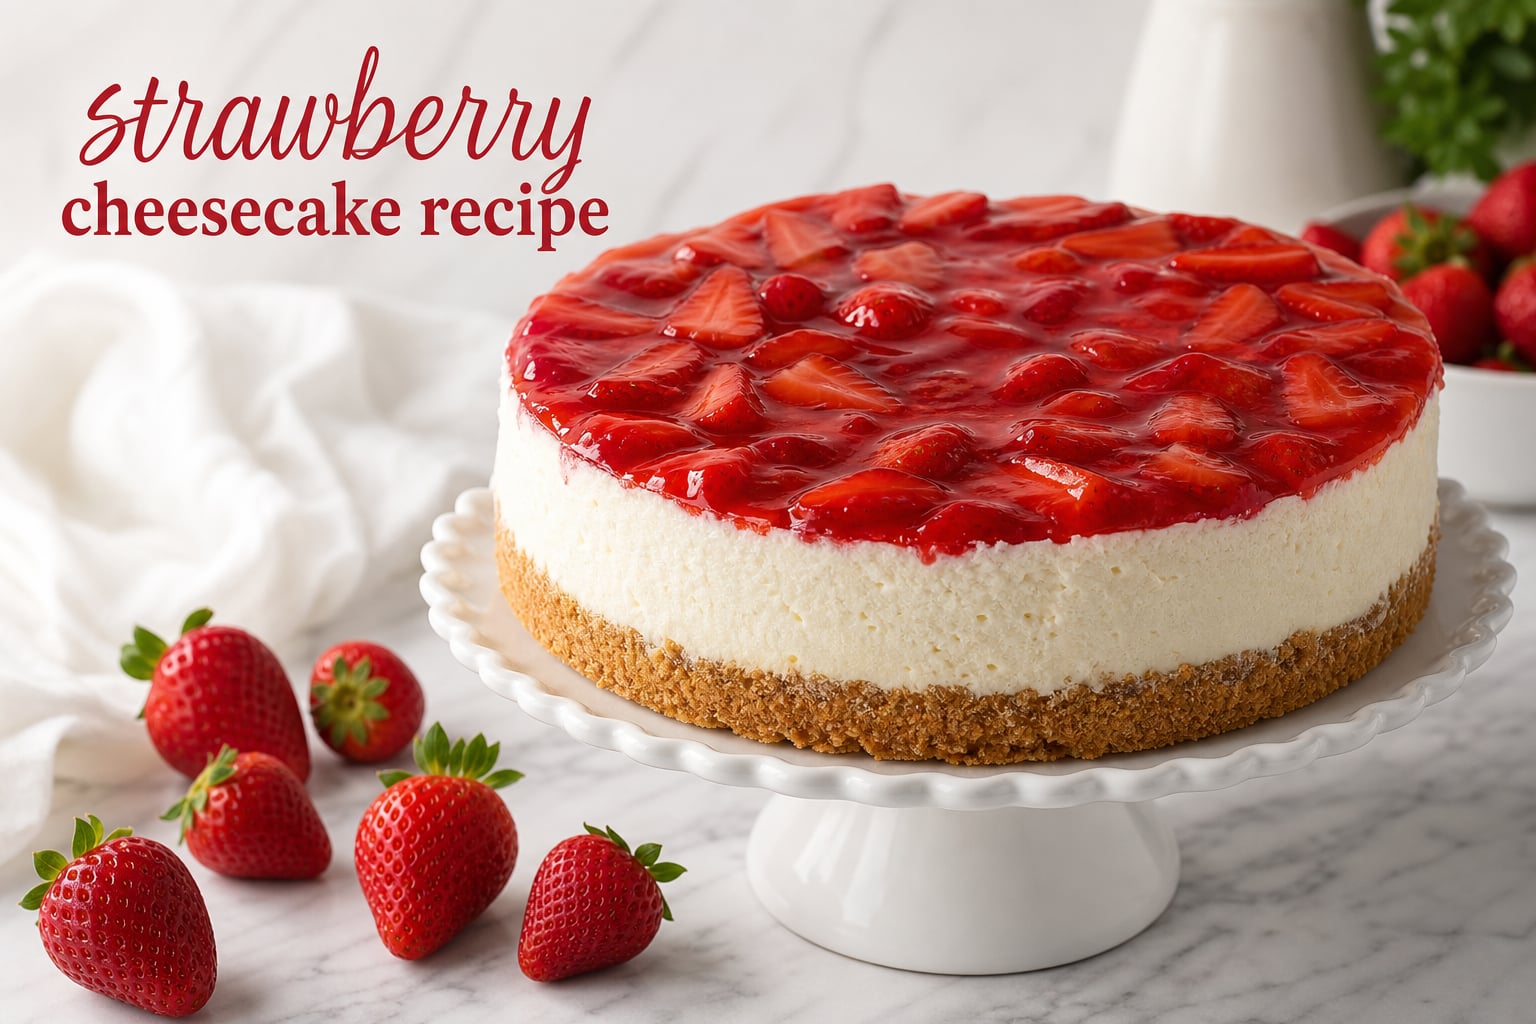
When I first started baking cheesecakes in my kitchen, I had no idea they would become my most requested dessert. Friends would ask me to bring one to every dinner party, and family gatherings always featured a creamy cheesecake as the centerpiece. After years of testing, tweaking, and yes, dealing with my fair share of cracked tops, I’ve developed a strawberry cheesecake recipe that delivers consistent results every single time.
This recipe creates a smooth, velvety cream cheese filling atop a buttery graham cracker crust, all crowned with a vibrant homemade strawberry topping. The best part? You don’t need a water bath to achieve perfect results. I’ll walk you through every step, sharing the techniques that transformed my cheesecake from frustrating to foolproof.
You’ll learn exactly which ingredients matter most, how to prevent those dreaded cracks, and the secrets to getting that restaurant-quality texture at home. Whether you’re a first-time cheesecake maker or looking to improve your technique, this guide has you covered from start to finish.
This strawberry cheesecake has earned a permanent spot in my dessert rotation. The bright, fresh strawberry topping cuts through the richness of the cream cheese filling in a way that feels balanced and never overwhelming. It’s the kind of dessert that disappears quickly at potlucks, impresses at holiday dinners, and satisfies late-night sweet cravings when you keep a slice in the fridge.
Before we dive into the details, let me promise you one thing: this recipe is completely doable for home bakers. You don’t need specialty equipment, hard-to-find ingredients, or professional training. What you need is patience, attention to a few key techniques, and the willingness to let your cheesecake chill overnight. That last part is the hardest for most people, including me.
Table of Contents
Strawberry Cheesecake Recipe: Complete Ingredient List
Great cheesecake starts with understanding your ingredients. Each component plays a specific role in creating that signature creamy texture and rich flavor. Let me break down exactly what you need and why each ingredient matters for your finished dessert.
I’ve organized this section into three parts: the crust, the filling, and the topping. Read through all of it before you start baking so you understand how each element contributes to the final result. Knowing your ingredients helps you make smart substitutions and avoid common mistakes.
For the Graham Cracker Crust
The foundation of any good cheesecake is a sturdy, buttery crust that holds its shape when sliced. This crust should be crisp enough to provide textural contrast but tender enough to cut cleanly with a fork.
- 2 cups graham cracker crumbs (about 16 full sheets, crushed) – The classic cheesecake base with just enough sweetness and a pleasant crunch. You can also use digestive biscuits if graham crackers aren’t available in your area.
- 1/4 cup granulated sugar – Sweetens the crust without making it cloying. The sugar also helps the crust brown slightly during baking.
- 1/2 cup unsalted butter, melted – Binds the crumbs together and adds richness. Use real butter, not margarine, for the best flavor and texture.
- Pinch of salt – Enhances the buttery flavor and balances the sweetness of the crust.
One note about graham cracker crumbs: you can buy pre-crushed crumbs at most grocery stores, but crushing your own gives you better texture control. Store-bought crumbs tend to be very fine and powdery, while freshly crushed crackers have a mix of fine and slightly coarser pieces that make for a more interesting crust.
For the Cream Cheese Filling
This is where the magic happens. The filling needs to be smooth, rich, and just tangy enough to balance the sweet strawberry topping. Every ingredient here serves a purpose, and understanding those purposes will make you a better cheesecake baker.
- 32 ounces full-fat cream cheese, softened (4 blocks of 8 ounces each) – This is non-negotiable. Brick-style cream cheese, not the spreadable kind. Full-fat is essential for proper texture and set. Low-fat or whipped cream cheese will not give you the same results.
- 1 cup granulated sugar – Provides sweetness and helps create structure in the filling as it bakes. The sugar dissolves during mixing and baking, contributing to that smooth, silky texture.
- 1/2 cup sour cream, room temperature – Adds tanginess and keeps the filling from being too heavy. Some recipes use heavy cream, but sour cream gives better flavor complexity and a slight tang that balances the sweetness beautifully.
- 1 teaspoon vanilla extract – Use pure vanilla, not imitation. The difference is noticeable in the final flavor. If you have vanilla bean paste, that works beautifully too and adds those lovely little specks.
- 1 tablespoon lemon juice – Brightens the flavor and helps the cheesecake set properly. The acidity interacts with the proteins in the cream cheese and eggs to improve texture.
- 4 large eggs, room temperature – These provide structure and help the filling set during baking. Room temperature eggs incorporate more evenly than cold ones, preventing streaks in your filling.
- 2 tablespoons all-purpose flour – Helps stabilize the filling and reduces cracking. This small amount of flour acts as insurance against those frustrating surface cracks that plague so many cheesecakes.
For the Strawberry Topping
Fresh strawberries cooked into a glossy sauce that transforms this cheesecake into something special. This topping is what sets this recipe apart from a plain cheesecake and makes it truly memorable.
- 4 cups fresh strawberries, hulled and quartered (or frozen strawberries, thawed) – Choose ripe, fragrant strawberries for the best flavor. In peak season, I use fresh berries exclusively. Off-season, frozen works great.
- 1/2 cup granulated sugar – Sweetens the berries and helps draw out their natural juices during cooking.
- 1 tablespoon cornstarch – Thickens the sauce without making it gummy or artificial-tasting. Cornstarch creates that beautiful glossy finish.
- 1 tablespoon lemon juice – Preserves the bright red color of the strawberries and adds a fresh brightness to the finished sauce.
- 1/2 teaspoon vanilla extract – Rounds out the flavor and adds depth to the strawberry sauce.
Equipment You Need
Before you start, gather your equipment. Having everything ready makes the process smoother and helps you work quickly once the filling is mixed. Cheesecake rewards preparation, so take five minutes to set up your workspace.
Springform pan (9-inch) – The essential tool for cheesecake. The removable sides let you release the cheesecake without damaging it. A 9-inch pan gives the best thickness ratio. If you only have a 10-inch pan, reduce baking time by about 10 minutes. Avoid nonstick pans with dark coatings, as they can cause the crust to brown too quickly.
Electric mixer – Stand mixer or hand mixer both work. A stand mixer frees your hands to add ingredients and scrape the bowl, but a hand mixer gives you more control over mixing time. If using a stand mixer, use the paddle attachment, not the whisk, to avoid incorporating too much air.
Parchment paper – Cut a circle for the bottom of your pan. This ensures the crust releases cleanly when you unmold the cheesecake. I consider this step absolutely essential, even with a well-greased pan.
Rubber spatula – Essential for scraping the bowl and folding ingredients without incorporating too much air. A silicone spatula with a flat edge works best for getting every last bit of filling from the bowl.
Heavy-duty aluminum foil – Place a sheet under your springform pan in the oven to catch any butter that might leak from the crust. Even if you’re not using a water bath, this protective layer saves you from cleaning burnt butter off your oven floor.
Measuring cups and spoons – Accuracy matters in baking. Use dry measuring cups for dry ingredients and liquid measuring cups for liquids. Level off dry ingredients with the back of a knife for consistent results.
Medium saucepan – For making the strawberry topping. A saucepan with a heavy bottom prevents hot spots and gives you more control over the cooking process.
How to Make Strawberry Cheesecake: Step-by-Step Instructions
Now for the main event. Follow these steps carefully, and you’ll have a bakery-worthy strawberry cheesecake that will impress anyone who tries it. Each step builds on the previous one, so work through them in order without skipping ahead.
Total time from start to finish is about 90 minutes of active work, plus chilling time. Plan to make this the day before you want to serve it for best results. The overnight chill is when the magic really happens.
Step 1: Make the Graham Cracker Crust
Preheat your oven to 350°F (175°C). Grease a 9-inch springform pan lightly with butter or cooking spray and line the bottom with a parchment paper circle. This little step saves you from struggling with a stuck crust later.
Crush your graham crackers into fine crumbs. A food processor makes quick work of this, but placing them in a zip-top bag and rolling with a heavy glass or rolling pin works just as well. You want uniform crumbs with no large pieces remaining – any chunk bigger than a pea will create a weak spot in your crust.
In a medium bowl, combine the graham cracker crumbs, sugar, melted butter, and salt. Stir thoroughly until the mixture resembles wet sand. When you squeeze a handful, it should hold its shape but crumble easily when touched. If it doesn’t hold together, add another tablespoon of melted butter.
Press the mixture firmly into the bottom of your prepared springform pan. I use the bottom of a measuring cup to get an even, compact layer. Work from the center outward, pressing the crumbs up the sides of the pan by about half an inch for a neat edge. Don’t press so hard that you create a dense, hard crust – just enough to make it cohesive.
Bake the crust for 8-10 minutes until it smells toasted and fragrant. The edges should be slightly darker than the center. Remove from the oven and let it cool while you prepare the filling. Reduce oven temperature to 325°F (160°C) for the cheesecake baking phase.
Step 2: Prepare the Cream Cheese Filling
This is where patience becomes your greatest ingredient. Rush this step, and you’ll have lumps. Take your time, and you’ll have silk. The quality of your finished cheesecake depends almost entirely on how well you handle the filling.
First, ensure your cream cheese is properly softened. Leave it on the counter for at least 2 hours, or overnight if your kitchen is cool. When you press it with your finger, it should leave a deep indent with almost no resistance. If there’s any pushback, it needs more time.
Place the softened cream cheese and sugar in the bowl of your stand mixer fitted with the paddle attachment. Beat on medium speed for 2-3 minutes until completely smooth and creamy. Stop halfway through to scrape down the bowl and paddle with your rubber spatula. No sugar granules should be visible when you’re done, and the mixture should be uniform in color and texture.
Add the sour cream, vanilla extract, and lemon juice. Mix on low speed until combined, about 30 seconds. Scrape the bowl again to make sure everything is evenly incorporated. The mixture should look smooth and slightly lighter in color at this point.
Add the flour and mix just until incorporated. The flour helps stabilize the filling and reduces the chance of cracks during baking. Don’t skip this ingredient – it’s one of the secrets to a crack-free surface.
Now for the eggs. Add them one at a time, mixing on low speed after each addition until just combined. This is crucial: do not overmix once the eggs are added. Overmixing incorporates air, which causes the cheesecake to puff during baking and then sink during cooling, leading to cracks. Mix each egg for no more than 15-20 seconds.
The finished filling should be smooth and creamy with no visible lumps. Give it a final stir with a rubber spatula to ensure everything from the bottom of the bowl is evenly distributed. The filling should pour slowly, like thick cake batter.
Step 3: Bake the Cheesecake
Pour the filling over your cooled crust. Use your spatula to spread it evenly, then give the pan a couple of gentle taps on the counter to release any large air bubbles. This tapping step might seem minor, but it helps eliminate those unsightly air pockets that can create craters on the surface.
Place the springform pan on a baking sheet lined with aluminum foil. This catches any butter that might leak from the crust and makes handling the pan much easier in and out of the oven. The foil also protects your oven from any drips.
Bake at 325°F (160°C) for 55-65 minutes. The cheesecake is done when the edges are set and puffy, but the center still has a slight wobble – like Jell-O that hasn’t quite set. It should not be liquid, just a gentle tremor when you shake the pan. This jiggle is the signal that the filling is perfectly cooked.
If the center is completely set when you take it out, you’ve overbaked it. The residual heat will continue cooking the center as the cheesecake cools, so removing it while still slightly jiggly is key to a creamy rather than dry texture.
Turn off the oven and crack the door open about an inch. Use a wooden spoon to prop the door if it won’t stay. Let the cheesecake cool in the oven for 1 hour. This gradual cooling prevents cracks from rapid temperature changes and is one of the most important steps in the entire process.
After an hour, remove the cheesecake from the oven and run a thin knife around the edge to loosen it from the pan. This is another crack-prevention step, as the cheesecake contracts as it cools. If the filling sticks to the sides of the pan during contraction, it will pull and crack the surface.
Let it cool completely at room temperature, about another hour, then cover with plastic wrap and refrigerate for at least 6 hours or overnight. The overnight chill is ideal – it gives the flavors time to develop and ensures the filling is properly set before slicing.
Step 4: Make the Strawberry Topping
While the cheesecake chills, prepare the strawberry topping. This can be made up to 3 days ahead and stored in the refrigerator, which is great for spreading out your prep work.
Combine the strawberries, sugar, and lemon juice in a medium saucepan over medium heat. Cook for 5-7 minutes, stirring occasionally, until the strawberries release their juices and begin to soften. The kitchen will smell amazing at this point.
Mix the cornstarch with 1 tablespoon of cold water to create a slurry. Add this to the saucepan and stir constantly for 2-3 minutes until the sauce thickens and becomes glossy. You’ll see it transform from a loose, watery mixture to a spoonable sauce that coats the back of a spoon. The cornstarch needs that constant stirring to prevent lumps from forming.
Remove from heat and stir in the vanilla extract. Let the topping cool completely before using, or store in an airtight container in the refrigerator for up to one week. The sauce will thicken further as it cools, so don’t worry if it seems a bit loose when you remove it from the heat.
For a smoother sauce, you can use an immersion blender to partially blend the cooked strawberries. I prefer to leave some chunks for texture, but this is entirely a matter of preference. Some bakers strain the sauce for a perfectly smooth glaze, though I find the rustic look of chunky strawberry topping more appealing.
Step 5: Assemble and Serve
When you’re ready to serve, remove the cheesecake from the refrigerator. Run a thin knife around the edge once more, then carefully release the springform pan sides. The cheesecake should release cleanly if you greased and lined the pan properly.
Transfer the cheesecake to your serving plate. You can leave the pan bottom underneath for stability, or carefully slide the cheesecake off onto your plate using the parchment paper as a guide. If the parchment sticks, a gentle pull should release it without damaging the crust.
Spoon the strawberry topping over the cheesecake just before serving. You can cover the entire top for a dramatic presentation, or serve the sauce alongside for guests to add their own. I like to arrange a few fresh strawberry halves on top of the sauce for extra visual appeal and texture contrast.
Use a sharp knife dipped in hot water to cut clean slices. Wipe the knife between cuts with a damp cloth for the neatest presentation. The hot water warms the blade, allowing it to glide through the filling without dragging. This cheesecake serves 12-14 people comfortably, depending on how generous you are with your portions.
Tips for Crack-Free Cheesecake
After making countless cheesecakes (and more than a few disappointing ones), I’ve identified the factors that make or break that perfect surface. Here’s everything I’ve learned about achieving a smooth, unblemished top. These tips come from years of personal experience and countless conversations with fellow bakers.
Room Temperature Ingredients Are Non-Negotiable
This is the single most important tip I can share. Cold cream cheese will not blend smoothly, no matter how long you beat it. Those tiny lumps might not seem like much, but they create weak spots in the filling that can lead to cracks during baking and an uneven texture in every slice.
Plan ahead and set your cream cheese, eggs, and sour cream on the counter at least 2-3 hours before you start. If you forget (and I have many times), you can soften cream cheese more quickly by cutting it into small cubes and letting it sit for 30 minutes. Another trick is placing the unwrapped blocks in a bowl of warm (not hot) water for 10 minutes, changing the water halfway through.
Room temperature eggs matter just as much. Cold eggs added to room temperature cream cheese will cause the fat to seize, creating those same lumps we’re trying to avoid. Put your eggs in a bowl of warm water for 10 minutes if you forgot to take them out ahead of time.
Don’t Overmix the Eggs
Once you add the eggs, stop mixing as soon as they’re incorporated. Overmixing whips air into the batter, which expands during baking and then contracts as the cheesecake cools. That contraction is what causes surface cracks, and no amount of topping can fully hide a badly cracked cheesecake.
Mix on the lowest speed setting after adding eggs. The goal is just to combine, not to create volume. This is one case where less mixing is definitely more. Count to 15 or 20 for each egg, and you’ll have perfectly incorporated eggs without excess air.
If you’re using a stand mixer, consider switching to hand-mixing for the egg stage. A hand mixer on its lowest setting gives you more control and makes it harder to accidentally overmix. Some bakers even stir in the last egg by hand with a spatula.
The Water Bath Question
Many cheesecake recipes insist on a water bath (bain-marie) to create steam and ensure even, gentle heating. While water baths do work, they’re also cumbersome and risk water seeping into your carefully prepared cheesecake. Nothing is more heartbreaking than pulling your cheesecake out of a water bath to find the crust has gone soggy.
My recipe skips the water bath entirely. The secret is the combination of a moderate oven temperature (325°F), the addition of flour to stabilize the filling, and the gradual cooling method. These three elements give you crack-free results without the water bath hassle.
If you’ve struggled with cracks in the past and want extra insurance, you can absolutely use a water bath. Wrap your springform pan tightly in two layers of heavy-duty foil to prevent leaks, place it in a larger roasting pan, and add hot water to reach halfway up the sides of the springform. Bake at 325°F, adding about 10-15 minutes to the total time. The steam creates a humid environment that promotes gentle, even cooking.
Alternatively, you can skip the water bath but add a pan of hot water on the rack below your cheesecake. This creates a similar humid environment without the risk of water touching your pan. I use this method when I want the benefits of steam without the hassle of wrapping the pan.
Cool Gradually, Not Quickly
Rapid temperature changes are a primary cause of cheesecake cracks. That’s why the gradual oven cooling method matters so much. After turning off the oven, leaving the cheesecake inside with the door cracked lets it cool slowly and evenly over the course of an hour.
Never put a hot cheesecake directly into the refrigerator. The temperature shock can cause the center to sink dramatically and crack across the surface. Let it come to room temperature first, then chill. This patience is rewarded with a smooth, professional-looking top.
Also, avoid drafts. Don’t place your cooling cheesecake near an open window, air conditioner vent, or fan. Rapid cooling from drafts causes the same problems as refrigerating too soon.
Make-Ahead, Storage, and Freezing
One of the best things about cheesecake is how well it keeps. Understanding proper storage opens up so many possibilities for stress-free entertaining and advance preparation.
Make-Ahead Instructions
This strawberry cheesecake recipe is ideal for making ahead. In fact, I prefer to make it the day before serving. The overnight chill gives the filling time to set completely and the flavors time to meld and develop. A cheesecake made a day ahead always tastes better than one served the same day.
You can make the cheesecake (without topping) up to 3 days ahead. Keep it covered in the springform pan in the refrigerator. The strawberry topping can be made separately and stored in an airtight container for up to one week. Having these components prepared separately gives you maximum flexibility.
For the freshest results, add the topping within a few hours of serving. If you need to transport the cheesecake, keep the topping in a separate container and add it at your destination. I’ve transported many cheesecakes this way, and it always arrives in perfect condition.
Storage Guidelines
Covered properly, your strawberry cheesecake will keep beautifully in the refrigerator for up to 5 days. Once you add the strawberry topping, try to consume it within 2-3 days, as the moisture from the sauce will eventually affect the texture of the filling.
For storage, I cover the springform pan with plastic wrap pressed directly against the surface of the cheesecake to prevent condensation from forming on top. This direct-contact method keeps the surface smooth and prevents that annoying condensation that can make the top look wet and unappetizing.
If you’ve removed the pan sides, place toothpicks around the edge before covering with plastic wrap. The toothpicks create a tent that keeps the wrap from sticking to the surface. This is especially helpful if your cheesecake has any decorative elements on top.
Freezing Instructions
This is something I rarely see covered in other recipes, but it’s one of the most common questions I get. Yes, you can absolutely freeze strawberry cheesecake – with a few important caveats. Properly frozen cheesecake is virtually indistinguishable from fresh when thawed correctly.
Freeze the cheesecake without the topping for best results. The fresh strawberry sauce doesn’t freeze as well and is better made fresh when you’re ready to serve the thawed cheesecake.
To freeze, let the chilled cheesecake come to room temperature for about 30 minutes. This prevents condensation from forming during freezing. Wrap it tightly in plastic wrap, then in a layer of aluminum foil for extra protection against freezer burn. Label with the date and freeze for up to 3 months.
To thaw, transfer the wrapped cheesecake to the refrigerator for 24 hours. Don’t thaw at room temperature – gradual thawing in the fridge prevents texture changes and condensation that can make the surface weep. Unwrap before serving and add fresh strawberry topping.
Individual slices can also be frozen using the same method, which is perfect for portion control or enjoying a treat without committing to a whole cake. Place a small piece of parchment paper between slices so they don’t freeze together, then wrap each slice individually. This way, you can thaw just one slice at a time.
Serving Temperature Guidance
Here’s a question that confuses many home bakers: should cheesecake be served cold or at room temperature? The answer surprises people who expect a definitive rule.
Most professional bakers recommend serving cheesecake cold from the refrigerator or after sitting out for 15-20 minutes. Fully room temperature cheesecake will be too soft to slice cleanly and loses some of that pleasant density. Cold cheesecake holds its shape beautifully on the plate and has a more refreshing quality.
My recommendation: remove the cheesecake from the refrigerator about 20-30 minutes before serving. This softens the texture just enough to be luxuriously creamy while still holding its shape for clean slicing. In warm weather, keep it chilled until the moment you serve it to prevent the filling from softening too much.
If you have leftovers that have been sitting out, return them to the refrigerator promptly. Cheesecake should not sit at room temperature for more than 2 hours for food safety reasons, especially since it contains dairy and eggs.
Variations and Adaptations
Once you master the basic recipe, the possibilities expand. Here are my favorite ways to customize this strawberry cheesecake to suit different tastes, dietary needs, and occasions.
Gluten-Free Adaptation
Making this recipe gluten-free is surprisingly simple. Replace the graham cracker crumbs with an equal amount of gluten-free cookie crumbs. Glutino or similar brands make excellent gluten-free graham-style crackers that work perfectly. You can also use crushed gluten-free shortbread cookies for a richer crust.
The filling is already gluten-free as written. Just ensure your cornstarch isn’t cross-contaminated by using a certified gluten-free brand. Some bakers prefer arrowroot powder as a cornstarch substitute, and it works equally well for the strawberry topping.
Always double-check your labels, especially on vanilla extract and other flavorings, to ensure they’re produced in gluten-free facilities. When in doubt, contact the manufacturer.
Oreo Crust Alternative
For a darker, more decadent base, swap the graham crackers for chocolate sandwich cookies. Use 2 cups of Oreo crumbs (about 24 cookies, filling included) and reduce the added sugar in the crust to 2 tablespoons since the cookies are already sweet. Use the same amount of melted butter.
This pairs beautifully with the strawberry topping and creates a more dramatic presentation. Some of my friends actually prefer this version to the traditional graham crust. The chocolate-strawberry combination is timeless and always well-received.
For the cookies, pulse whole Oreos (including the cream filling) in a food processor until you have fine crumbs. Don’t remove the filling – it adds richness and helps bind the crust together.
No-Bake Option
If you don’t want to use the oven, you can adapt this recipe for a no-bake version. The texture will be slightly different – more mousse-like than dense – but still delicious and satisfying. This is a great option for hot summer days when you don’t want to heat up the kitchen.
For the no-bake filling, use 2 cups of heavy cream whipped to stiff peaks, folded into the cream cheese mixture (reduce cream cheese to 24 ounces). Add 1/2 cup of powdered sugar instead of granulated sugar to the cream cheese mixture, as powdered sugar dissolves more easily without baking. The strawberry topping remains the same.
For the crust, prepare it as directed but skip the baking step – just chill it in the refrigerator while you make the filling. Pour the no-bake filling over the chilled crust and refrigerate for at least 8 hours or overnight to set completely.
Fresh vs Frozen Strawberries
Both work beautifully in the topping, and your choice depends on availability and season. Fresh strawberries have better texture and brighter flavor, especially when in season from late spring through summer. Look for berries that are fragrant, deeply colored, and firm but not hard.
Frozen strawberries are perfectly acceptable and sometimes even preferred for the sauce because they break down more quickly during cooking. They’re also available year-round, making this recipe accessible regardless of the season. Frozen berries are typically picked at peak ripeness and flash-frozen, so the flavor is excellent.
If using frozen strawberries, don’t thaw them first. Add them directly to the saucepan and increase the cooking time by 2-3 minutes. The sauce might be slightly less vibrant in color, but the flavor remains excellent. A squeeze of extra lemon juice helps brighten the color.
Troubleshooting Common Issues
Even with careful preparation, things can go sideways. Here are solutions to the most common cheesecake problems, drawn from years of personal experience and reader questions. Don’t be discouraged if your first attempt isn’t perfect – every cheesecake is a learning opportunity.
Why Did My Cheesecake Crack?
Cracks usually result from one of three issues: overmixing eggs (incorporated air expands and contracts), rapid temperature changes, or overbaking. Review the crack-prevention tips above to identify which factor might have affected your cheesecake.
The good news is that a cracked cheesecake still tastes wonderful. Simply cover it with the strawberry topping, and no one will notice. The topping is thick enough to fill most cracks completely. For severe cracks, you can spread a thin layer of sour cream mixed with a little powdered sugar over the top before adding the strawberry sauce.
Lumpy Filling
Lumps mean your cream cheese wasn’t soft enough or wasn’t beaten thoroughly before adding other ingredients. Prevent this by ensuring proper softening time and beating the cream cheese alone for several minutes before adding sugar.
If you discover lumps after adding eggs, you can’t really fix them without overmixing. A few small lumps won’t ruin the cheesecake – they’ll just affect the visual appearance of each slice. For future batches, invest more time in softening and initial beating.
Soggy Crust
A crust that’s too wet can happen if you add the strawberry topping too early, or if moisture from the filling seeps down during baking. Ensure your crust is fully baked before adding filling – those 8-10 minutes in the oven create a barrier that resists moisture.
Also, let the crust cool completely before adding the filling. Adding warm filling to a warm crust can cause the butter to melt further and create a greasy, soggy layer. Patience at this stage pays dividends in the final texture.
Sinking Center
If the center of your cheesecake sinks significantly after cooling, it was likely underbaked or contained too much air from overmixing. The texture will still be good, just denser at the edges and softer in the center. A slight dip in the center is normal and expected – it’s actually the traditional shape of a properly baked cheesecake.
To prevent significant sinking, make sure to test for doneness correctly. The edges should be set while the center still has that gentle wobble. If the entire cheesecake jiggles when you shake the pan, it needs more time in the oven.
Frequently Asked Questions
How to make the best strawberry cheesecake?
Start with room temperature ingredients, especially brick-style cream cheese. Don’t overmix once eggs are added. Bake at 325°F until the edges are set but the center still wobbles slightly. Cool gradually in the turned-off oven with the door cracked for 1 hour, then chill overnight. Add fresh strawberry topping just before serving.
What is the secret to a perfect cheesecake?
The secret is room temperature ingredients combined with minimal mixing after adding eggs. Cold cream cheese creates lumps, and overmixing whips air into the batter that causes cracks during baking. Proper cooling technique (gradual, not rapid) is equally important for that smooth, crack-free surface.
Can I freeze strawberry cheesecake?
Yes, freeze the cheesecake without the topping for up to 3 months. Wrap tightly in plastic wrap and aluminum foil. Thaw in the refrigerator for 24 hours before serving, then add fresh strawberry topping. Individual slices can also be frozen using the same method.
Can I use frozen strawberries instead of fresh?
Absolutely. Frozen strawberries work well for the topping and break down more quickly during cooking. Add them directly to the saucepan without thawing and increase cooking time by 2-3 minutes. The color may be slightly less vibrant, but the flavor remains excellent.
Should I serve cheesecake cold or at room temperature?
Serve cheesecake chilled from the refrigerator or after sitting out for 15-20 minutes. Fully room temperature cheesecake becomes too soft to slice cleanly. For best texture, remove from the refrigerator 20-30 minutes before serving to soften slightly while maintaining structure.
How long does strawberry cheesecake last in the fridge?
Properly stored, the cheesecake keeps for up to 5 days in the refrigerator. Once you add the strawberry topping, consume within 2-3 days for best texture. Store the topping separately until ready to serve for longer shelf life.
Conclusion
This strawberry cheesecake recipe has become my go-to for celebrations, holidays, and anytime I want to impress without stress. The combination of a buttery graham cracker crust, smooth cream cheese filling, and vibrant strawberry topping creates a dessert that looks as good as it tastes.
Remember the key points: room temperature ingredients, minimal mixing after eggs, and gradual cooling. Master these techniques, and you’ll have a reliable recipe in your collection for years to come. The freezing and make-ahead options mean you can always have dessert ready with minimal last-minute effort.
I hope this guide gives you the confidence to bake a cheesecake you’re proud to share. Every baker I know started with imperfect results and improved with practice. Now go preheat that oven and enjoy the process – your future self (and your guests) will thank you.