
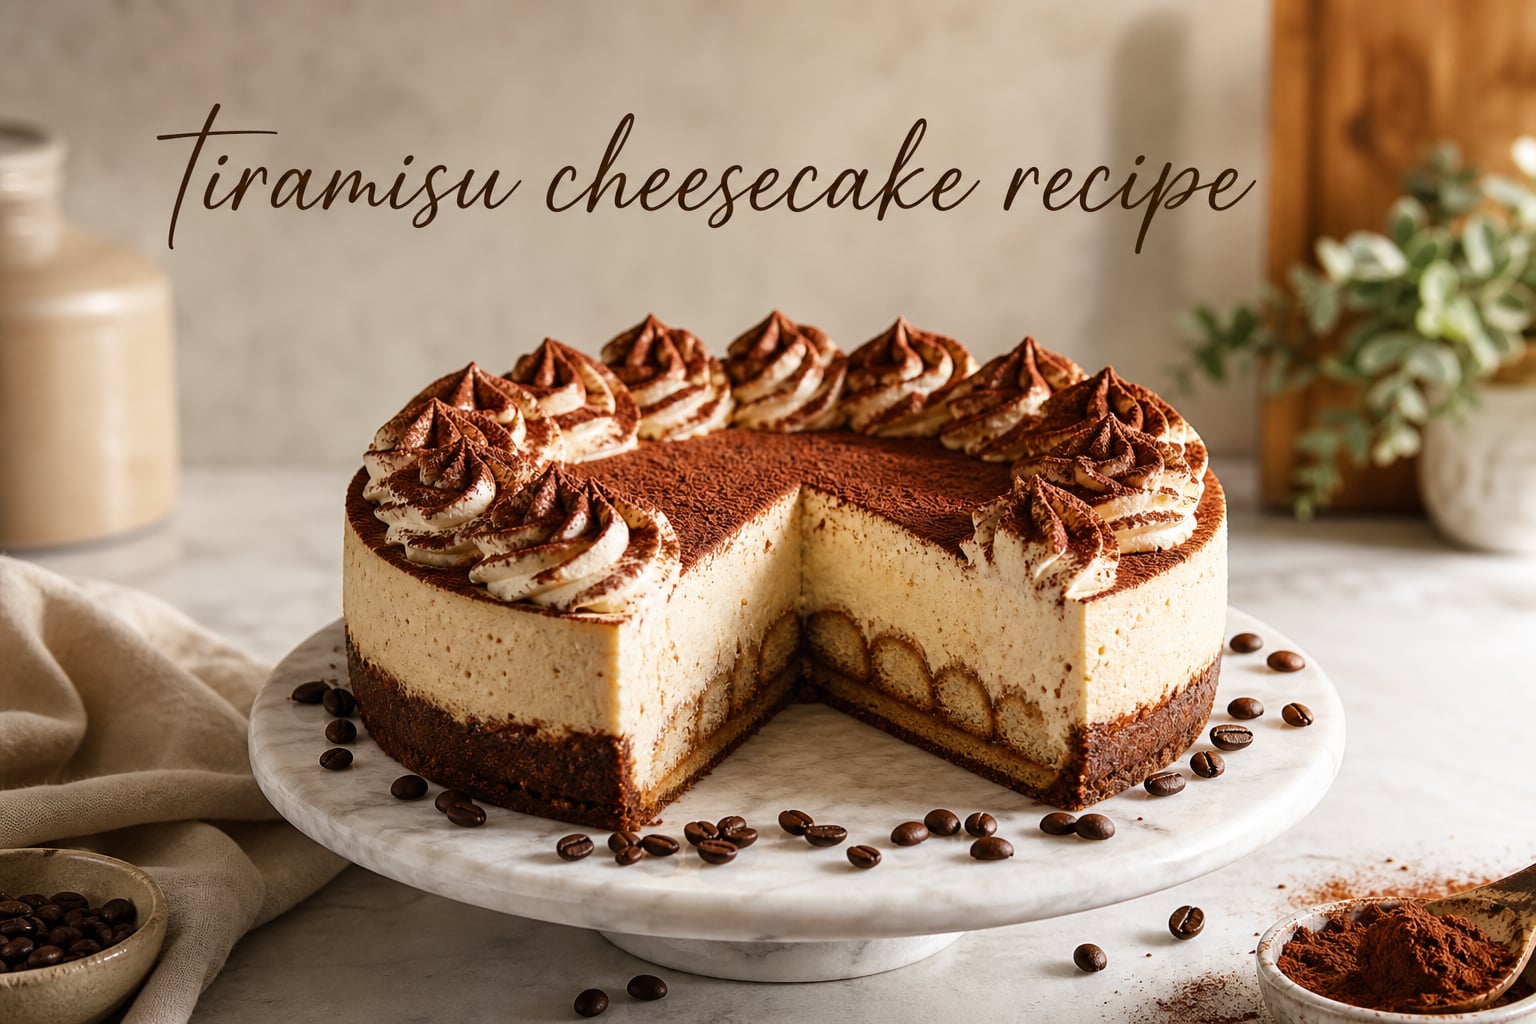
If you have ever had to choose between tiramisu and cheesecake at a restaurant, I want you to stop thinking of them as separate desserts. A tiramisu cheesecake recipe brings the bold espresso-soaked ladyfingers, the cloud-like mascarpone cream, and the bittersweet cocoa dust of the Italian classic into a single, sliceable showstopper. I built this version after baking roughly four dozen cheesecakes at home and dozens more in our test kitchen, and it nails the silky texture I want from a New York-style cheesecake while keeping every bit of tiramisu’s coffee-laced personality.
The result is a creamy, rich, deeply coffee-flavored dessert that looks beautiful on a holiday table. In this guide, I will walk you through every step, including the water bath that prevents cracks, the trick that keeps ladyfingers from floating to the top, and the storage method that lets you make this tiramisu cheesecake recipe entirely ahead of time.
Table of Contents
What Is a Tiramisu Cheesecake?
A tiramisu cheesecake is exactly what it sounds like: a hybrid dessert that takes the best parts of tiramisu and folds them into a classic cheesecake. Instead of plain vanilla or lemon, you get a mascarpone filling flavored with espresso and a splash of coffee liqueur, a middle layer of coffee-soaked savoiardi (Italian ladyfingers), and a mascarpone whipped cream topping finished with a generous dusting of cocoa powder. It is not tiramisu on top of a cheesecake. The two desserts become one cohesive slice from crust to crown.
Is tiramisu similar to cheesecake? Not really. Classic tiramisu is a spoon dessert built from layers of mascarpone cream and espresso-soaked ladyfingers with no baking at all. Cheesecake is a dense, custard-style cake that sets with the help of eggs and gentle oven heat. Combining them gives you the airy coffee flavor of tiramisu with the lush, sliceable body of cheesecake, which is why this tiramisu cheesecake recipe has become one of my favorites for Christmas, birthdays, and dinner parties.
Why This Tiramisu Cheesecake Recipe Works
I have tested enough cheesecakes to know the difference between a good one and a great one comes down to a few details. Here is why this version is worth your Sunday afternoon.
- Triple-coffee flavor profile. Espresso powder in the crust, a coffee liqueur soak for the ladyfingers, and chilled espresso in the filling layer three distinct notes of coffee so nothing tastes flat.
- Water bath baking. The steam from the water bath keeps the top from cracking and gives you a satin-smooth surface that does not need to be hidden under toppings.
- Mascarpone in the filling AND the topping. Most recipes pick one. I use both because mascarpone is what gives tiramisu its signature tangy richness, and skipping it would make this just a coffee-flavored New York cheesecake.
- Make-ahead friendly. The cheesecake actually tastes better after a full overnight rest, which means you can bake it the day before your event without scrambling at the last minute.
- No raw eggs in the finished dessert. The filling is baked until the eggs are fully set, so it is safe for kids, pregnant guests, and anyone cautious about undercooked custard.
Tiramisu Cheesecake Recipe: Ingredients
Most of these ingredients are pantry and refrigerator staples if you bake regularly. The few specialty items (mascarpone, espresso powder, savoiardi) are easy to find at any well-stocked grocery store in the international aisle. The list below makes one 9-inch cheesecake serving 12.
For the Chocolate Espresso Crust
- 2 cups (260 g) chocolate cookie crumbs (such as Oreo, with filling removed)
- 2 tablespoons granulated sugar
- 1 tablespoon instant espresso powder
- 6 tablespoons (85 g) unsalted butter, melted
For the Mascarpone Filling
- 24 oz (680 g) full-fat cream cheese, room temperature
- 8 oz (225 g) mascarpone cheese, room temperature
- 1 cup (200 g) granulated sugar
- 3 tablespoons (25 g) cornstarch
- 4 large eggs, room temperature
- 1 large egg yolk, room temperature
- 1 cup (240 ml) sour cream, room temperature
- 2 tablespoons instant espresso powder dissolved in 2 tablespoons hot water
- 1 tablespoon vanilla extract
For the Coffee-Soaked Ladyfinger Layer
- 6 to 8 savoiardi (crisp Italian ladyfingers), depending on pan size
- 1/2 cup (120 ml) brewed espresso or strong coffee, cooled
- 2 tablespoons Kahlua, dark rum, or Marsala wine (optional)
For the Mascarpone Whipped Cream Topping
- 1 cup (240 ml) heavy whipping cream, cold
- 4 oz (115 g) mascarpone cheese, cold
- 3 tablespoons powdered sugar
- 1 teaspoon vanilla extract
For Finishing
- 2 tablespoons unsweetened cocoa powder, sifted (Dutch-processed gives the darkest finish)
- Optional: chocolate curls, espresso beans, or a light drizzle of melted chocolate
A quick note on swaps. If you cannot find mascarpone, blend 8 oz of cold full-fat cream cheese with 1/4 cup heavy cream and 2 tablespoons sour cream until smooth. It is not identical, but it works. For the eggs, large eggs at room temperature are essential; cold eggs will create lumps no amount of beating will smooth out.
Equipment You’ll Need
You do not need a professional kitchen, but the right tools make this tiramisu cheesecake recipe noticeably easier. I have linked the specific gear I use so you do not have to guess.
- 9-inch springform pan (a 10-inch pan also works but yields a slightly shorter cheesecake)
- Large roasting pan for the water bath
- Heavy-duty aluminum foil to wrap the outside of the springform
- Stand mixer fitted with paddle attachment (a hand mixer is fine but requires more patience)
- Offset spatula for smoothing the filling and topping
- Fine-mesh sieve for sifting the cocoa powder at the end
- Instant-read thermometer (optional but reliable for testing doneness)
- Pastry bag and large star tip if you want to pipe decorative rosettes of whipped cream
Do not skip the heavy-duty foil wrap. A soggy crust is one of the top complaints I see about this kind of cheesecake, and it almost always comes from water leaking into the springform through the seam. Wrap the pan in at least two layers of wide, heavy-duty foil, pressing it up the sides as far as it will reach.
How to Make Tiramisu Cheesecake: Step-by-Step
This recipe moves through three stages: a press-in chocolate crust, the mascarpone filling with a middle layer of coffee-soaked ladyfingers, and a mascarpone cream topping. Plan on about 30 minutes of active work plus 1 hour 15 minutes of baking and at least 6 hours of chilling. I almost always make this the night before I want to serve it.
Step 1: Prep the Pan and Preheat the Oven
Preheat your oven to 325 degrees F (163 degrees C). Wrap the outside of the springform pan with two layers of heavy-duty aluminum foil, making sure the foil reaches all the way up the sides. A soggy crust starts here; the foil is the only thing standing between your cheesecake and the water bath.
Lightly grease the inside of the pan with butter or nonstick spray. Set a kettle of water on to boil for the water bath later.
Step 2: Make the Chocolate Espresso Crust
In a medium bowl, stir the chocolate cookie crumbs, granulated sugar, and instant espresso powder together until evenly combined. Pour the melted butter over the dry ingredients and stir with a fork until the mixture looks like wet sand and holds together when you press a small amount between your fingers.
Tip the crumbs into the prepared springform and use the bottom of a flat measuring cup to press them firmly into an even layer across the bottom and about 1 inch up the sides. A packed crust resists sogginess better than a loose one.
Bake the crust for 10 minutes while you make the filling. This short pre-bake sets the butter, so the crust stays crisp under the creamy filling.
Step 3: Beat the Cream Cheese and Mascarpone
In the bowl of a stand mixer fitted with the paddle attachment, beat the room temperature cream cheese and mascarpone together on medium-low speed until completely smooth, about 3 minutes. Stop and scrape down the bowl and paddle at least twice. Any lumps now will show up in your finished cheesecake, so do not rush this step.
If your cream cheese is not soft enough, the mascarpone will stay lumpy no matter how long you beat. I leave mine on the counter for at least 90 minutes before starting.
Step 4: Add Sugar and Cornstarch
Add the granulated sugar and cornstarch all at once and beat on medium-low for another 2 minutes, scraping the bowl halfway through. The cornstarch is doing real work here; it stabilizes the filling so it sets cleanly and helps prevent cracks during cooling.
Step 5: Add Eggs and Espresso
With the mixer on low, add the eggs and egg yolk one at a time, mixing just until the yellow disappears before adding the next. Over-mixing at this stage is what leads to cracks and puffing up in the oven. Once the eggs are incorporated, add the sour cream, dissolved espresso, and vanilla, and mix on low just until smooth, about 30 seconds.
The finished batter should look glossy, pale beige, and slightly pourable, almost like thick pancake batter.
Step 6: Pour Half the Filling and Add the Ladyfingers
Pour about half of the mascarpone filling over the warm crust and gently smooth it into an even layer. Stir the brewed espresso and Kahlua (if using) together in a shallow bowl. Quickly dip each savoiardi into the coffee mixture for about 2 seconds per side. They should be dampened but not soggy. Over-soaked ladyfingers turn to mush; under-soaked ones taste bready in the finished cheesecake.
Arrange the dipped ladyfingers in a single layer over the filling, breaking them in half if needed to fit the round pan. Try to leave a small gap around the edges so the batter can flow through and lock them in place.
Step 7: Pour the Remaining Filling and Set Up the Water Bath
Gently pour the remaining filling over the ladyfinger layer, taking care not to disturb the savoiardi. Smooth the top with an offset spatula. Place the foil-wrapped springform inside the large roasting pan and set the pan on the middle rack of the oven.
Carefully pour the hot water from the kettle into the roasting pan until it reaches about 1 inch up the sides of the springform. This steamy environment is what prevents cracks and gives the cheesecake its signature creamy texture.
Step 8: Bake Low and Slow
Bake the cheesecake at 325 degrees F for 1 hour and 10 to 20 minutes. The cheesecake is done when the edges look set but the center (about a 2-inch circle) still wobbles slightly when you gently nudge the pan. The internal temperature should read 150 degrees F on an instant-read thermometer when it is ready to come out.
If you do not have a thermometer, watch for these three signs: the top is no longer shiny, the edges are puffed and pulling slightly away from the pan, and the center jiggles like set Jello rather than liquid.
Step 9: Cool Slowly in the Oven
This is the step most home bakers skip, and it is why their cheesecakes crack. Turn off the oven, crack the door open about 1 inch with a wooden spoon, and leave the cheesecake inside for 1 full hour. The gradual temperature drop prevents the surface from contracting too quickly and splitting.
After the hour is up, remove the cheesecake from the water bath, peel off the foil, and let it cool completely on a wire rack at room temperature, about 1 more hour.
Step 10: Chill Overnight
Once the cheesecake has fully cooled, cover it loosely with plastic wrap (do not let the wrap touch the surface) and refrigerate for at least 6 hours, preferably overnight. This resting time is when the flavors of espresso, mascarpone, and cocoa fully come together. The texture firms up too, which means cleaner slices.
Step 11: Add the Mascarpone Whipped Cream Topping
Just before serving, make the mascarpone whipped cream. In a cold mixing bowl, beat the heavy cream, cold mascarpone, powdered sugar, and vanilla together on medium speed until stiff peaks form, about 2 to 3 minutes. Be careful not to over-whip; mascarpone can split and turn grainy if you beat it past the stiff peak stage. If it starts looking curdled, stop; it cannot be saved.
Spread the mascarpone cream over the chilled cheesecake with an offset spatula, or pipe it into decorative rosettes using a large star tip. Either way gives you a beautiful finish.
Step 12: Dust with Cocoa and Serve
Hold a small fine-mesh sieve about 8 inches above the cheesecake and tap the side gently to sift a thick, even layer of cocoa powder over the entire surface. The contrast of dark cocoa against pale mascarpone cream looks stunning.
For the cleanest slices, dip a sharp chef’s knife into hot water, wipe it dry, and cut straight down. Re-dip and dry between each slice. Serve cold with an extra dusting of cocoa and a small espresso on the side.
Baked vs No-Bake Tiramisu Cheesecake
Both versions of a tiramisu cheesecake recipe are excellent, and the right choice depends on your timeline, your oven, and how impressive you want the final presentation to look.
Baked tiramisu cheesecake uses eggs and gentle oven heat to set the filling. The result is denser, tangier, and sliceable straight from the fridge. It is what most people picture when they think of cheesecake, and it is the version I make for holiday dinners. The trade-off is that baking requires a water bath, careful cooling, and at least 6 hours of chill time.
No-bake tiramisu cheesecake sets in the refrigerator with the help of gelatin or thickened cream. It is lighter, mousse-like, and far more forgiving. If you have never made cheesecake before, this is the place to start. You skip the cracking risk entirely, you can use a regular cake pan (no springform needed), and it is ready to serve after about 4 hours of chilling. The flavor is slightly less rich because there are no eggs, but the espresso and mascarpone still carry the dessert.
If you go no-bake, dissolve 1 packet (about 2 1/4 teaspoons) of unflavored gelatin in 3 tablespoons cold water, let it bloom for 5 minutes, then stir it into the warmed cream cheese mixture before chilling. That is the trick that keeps no-bake cheesecake from weeping or collapsing after a few hours on the table.
Tips for the Perfect Tiramisu Cheesecake
These are the small details that took this recipe from good to great in my kitchen. Skim them before you start.
- Use room temperature ingredients, every time. Cold cream cheese and mascarpone will leave lumps no amount of beating will fix. Set everything out on the counter 90 minutes before you begin.
- Pick the right ladyfingers. Hard, dry savoiardi (the Italian kind) absorb espresso without falling apart. Soft, cake-style ladyfingers turn to mush and create a soggy layer. If you can find the Italian crisp variety at a specialty store or online, those are worth seeking out.
- Dip, do not soak. Two to three seconds per side is plenty. You want the ladyfingers damp, not dripping. Squeeze them gently between two fingers after dipping if they feel soggy.
- Do not skip the cornstarch. This is the single biggest insurance policy against cracks. Combined with sour cream, it stabilizes the filling during baking and cooling.
- Cool slowly in the oven. Cracking is almost always caused by a sudden temperature drop. The one-hour rest in a turned-off oven with the door cracked is non-negotiable in my kitchen.
- Chill overnight when possible. Six hours is the minimum, but eight or more gives the espresso time to bloom through the filling. The flavor becomes noticeably rounder.
Troubleshooting: Common Tiramisu Cheesecake Problems
Even experienced bakers run into trouble sometimes. Here are the fixes for the most common issues I see with this type of recipe.
Why Did My Cheesecake Crack?
Cracking is the number one complaint about cheesecake, and almost always comes down to one of three causes: over-mixing the eggs (whisking too much air into the batter), baking too hot or too long, or cooling too fast. If the top cracks, do not panic; the mascarpone cream topping and cocoa dusting completely cover small cracks, so it is mostly cosmetic. To prevent cracks next time, mix on low speed once you add the eggs, bake at 325 degrees F with a water bath, and let the cheesecake cool gradually in the turned-off oven.
Why Is My Cheesecake Crust Soggy?
A soggy bottom crust usually means water from the water bath seeped in through the springform seam. Two things solve it: wrap the pan in two layers of heavy-duty foil (not regular foil, which tears easily) and press the crust crumbs firmly into the pan so they form a compact barrier. Pre-baking the crust for 10 minutes before adding the filling also helps set the butter and create a moisture-resistant base.
Why Are the Ladyfingers Floating to the Top?
Ladyfingers rise during baking because they trap air and gas from the eggs. The fix is twofold: arrange the dipped ladyfingers in a single layer, then pour the remaining filling on top in a thin, slow stream from the center outward. The weight of the batter pushes them down and locks them in place. A small gap around the edges of the pan helps too, because it lets the filling flow down and surround each ladyfinger instead of leaving them floating on air pockets.
How Do I Know the Cheesecake Is Done?
The classic test is the jiggle test: tap the side of the pan gently. The outer two-thirds should look set while the center (about a 2-inch circle) wobbles like gelatin. If the whole thing sloshes, it needs more time. For a more accurate read, an instant-read thermometer pushed into the center should register 150 degrees F. Going past 155 degrees F is how you get a dry, cracked cake.
Why Did My Mascarpone Cream Split?
Mascarpone splits easily, especially in warm kitchens or when over-whipped. Always start with cold mascarpone and cold heavy cream, chill your mixing bowl in the freezer for 10 minutes first, and stop beating the moment stiff peaks form. If the cream looks grainy or starts to weep, the fat has broken out of the mixture and unfortunately cannot be rescued. Start over, and chill your equipment next time.
Why Is the Center Undercooked?
An undercooked center paired with a brown top usually means the oven is running hot or the water bath was not deep enough. Double-check your oven temperature with a separate thermometer (many ovens run 25 degrees hotter than the dial shows), and make sure the hot water in the roasting pan reaches at least 1 inch up the sides of the springform. If the top is browning too quickly, tent it loosely with aluminum foil for the last 20 minutes of baking.
Make-Ahead, Storage, and Freezing
This tiramisu cheesecake recipe was practically designed for entertaining. The flavors only deepen as it chills, so it is actually better on day two than day one.
- Refrigerator: Cover loosely with plastic wrap and store in the fridge for up to 5 days. Add the cocoa dusting and any decorative toppings right before serving so the cocoa does not absorb moisture and turn patchy.
- Freezer: Yes, tiramisu cheesecake freezes well. Chill it overnight first, then wrap the whole cake (or individual slices) tightly in plastic wrap followed by a layer of aluminum foil. Freeze for up to 2 months. Thaw overnight in the refrigerator, then dust with cocoa and add the whipped topping just before serving.
- Make-ahead for parties: Bake the cheesecake 1 to 2 days before your event and keep it covered in the fridge. Make the mascarpone cream topping the day of, and dust with cocoa 10 minutes before serving. Your guests will never know you did most of the work in advance.
Avoid freezing the mascarpone whipped cream topping by itself; it does not whip back up to the same texture after thawing. Always add fresh topping to a frozen and thawed cheesecake.
Serving Suggestions
This tiramisu cheesecake stands beautifully on its own, but a few small additions can turn it into a plated dessert.
- Pair each slice with a small shot of espresso or a hazelnut latte.
- Serve with a spoonful of warm vanilla sauce or fresh berries on the side.
- Drizzle plates with chocolate sauce and a tiny spoon of mascarpone cream for restaurant-style plating.
- For holidays, dust the cocoa through a stencil (a snowflake works beautifully) to create a pattern on top.
Frequently Asked Questions
What is a substitute for mascarpone cheese in tiramisu cheesecake?
The closest substitute is an equal amount of full-fat cream cheese blended with 3 tablespoons of heavy cream and 1 tablespoon of sour cream until smooth. You can also use 8 oz of full-fat cream cheese plus 2 tablespoons of crème fraîche per 8 oz of mascarpone called for. The flavor will be slightly tangier and less buttery, but it sets up beautifully in both baked and no-bake versions.
Can I add rum to tiramisu cheesecake?
Yes. Dark rum, spiced rum, or even coconut rum all pair beautifully with the coffee and mascarpone. Use 2 tablespoons in the ladyfinger soak and another 1 to 2 teaspoons in the filling if you want a stronger flavor. For an alcohol-free version, replace the rum with 1 teaspoon of rum extract or simply use additional cooled espresso.
I do not have a 9-inch springform pan. Can I use a different pan?
Yes, with adjustments. A 10-inch springform pan yields a slightly shorter cheesecake and may need only 55 to 65 minutes of baking. An 8-inch springform produces a taller, slightly longer-baking cheesecake. Avoid regular cake pans because cheesecakes need to release from the sides without inverting. If you must use a regular pan, line it with parchment paper strips for easy lifting.
How do I tell when the cheesecake is done baking?
Use the jiggle test and a thermometer together. The outer 2 inches should look set and slightly puffed while the center still wobbles like gelatin. An instant-read thermometer inserted into the center should read 150 degrees F. Anything above 155 degrees F risks a dry, cracked cake.
Why is my cheesecake crust soggy?
A soggy crust usually means water from the water bath seeped through the springform seam. To prevent it, wrap the outside of the pan in two layers of heavy-duty aluminum foil, press the crust crumbs firmly into the pan, and pre-bake the crust for 10 minutes before adding the filling. A compact crust resists moisture far better than a loose one.
Can tiramisu cheesecake be frozen?
Yes. Wrap the fully chilled cheesecake (without whipped topping) tightly in plastic wrap and then a layer of aluminum foil. Freeze for up to 2 months. Thaw overnight in the refrigerator, then add the mascarpone whipped cream and cocoa dusting just before serving. Do not freeze the mascarpone cream topping on its own; it does not whip back up properly after thawing.
Final Thoughts
This tiramisu cheesecake recipe is one of the most-requested desserts I make for friends and family, and I think it is the perfect introduction to hybrid baking. The espresso-soaked ladyfingers in the center, the creamy mascarpone filling, and that final cloud of cocoa powder combine everything people love about both desserts in a single, sliceable cake.
If you make this recipe, leave a comment below and let me know how it turned out. Did the water bath keep the top crack-free? Did you go with Kahlua, Marsala, or rum in the soak? I read every comment, and your tips help me make each year’s version even better.