
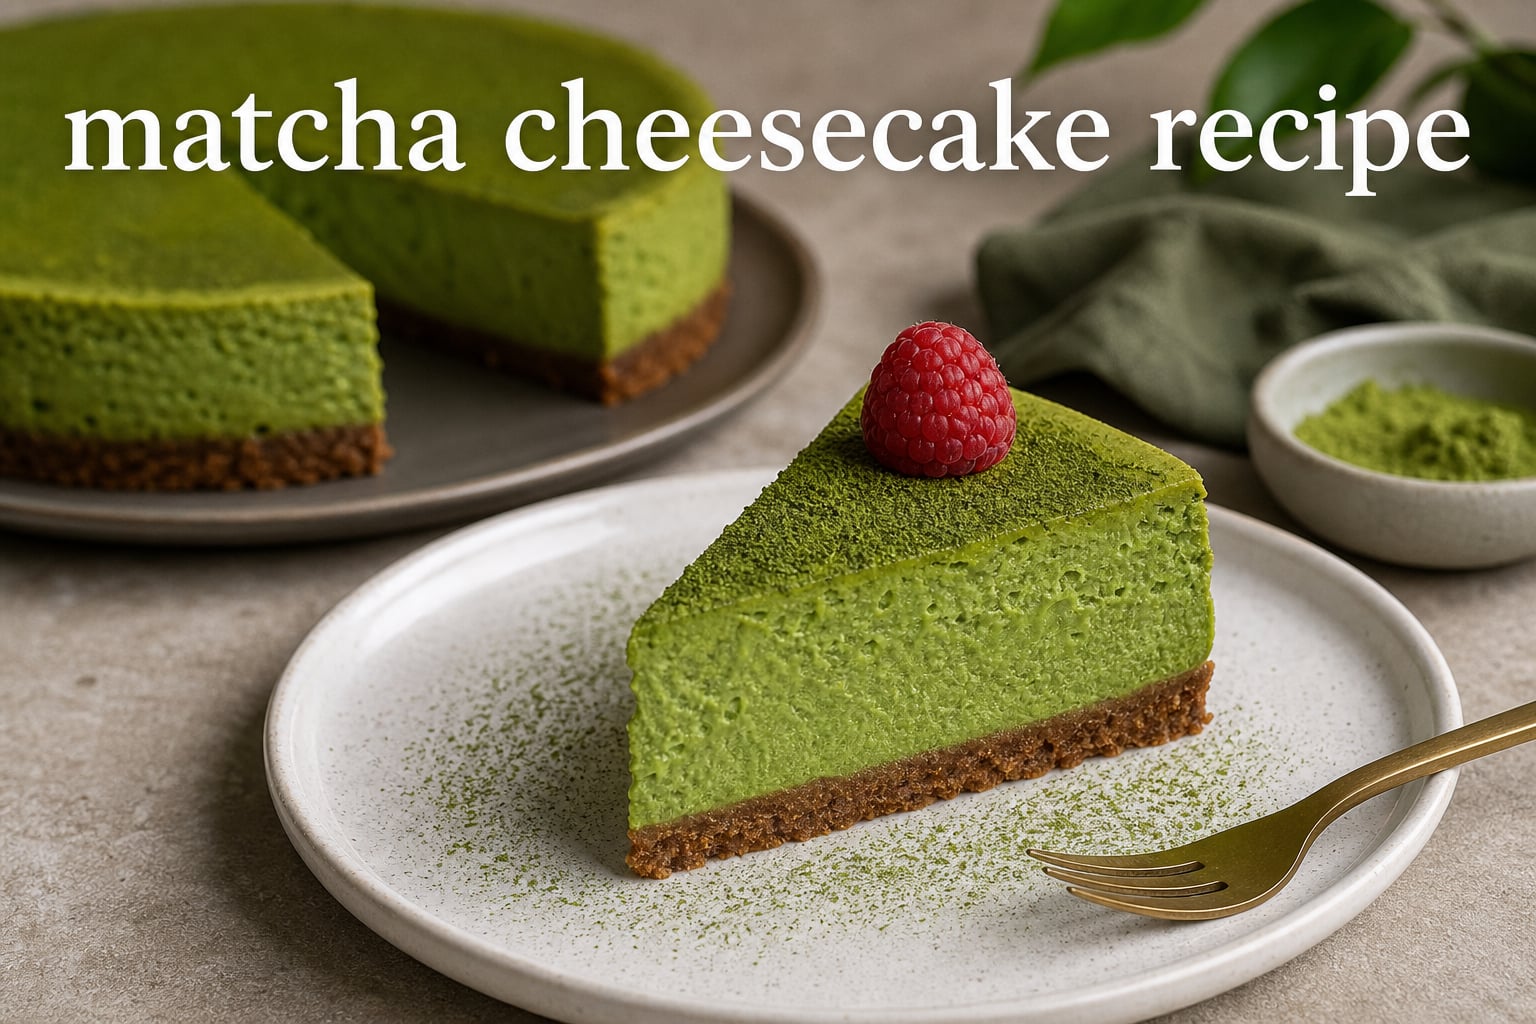
If you have ever ordered a slice of green tea cheesecake at a Japanese restaurant and wondered how to recreate it at home, you are in the right place. This matcha cheesecake recipe walks you through every step of making a creamy, vibrantly green dessert that tastes like it came from a bakery. Our team at 7ate9 Bakery has tested this recipe over a dozen times to get the matcha ratio, texture, and baking technique just right. Updated for October 2026.
Unlike most recipes online that only show one method, I am sharing both a baked version and a no-bake alternative. The baked version gives you that classic New York-style density with a silky smooth texture. The no-bake version is lighter, faster, and perfect for summer when you do not want to turn on the oven.
By the end of this guide, you will know exactly which matcha to buy, how to prevent cracks, how to get that stunning vibrant green color, and how to serve a cheesecake that looks as good as it tastes. Let us dive into the best matcha cheesecake recipe you will ever make.
Table of Contents
What Is Matcha and Why Use It in Cheesecake?
Matcha is a fine green tea powder made from stone-ground tea leaves, primarily produced in Japan. Unlike regular green tea where the leaves are steeped and discarded, matcha involves consuming the entire leaf. This means you get a more concentrated flavor and significantly higher nutrient content in every serving.
The flavor of matcha is earthy, slightly grassy, and has a natural umami quality that balances beautifully with dairy. When you whisk matcha powder into a cream cheese filling, the bitterness of the green tea cuts through the richness of the cheese. The result is a dessert that feels indulgent but never overwhelmingly sweet.
Matcha also brings a stunning visual element to cheesecake. A well-made matcha green tea cheesecake has a vibrant green color that makes it instantly recognizable on any dessert table. This makes it perfect for special occasions like tea parties, dinner gatherings, or even a Japanese cuisine night at home.
Beyond flavor and appearance, matcha offers real health benefits. It is packed with antioxidants called catechins, contains natural caffeine for a gentle energy lift, and has L-theanine which promotes calm focus. So yes, you can feel slightly better about eating that second slice.
Choosing the Right Matcha: Ceremonial vs Culinary Grade
The grade of matcha you choose will make or break your Japanese matcha dessert. This is the single most important ingredient decision in this entire recipe, so let me break it down clearly.
Ceremonial Grade Matcha
Ceremonial grade matcha is the highest quality available. It is made from the youngest tea leaves, hand-picked and stone-ground into an ultra-fine powder. The color is a bright, vibrant green and the flavor is smooth with natural sweetness and minimal bitterness.
This grade is traditionally used for drinking in Japanese tea ceremonies. However, many bakers prefer it for cheesecake because it produces the most vivid green color and the most refined, delicate flavor. The downside is the cost. Ceremonial grade matcha can run $20 to $40 for a small tin.
Culinary Grade Matcha
Culinary grade matcha is designed specifically for cooking and baking. It is made from slightly older tea leaves, which gives it a more robust, slightly bitter flavor. The color is still green but can be slightly less vibrant than ceremonial grade depending on the brand.
For most home bakers, a good quality culinary grade matcha is the sweet spot for this matcha cheesecake recipe. It costs roughly $10 to $20, holds up well to the richness of cream cheese, and delivers a satisfying green tea flavor without breaking the bank.
Which Grade Should You Use?
Here is my honest recommendation after testing both extensively. If you are making this cheesecake for a special occasion where appearance matters, go with ceremonial grade. The color difference is noticeable and the flavor is more delicate. If you are baking casually for yourself or family, a quality culinary grade will serve you perfectly.
What you want to avoid is cheap cooking matcha that looks dull brownish-green. If the powder itself does not look bright green in the bag, your cheesecake will not look green on the plate. One common pain point from bakers on forums like r/Baking is matcha turning brownish during baking. This almost always traces back to low-quality powder, not the baking process itself.
How Much Matcha to Use
For a standard 9-inch cheesecake, I use 2 tablespoons of matcha powder. This gives a distinct but not overpowering green tea flavor. If you want a subtler taste, start with 1 tablespoon. For serious matcha lovers who want that assertive, earthy punch, you can go up to 3 tablespoons.
Always sift your matcha powder before adding it to the batter. Matcha clumps easily, and those clumps will show up as dark green spots in your finished cheesecake. A fine mesh sieve or a matcha sifter does the job in about 30 seconds.
Ingredients for the Best Matcha Cheesecake Recipe
Here is everything you need to make the baked version of this matcha cheesecake recipe. I have included weight measurements in grams because serious bakers on forums consistently report better results when weighing ingredients rather than using cups.
For the Graham Cracker Crust
You will need 1 and a half cups (180g) of graham cracker crumbs. If you cannot find graham crackers, digestive biscuits or Oreos (with the cream removed) work equally well. Many bakers on r/AskBaking report that an Oreo crust actually pairs wonderfully with the earthy matcha flavor.
Combine the crumbs with 6 tablespoons (85g) of melted unsalted butter and a quarter cup (50g) of granulated sugar. Mix until the texture resembles wet sand and holds together when pressed. Press this mixture firmly into the bottom and slightly up the sides of your prepared springform pan.
For the Matcha Cream Cheese Filling
The star ingredients are 32 ounces (900g) of full-fat cream cheese and 2 tablespoons of sifted matcha powder. Use full-fat cream cheese only. Low-fat or spreadable versions contain more water and will result in a loose, soft cheesecake that never fully sets.
You will also need 1 cup (200g) of granulated sugar, 3 large eggs at room temperature, half a cup (120ml) of sour cream, a quarter cup (60ml) of heavy cream, 1 teaspoon of vanilla extract, and 1 tablespoon of cornstarch. The sour cream adds tanginess and moisture. The cornstarch helps stabilize the filling and is a trick many bakery professionals use to prevent cracking.
Critical Ingredient Tips
Every ingredient must be at room temperature before you begin mixing. Cold cream cheese will leave lumps in your batter that no amount of mixing will smooth out. Take your cream cheese, eggs, sour cream, and heavy cream out of the fridge at least 2 hours before baking.
For bakers outside the United States, you can substitute graham crackers with digestive biscuits (UK), Arnott’s Marie biscuits (Australia), or any plain sweet biscuit. If you are using Australian cream cheese, note that it comes in blocks rather than the tubs common in the US. The block form is actually what you want.
Equipment You Will Need
Having the right tools makes a noticeable difference in your final result. Here is what you need before starting this matcha cheesecake recipe.
You will need a 9-inch springform pan. This is non-negotiable for cheesecake because the removable sides let you release the cake without flipping it. Line the bottom with parchment paper for easy removal.
A stand mixer with a paddle attachment or a good quality hand mixer is essential. You need to beat the cream cheese until perfectly smooth, and doing this by hand is exhausting and rarely produces a lump-free result. Use the paddle attachment rather than the whisk attachment to avoid whipping too much air into the batter.
For the water bath, you need a large roasting pan that is bigger than your springform pan. You also need heavy-duty aluminum foil to wrap the outside of the springform pan. This prevents water from seeping in and ruining your crust, which is one of the most common complaints from home bakers.
Finally, grab a fine mesh sieve for sifting matcha, a silicone spatula for folding, and an offset spatula for smoothing the top. A digital kitchen scale is strongly recommended for accurate measurements.
Step-by-Step Matcha Cheesecake Recipe
Now for the main event. Follow these steps carefully and you will have a bakery-quality baked matcha cheesecake with a silky smooth texture and vibrant green color.
Step 1: Prepare the Crust
Preheat your oven to 350 degrees Fahrenheit (175 degrees Celsius). Mix the graham cracker crumbs, melted butter, and sugar in a medium bowl until evenly combined. The mixture should look like damp sand and hold its shape when you squeeze a handful.
Press the crumb mixture firmly into the bottom and about 1 inch up the sides of your parchment-lined springform pan. Use the bottom of a measuring cup to press it down flat and compact. Bake the crust for 10 minutes, then remove it from the oven and let it cool while you prepare the filling.
Reduce the oven temperature to 325 degrees Fahrenheit (160 degrees Celsius). This lower temperature is critical for baking cheesecake gently and evenly.
Step 2: Beat the Cream Cheese
Place the room-temperature cream cheese in the bowl of your stand mixer. Beat it on medium speed using the paddle attachment for about 2 minutes until it is completely smooth and creamy. Scrape down the sides of the bowl at least once during this process.
Add the granulated sugar and beat for another minute until fully incorporated. The mixture should be light and fluffy with zero lumps. If you see or feel any lumps, keep mixing until they disappear. This is your foundation, and a smooth base means a smooth cheesecake.
Step 3: Add the Matcha and Remaining Ingredients
Sift the matcha powder into the cream cheese mixture through a fine mesh sieve. Beat on low speed just until the matcha is evenly distributed and the batter turns a uniform green color. Do not overmix at this stage.
Add the sour cream, heavy cream, vanilla extract, and cornstarch. Mix on low speed until just combined. Then add the eggs one at a time, mixing on the lowest speed just until each egg is incorporated. Stop mixing the moment the last egg blends in. Overmixing eggs incorporates air, which causes the cheesecake to puff up and then collapse and crack.
Pour the filling over the cooled crust. Use your offset spatula to smooth the top evenly.
Step 4: Set Up the Water Bath
Wrap the outside of your springform pan tightly with heavy-duty aluminum foil. Use at least two layers and wrap all the way up the sides. This creates a waterproof barrier so the water bath cannot seep into your crust.
Place the wrapped springform pan inside a large roasting pan. Carefully pour boiling water into the roasting pan until it reaches about halfway up the sides of the springform pan. The water bath creates a humid, gentle baking environment that helps the cheesecake cook evenly and prevents the top from cracking.
Step 5: Bake
Carefully transfer the roasting pan to the preheated 325-degree oven. Bake for 55 to 65 minutes. You will know the cheesecake is done when the edges are set but the center still has a slight wobble when you gently shake the pan. It should look like a water bed, not a liquid, but it should jiggle.
Do not open the oven door during baking. Temperature fluctuations are the number one cause of cracked cheesecakes. If you need to check on it, use the oven light.
Step 6: Cool Gradually
When the cheesecake is done, turn off the oven and crack the oven door open about an inch. Leave the cheesecake inside for 1 hour. This gradual cooling prevents thermal shock, which is another major cause of cracks.
After an hour, remove the cheesecake from the oven and the water bath. Let it cool completely at room temperature for another hour. Then cover it loosely with plastic wrap and refrigerate for at least 8 hours, preferably overnight. Patience here is what separates a good cheesecake from a great one.
Step 7: Slice and Serve
To remove the cheesecake from the pan, run a thin knife around the edge to loosen it, then release the springform sides. Dip a sharp knife in hot water and wipe it clean between each cut for picture-perfect slices with clean edges.
No-Bake Matcha Cheesecake Variation
If you want a faster, lighter version or simply do not want to deal with a water bath, the no-bake matcha cheesecake is an excellent alternative. Our team tested this version multiple times during summer months and the results are consistently delicious.
The texture is lighter and fluffier than the baked version, more like a mousse. It sets in the refrigerator rather than the oven, making it perfect for hot days. Most bakers on forums report that no-bake versions need at least 4 to 6 hours to set properly, and overnight is even better.
No-Bake Ingredients
For the crust, use the same graham cracker or Oreo base as the baked version. For the filling, you will need 16 ounces (450g) of full-fat cream cheese at room temperature, half a cup (100g) of powdered sugar, 2 tablespoons of sifted matcha powder, 1 teaspoon of vanilla extract, and 1 cup (240ml) of heavy whipping cream that is very cold.
The key difference is that instead of eggs and baking, you whip cold heavy cream to stiff peaks and fold it into the matcha cream cheese mixture. This creates the airy, mousse-like texture that makes no-bake cheesecake so popular.
No-Bake Steps
Prepare and bake the crust for 10 minutes, then let it cool completely. Beat the room-temperature cream cheese until smooth, then add powdered sugar and vanilla and beat until combined. Sift in the matcha powder and mix until evenly green.
In a separate bowl, whip the cold heavy cream to stiff peaks using the whisk attachment. Gently fold the whipped cream into the matcha cream cheese mixture using a silicone spatula. Pour the filling into the cooled crust, smooth the top, and refrigerate for at least 4 hours, ideally overnight.
The folding technique is important here. Use a gentle up-and-over motion with your spatula to combine the mixtures without deflating the whipped cream. Cut through the center, scrape along the bottom, and lift up and over. Repeat until just combined.
Tips and Troubleshooting for Perfect Matcha Cheesecake
Even experienced bakers run into issues with cheesecake. Here are solutions to the most common problems people report on baking forums and in our own test kitchen.
How to Prevent Cracks
Cracks are the most common cheesecake problem, and they almost always come down to one of four causes. First, overmixing the eggs incorporates air that expands and contracts during baking. Mix eggs on the lowest speed and stop the moment they blend in.
Second, temperature shock from opening the oven door causes the cheesecake to contract rapidly. Keep that door closed. Third, baking at too high a temperature causes the edges to overcook and pull away from the center. Stick to 325 degrees and use a water bath.
Fourth, cooling too quickly causes the top to contract faster than the interior. The gradual cooling method in the oven with the door cracked solves this. If a small crack does appear, do not panic. A thin layer of whipped cream or a dusting of matcha powder on top before serving will hide it completely.
Preventing a Soggy Crust
A soggy crust is a frequent complaint, especially with water bath baking. The solution is thorough wrapping with heavy-duty foil. Use two to three layers and wrap all the way up the sides of the pan. Some bakers even place the springform pan inside a slightly larger cake pan, then put both inside the water bath, for double protection.
Another trick is to bake the crust for 10 minutes before adding the filling. This creates a barrier that helps the crust hold its structure against the wet filling.
Getting That Vibrant Green Color
If your cheesecake comes out looking dull or brownish, the problem is almost certainly your matcha quality, not your technique. Quality matcha powder should be a vivid, almost neon green. If the powder in your bag looks dull or yellowish, your cheesecake will look the same way.
Ceremonial grade matcha will always give you the brightest color. If you are using culinary grade, look for one specifically labeled as premium or first-harvest culinary grade. Avoid anything labeled simply as cooking green tea, as these are often the lowest quality.
Fixing Matcha That Tastes Too Bitter
If your cheesecake tastes overly bitter, you may have used too much matcha or a lower-quality culinary grade. Start with 1 tablespoon and taste the batter before adding more. You can also balance bitterness by adding an extra tablespoon of sugar to the filling.
A pinch of salt in the filling also helps round out the bitterness and enhances the overall flavor. Do not skip the vanilla extract either, as it softens the astringent edge of the green tea.
Storage, Serving, and Decoration Ideas
Proper storage keeps your matcha cheesecake tasting fresh and looking beautiful for days after baking.
Refrigerator Storage
Matcha cheesecake will last 4 to 5 days in the refrigerator when stored properly. Cover it loosely with plastic wrap or store it in an airtight container. Do not leave it uncovered or it will absorb refrigerator odors and dry out on the surface.
Let refrigerated cheesecake sit at room temperature for 20 to 30 minutes before serving. This softens the texture and brings out the matcha flavor. Cold cheesecake straight from the fridge mutes both the taste and the creamy mouthfeel.
Freezer Storage
You can freeze matcha cheesecake for up to 2 months. Slice it first, then wrap each slice tightly in plastic wrap and store in a freezer-safe container. Thaw individual slices in the refrigerator overnight for a ready-to-eat dessert.
Decoration Ideas
For a simple finish, dust the top with a light coating of matcha powder right before serving. Use a small sieve and tap gently for an even layer. The contrast between the darker dusted top and the lighter green interior looks professional and appetizing.
For something more elaborate, pipe whipped cream rosettes around the edge. You can also create decorative patterns by piping lines of white whipped cream across the green surface and dragging a toothpick through them to create feathered swirls. This technique is popular in Japanese bakeries.
Fresh berries, especially raspberries and blueberries, add a beautiful color contrast against the green. Edible flowers and white chocolate shavings are also excellent garnishes for special occasions.
Serving Suggestions
This Japanese matcha dessert pairs wonderfully with a cup of hot green tea or coffee. Serve it at tea parties, dinner gatherings, holiday celebrations, or Japanese-themed meals. It is also a surprising hit on St. Patrick’s Day thanks to that natural green color.
FAQs
What is matcha and why is it used in cheesecake?
Matcha is a fine green tea powder made from stone-ground tea leaves. It is used in cheesecake because its earthy, slightly bitter flavor balances the richness of cream cheese beautifully. It also gives the cheesecake a vibrant green color and adds antioxidants, caffeine, and L-theanine.
What type of matcha powder is best for baking?
For baking, a good quality culinary grade matcha is the best choice for everyday recipes. It is more affordable than ceremonial grade and has a robust flavor that holds up well against cream cheese and sugar. If you want the most vibrant green color and most delicate flavor, ceremonial grade is the better option, though it costs more.
Can I make matcha cheesecake without a water bath?
Yes, you can bake a matcha cheesecake without a water bath, but you are more likely to get cracks and a drier texture. If you skip the water bath, bake at a lower temperature of 300 degrees Fahrenheit and place a pan of hot water on the rack below the cheesecake to add moisture to the oven. The no-bake version skips the oven entirely and is the simplest alternative.
How do I prevent cracks in my matcha cheesecake?
To prevent cracks, use room-temperature ingredients, mix eggs on the lowest speed just until incorporated, never open the oven door during baking, use a water bath for even heat distribution, and cool the cheesecake gradually by turning off the oven and cracking the door for one hour before removing it.
How long does matcha cheesecake last in the fridge?
Matcha cheesecake lasts 4 to 5 days in the refrigerator when stored covered or in an airtight container. Let it sit at room temperature for 20 to 30 minutes before serving for the best flavor and texture. You can also freeze it for up to 2 months.
Can I make matcha cheesecake ahead of time?
Yes, matcha cheesecake is actually better when made ahead because it needs to chill overnight to fully set. You can make it 1 to 2 days before serving and store it covered in the refrigerator. The flavor also deepens as it sits, making it an ideal make-ahead dessert for dinner parties.
Why did my matcha cheesecake turn brown?
Your matcha cheesecake likely turned brown because the matcha powder was low quality or stale. Quality matcha should be a vibrant green color in the bag. Using ceremonial or premium culinary grade matcha and sifting it fresh will give you the brightest green result. Overbaking can also dull the color slightly.
Can I use matcha latte powder instead of culinary matcha?
Matcha latte powder is not recommended for baking because it already contains sugar and sometimes milk powder mixed in. This throws off the sweetness and moisture balance in your cheesecake. Use pure matcha powder, either culinary or ceremonial grade, for the best results in this recipe.
Time to Bake Your Matcha Cheesecake
You now have everything you need to make an incredible matcha cheesecake recipe at home. You know the difference between ceremonial and culinary grade matcha, how to set up a water bath, how to prevent cracks, and how to get that stunning vibrant green color that makes this dessert so memorable.
Remember the key takeaways. Use full-fat cream cheese at room temperature. Sift your matcha to avoid clumps. Mix eggs gently and never open the oven during baking. Cool gradually and chill overnight for the best texture. And if baking feels like too much work, the no-bake variation gives you a lighter, faster alternative that is just as delicious.
Grab your springform pan, order some quality matcha powder, and give this recipe a try. Once you taste that first slice of silky, earthy, vibrantly green cheesecake, you will understand why this Japanese-inspired dessert has become a favorite at 7ate9 Bakery. Happy baking.