
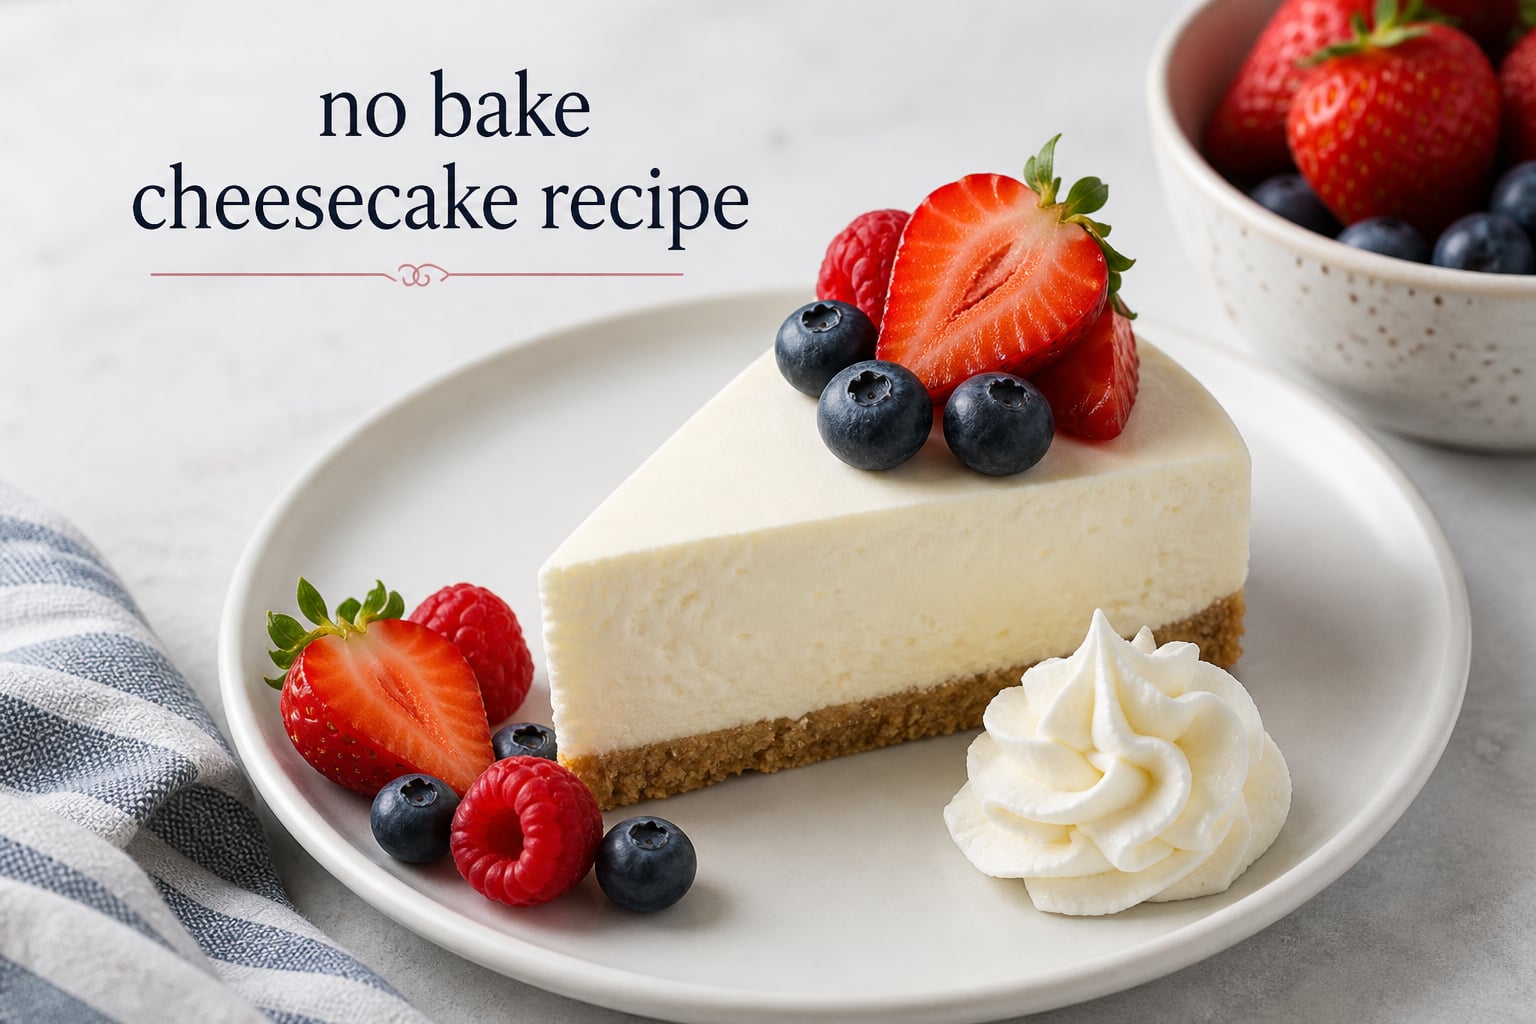
A no bake cheesecake recipe gives you a creamy, sliceable dessert without eggs, a water bath, or an oven. This version uses a crisp graham cracker crust and a light cream cheese filling that firms in the refrigerator, making it a practical make-ahead dessert for warm days, birthdays, and casual dinners.
The key is not a mystery ingredient. Use brick-style cream cheese that has softened, whip cold heavy cream to stiff peaks, fold it in gently, and give the cheesecake enough uninterrupted chill time.
For the best no-bake cheesecake, plan on at least 8 hours in the refrigerator and preferably overnight. That wait gives the whipped cream structure time to support the filling, so each slice holds together instead of slumping onto the plate.
Table of Contents
This no bake cheesecake recipe makes a creamy, firm dessert without gelatin.
No-bake cheesecake is a dessert made with a graham cracker crust and a cream cheese filling that sets in the refrigerator instead of the oven. Its texture is lighter than baked cheesecake: creamy and rich, but also airy from whipped cream.
This method makes one 9-inch cheesecake, or about 10 to 12 slices. Allow about 30 minutes of active preparation, then refrigerate it for 8 to 12 hours; there is no cook time.
A springform pan is the easiest choice because its removable sides leave the chilled cake intact. A deep 9-inch pie dish also works, though serving wedges directly from the dish is simpler than unmolding them.
The ingredient list builds a sturdy crust and a light filling.
The graham cracker crust needs crumbs, sugar, and butter.
- 1 3/4 cups graham cracker crumbs, from about 14 full sheets
- 2 tablespoons packed light brown sugar
- 7 tablespoons unsalted butter, melted and slightly cooled
- A small pinch of fine salt, optional
Graham cracker crumbs make a familiar, lightly sweet base. Brown sugar adds a deeper caramel note, while melted butter is the binder that turns loose crumbs into a crust that can be cut cleanly.
Do not swap the butter for a watery liquid. The crust needs fat to coat the crumbs; too little leaves it dry and crumbly, while too much makes it greasy and hard to slice.
The cheesecake filling needs full-fat cream cheese and cold heavy cream.
- 24 ounces full-fat brick-style cream cheese, softened
- 1 cup powdered sugar, sifted if lumpy
- 1/4 cup full-fat sour cream
- 1 tablespoon fresh lemon juice
- 2 teaspoons vanilla extract
- 1 1/4 cups cold heavy cream
Brick-style cream cheese, often called Philadelphia-style cream cheese, has the dense body this filling needs. Spreadable tub cream cheese has more moisture and a softer texture, so it is a poor fit when the cheesecake must set without gelatin.
Powdered sugar dissolves smoothly and helps keep the cream cheese mixture silky. Sour cream brings a mild tang, while lemon juice and vanilla extract sharpen the cheesecake flavor without turning it into lemon cheesecake.
Heavy cream must be cold when you whip it. Cold fat traps air more reliably, which is why the cream becomes a stable foam rather than a loose, bubbly liquid.
The no bake cheesecake recipe comes together in six straightforward steps.
Step 1: Prepare the pan before mixing anything.
Lightly grease the bottom and sides of a 9-inch springform pan. If you want the cleanest release, line the bottom with a round of parchment paper and place a narrow parchment strip around the inside edge.
Set the prepared pan on a flat tray or plate that fits in your refrigerator. Moving a filled springform pan later is awkward, and the tray catches any butter that may seep from the crust.
Step 2: Press the graham cracker crust firmly into the pan.
Stir the graham cracker crumbs, brown sugar, salt, and melted butter until every crumb looks moistened. Pour the mixture into the pan, then press it across the bottom and about 1 1/2 inches up the sides.
Use the flat bottom of a dry measuring cup to compact the base, then use your fingers or a straight-sided glass for the corners and sides. Firm pressure matters more than force: the goal is an even, packed layer rather than a rock-hard one.
Refrigerate the crust while you make the filling. A 15- to 20-minute rest helps the butter firm, so the crust is less likely to tear when the filling goes in.
Step 3: Beat the softened cream cheese until it is completely smooth.
Place the softened cream cheese in a large bowl and beat it on medium speed until smooth, scraping the bowl and beaters once or twice. Add the powdered sugar, sour cream, lemon juice, and vanilla, then beat just until the mixture looks uniform.
Stop to check the bottom of the bowl with a flexible spatula. Small pieces of cold cream cheese tend to hide there, and they will remain as lumps after the whipped cream is added.
The cream cheese should be soft enough to yield when pressed but not melted, oily, or warm. Depending on your kitchen, this often means leaving sealed blocks at room temperature for roughly 30 to 60 minutes before you start.
Step 4: Whip the heavy cream to stiff peaks in a separate bowl.
Pour the cold heavy cream into a chilled medium bowl. Beat on medium-high speed until the beaters leave deep tracks, then slow down and watch closely as the peaks form.
Stiff peaks stand straight up, or nearly so, when you lift the beaters. The tip should not curl over like a soft peak, but the cream should still look smooth; graininess means it has gone too far toward butter.
This step provides the structure for a no bake cheesecake without gelatin. Forum discussions repeatedly point to underwhipped cream as a reason for a filling that stays loose, so do not stop at merely thickened cream.
Step 5: Fold the whipped cream into the filling by hand.
Add about one-third of the whipped cream to the cream cheese mixture and fold with a wide spatula to loosen the base. Add the remaining whipped cream in two additions, cutting down through the center, sweeping across the bottom, and turning the bowl as you go.
Use a gentle hand and stop when no white streaks remain. Beating with the mixer at this point knocks out the air you worked to create and can make the filling denser or less stable.
Spoon the filling into the cold crust and smooth the surface with an offset spatula or the back of a spoon. A few deliberate passes are enough; repeated fussing can pull crumbs from the crust into the filling.
Step 6: Chill the cheesecake until it is fully set.
Cover the pan loosely without letting plastic wrap touch the surface. Refrigerate for at least 8 hours, though an overnight chill is the more dependable plan when you need neat slices.
Many home bakers find that 12 or more hours produces a noticeably firmer result than the minimum six-to-eight-hour window. The center should feel cold and firm when gently touched, with only a very slight give.
Release the springform sides only after the cheesecake is cold all the way through. For clean portions, dip a long sharp knife in hot water, dry it, make one cut, and repeat the hot-water-and-dry routine between every slice.
The best texture comes from controlling temperature, air, and time.
Room-temperature cream cheese prevents lumps in the filling.
Cold cream cheese resists blending and breaks into tiny pieces, which is why a filling can taste right yet look speckled or curdled. Softening it first lets the sugar and sour cream blend into a smooth base before the whipped cream arrives.
Do not use a microwave to hurry the process unless your appliance has a very gentle setting and you work in short bursts. Melted spots can make the cream cheese oily, and an unevenly warm base weakens the final texture.
Cold heavy cream creates the foam that supports the cheesecake.
The contrast is intentional: cream cheese should be soft, but heavy cream should be refrigerator-cold. Whipping cold cream creates a network of fat and air bubbles that gives the no-bake filling its lift and helps it set into slices.
Measure the heavy cream before you begin, but leave it in the refrigerator until the moment you whip it. In a very warm kitchen, chilling the bowl and beaters is especially helpful.
Gentle folding keeps the cheesecake light and airy.
Folding is not just a fussy baking term. It protects the air in the whipped cream, so the finished filling has a mousse-like feel rather than the compact texture of a dense cream cheese spread.
Scrape all the way to the bottom of the bowl with each fold. That motion combines the filling evenly without the fast agitation that a mixer creates.
A long chill gives the filling its sliceable finish.
Refrigeration is an ingredient in this recipe, not an optional pause. The butter in the crust hardens, the cream cheese cools, and the whipped cream structure firms as the dessert rests.
If you are serving guests, make the cheesecake the day before. That choice removes the most common timing problem and gives you a calmer final hour for toppings and serving.
Common no-bake cheesecake problems have clear fixes.
A runny cheesecake usually needs better whipped cream or more chill time.
If the cheesecake is still loose after several hours, leave it covered in the refrigerator overnight before judging it. A short chill is the most common cause, and many bakers report better results after 12 hours or longer.
For the next batch, use cold heavy cream with enough fat to whip, bring it to stiff peaks, and fold it in by hand. Also check that you used brick-style full-fat cream cheese rather than a tub variety or a reduced-fat alternative.
Do not try to repair a soft finished cheesecake by stirring in dry ingredients after it has been poured into the crust. Serve a soft but cold cheesecake in bowls with berries or a fruit sauce, then adjust the technique next time.
A lumpy filling means the cream cheese was too cold or not beaten first.
Small lumps are usually bits of cream cheese that never softened or mixed into the sugar. Let the blocks soften until pliable, beat them alone until smooth, and scrape the bowl before adding the other filling ingredients.
If you spot lumps before folding in the whipped cream, keep beating the cream cheese mixture on low or medium speed until smooth. Once whipped cream has been folded in, aggressive mixing costs you the airy texture, so prevention is much easier than rescue.
A falling-apart crust needs firmer packing and a proper rest.
Crusts break when crumbs are too dry, unevenly buttered, or lightly pressed. Mix until the crumbs are consistently damp, pack them with a flat cup, and refrigerate the finished crust before adding filling.
Cut only after the cheesecake has chilled thoroughly, because cold butter binds the crumbs. A hot, wiped-dry knife also cuts rather than drags, protecting the crust edge with every slice.
A dense filling usually means the whipped cream lost its air.
Whip the cream separately and fold rather than beating the entire filling together. A dense cheesecake is safe to eat, but it loses the light and airy texture that makes this style different from baked cheesecake.
Fold only until combined. Overworking the bowl after the cream goes in deflates it, while underfolding leaves uneven white streaks and pockets of plain whipped cream.
A stuck cheesecake needs a warm release, not force.
Run a thin knife warmed under hot water around the inside edge before opening the springform latch. Dry the knife first so water does not drip onto the cake.
If the bottom will not slide off, serve from the pan base rather than prying. The parchment circle is helpful here because it lets you lift individual slices cleanly without damaging the crust.
Easy variations change the flavor without changing the set-up method.
A berry cheesecake uses fresh fruit as a bright finish.
Top the fully chilled cheesecake with strawberries, raspberries, blueberries, or a cooled berry sauce immediately before serving. Keep wet fruit sauces off the cake until the end so the surface stays neat.
For lemon-forward flavor, add finely grated lemon zest to the cream cheese base along with the lemon juice. Use only the colored outer peel, not the bitter white pith.
A chocolate or cookie crust gives the same recipe a new direction.
Use finely crushed chocolate sandwich cookies in place of graham crackers for an Oreo-style crust; because the cookies contain filling, begin with less melted butter and add only enough to make the crumbs hold when squeezed. This popular variation pairs well with chocolate shavings, cherries, or whipped cream.
For a chocolate filling, fold cooled melted chocolate into the smooth cream cheese mixture before the whipped cream. Let it cool to room temperature first, because warm chocolate can soften the filling and turn it grainy.
Mini cheesecakes make serving simple.
Line a standard muffin pan with paper liners, press a thin layer of crust into each cup, then divide the filling among them. Chill until firm and serve in the liners, which avoids the need to cut a full cake.
The smaller portions set more quickly because the filling is shallow, but an overnight chill is still the safest choice for a firm center. Add toppings just before serving for the cleanest look.
Gluten-free and lower-sugar changes need thoughtful swaps.
For a gluten-free crust, use certified gluten-free graham-style crumbs or gluten-free cookies and follow the same mixing and packing approach. Check every packaged ingredient, including toppings, if cross-contact is a concern.
For a lower-sugar dessert, reduce added sugar only with a powdered sweetener designed to replace powdered sugar in no-cook fillings. A major change to the sugar can affect sweetness and texture, so make a small test portion if the result matters for an event.
Storage keeps no-bake cheesecake safe and ready to serve.
The refrigerator keeps the cheesecake at its best for several days.
Cover the cheesecake and refrigerate it promptly after serving. Keep it in the pan or transfer slices to an airtight container, separating layers with parchment if needed.
For the freshest texture, eat it within 3 to 4 days. Store fruit toppings separately where possible, since they can release liquid and make the surface wet.
The freezer works well for a longer make-ahead plan.
Freeze the fully chilled cheesecake without delicate fresh toppings. Place it on a tray until firm, wrap it tightly in plastic wrap and then foil, and label it so it is not forgotten.
Thaw it overnight in the refrigerator rather than on the counter. Add berries, whipped cream, or sauce after thawing, when the surface is cold and firm again.
A day-ahead schedule makes this dessert low-stress.
On the day before serving, make the crust and filling, then refrigerate the finished cheesecake overnight. On serving day, release the pan, add toppings, and slice with a heated dry knife.
That simple schedule follows the experience shared by many home bakers: the extra refrigerator time is not wasted time. It is what turns a soft mixture into a composed dessert.
No-bake cheesecake differs from baked cheesecake in texture and method.
No-bake cheesecake gets its structure from chilled cream cheese, whipped cream, and a cold crust. Baked cheesecake uses eggs and oven heat to set into a denser, more custard-like cake and often calls for careful temperature control to prevent cracks.
Choose no-bake when you want a light summer cheesecake, do not want to use the oven, or need a make-ahead dessert. Choose baked cheesecake when you prefer a richer, firmer, more traditional New York-style texture.
Frequently asked questions answer the most common no-bake cheesecake concerns.
What makes the best no-bake cheesecake?
The best no-bake cheesecake starts with full-fat brick-style cream cheese that has softened, cold heavy cream whipped to stiff peaks, and a firmly packed graham cracker crust. Fold the whipped cream in gently, then refrigerate the cake for at least 8 hours and preferably overnight so it becomes creamy but sliceable.
What are the ingredients in 3 ingredient cheesecake?
A very simple 3-ingredient cheesecake typically combines cream cheese, a sweetened whipped topping or whipped cream, and sweetened condensed milk or another sweetener. That shortcut differs from this no-bake cheesecake recipe, which uses a separate crust and several flavoring ingredients for a more classic cheesecake taste and firmer structure.
What is the 2 ingredient cheesecake?
A 2-ingredient cheesecake is usually a shortcut dessert made by combining cream cheese with a sweetened whipped topping or condensed milk. It can be convenient, but it does not offer the same control over sweetness, tang, crust, and whipped texture as a full no-bake cheesecake recipe.
Why is my no-bake cheesecake runny?
A runny no-bake cheesecake usually comes from underwhipped cream, warm or spreadable tub cream cheese, overmixing after folding, or too little refrigerator time. Chill it overnight first; next time use cold heavy cream whipped to stiff peaks, brick-style cream cheese, and a gentle hand when folding.
Can you freeze no-bake cheesecake?
Yes. Freeze a fully chilled no-bake cheesecake without fresh fruit toppings, wrap it tightly, and thaw it overnight in the refrigerator. Add delicate toppings after thawing for the best appearance and texture.
Can I have cheesecake with CKD?
People with chronic kidney disease should ask their renal dietitian or clinician about cheesecake because the right portion and ingredients depend on their individual potassium, phosphorus, sodium, fluid, and protein guidance. This dessert contains dairy and added sugar, so it should not be treated as universally suitable for a CKD diet.
This no bake cheesecake recipe succeeds when you respect the chill.
Start with a packed graham cracker crust, smooth softened cream cheese, and cold heavy cream whipped to stiff peaks. Fold patiently, refrigerate overnight when possible, and cut with a hot dry knife for tidy slices.
Once you have the base method down, this no bake cheesecake recipe is easy to make your own with berries, chocolate, cookie crumbs, or mini portions. Pick your topping, clear space in the refrigerator, and let time do the work.