
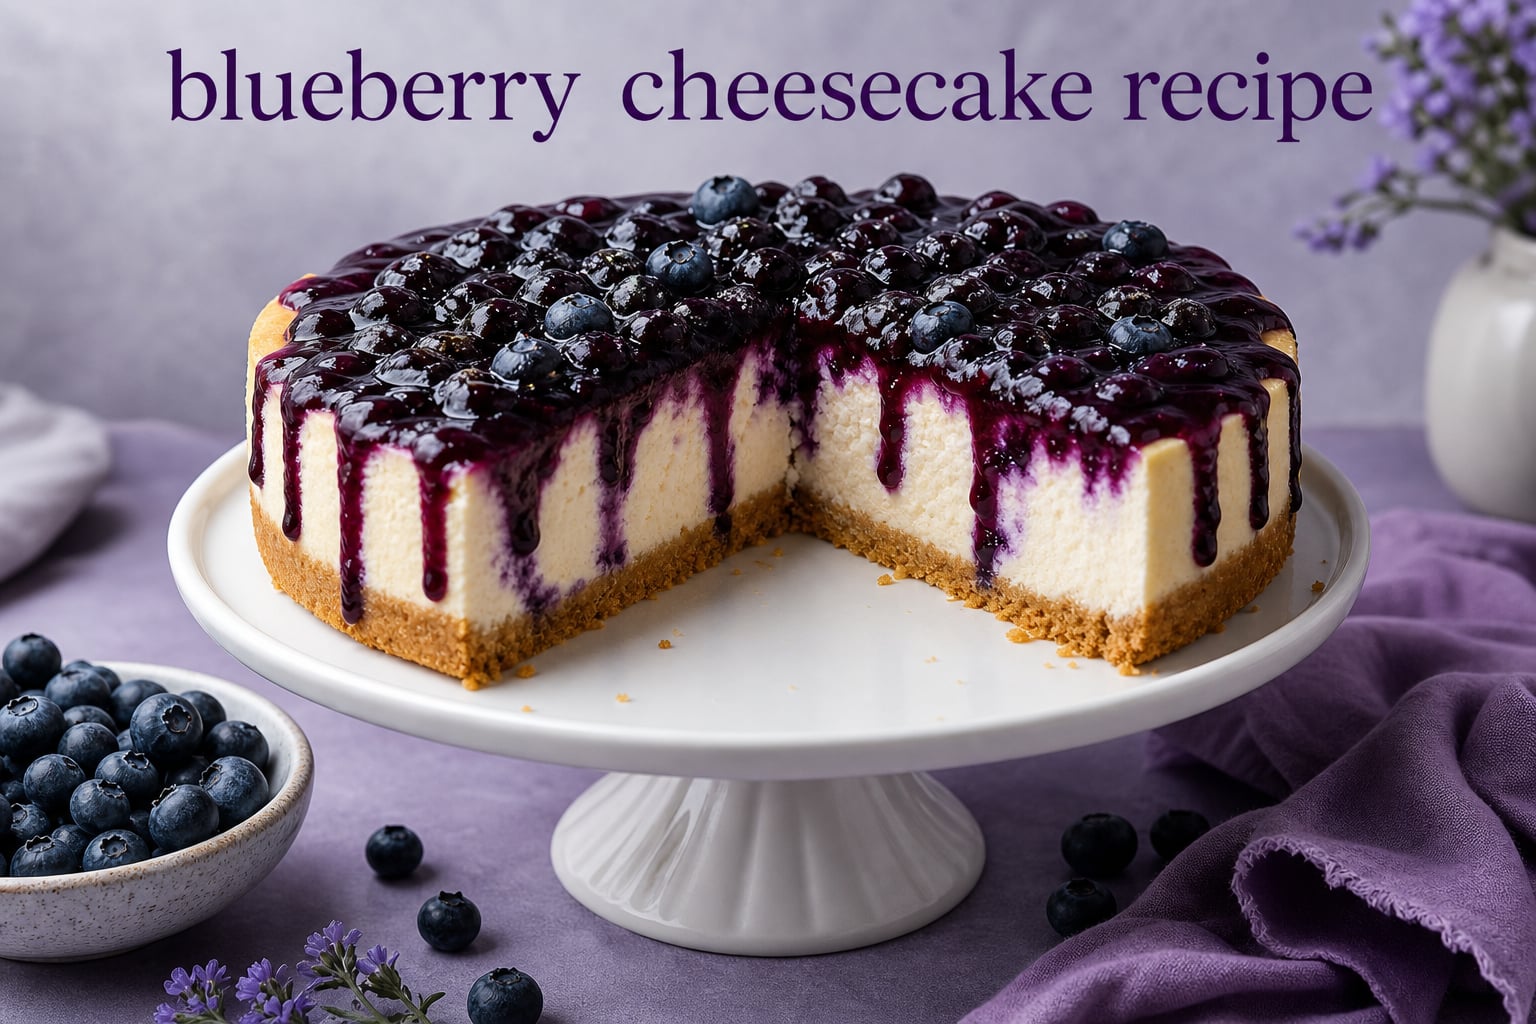
A great blueberry cheesecake recipe delivers a silky smooth cream cheese filling studded with juicy blueberries, all nestled in a buttery graham cracker crust and topped with a glossy, tangy blueberry sauce. After testing this recipe more than a dozen times in our kitchen, I found the exact technique that produces a crack-free cheesecake without needing a water bath. Whether you are baking for a summer gathering, a birthday celebration, or simply because you love cheesecake, this guide will walk you through every step with clear instructions and pro tips.
This recipe uses simple ingredients you probably already have in your kitchen. The secret lies in using brick-style cream cheese at room temperature, mixing just until combined, and cooling the cheesecake gradually in the oven. I will also show you how to make a thick, glossy blueberry sauce that spreads perfectly over the top without making a mess.
If you have ever struggled with cracked cheesecakes, runny sauces, or a filling that sinks in the middle, this guide addresses all of those issues and more. Our team has compiled the most common problems bakers face and paired each one with a clear solution so you can bake with confidence.
One note before you begin: plan ahead. This blueberry cheesecake recipe requires overnight chilling, so it is best started the day before you plan to serve it. The actual hands-on time is only about 45 minutes, but the cooling and chilling process takes several hours. The patience pays off in texture and flavor.
Table of Contents
Blueberry Cheesecake Recipe Ingredients
You will need three sets of ingredients for this recipe: the crust, the filling, and the blueberry topping. Each component plays a key role in the final texture and flavor. Let me walk through what you need and why each ingredient matters.
For the Graham Cracker Crust
The crust provides a crisp, buttery base that balances the creamy filling. A good crust should hold together when sliced but still crumble gently when you bite into it.
1 and 1/2 cups (135g) graham cracker crumbs (about 10 full crackers, crushed)
1/4 cup (50g) granulated sugar
6 tablespoons (85g) unsalted butter, melted
1/4 teaspoon salt
I prefer making my own graham cracker crumbs by pulsing whole crackers in a food processor. The texture ends up more consistent, and you can control how fine or coarse you want the crumbs. If you buy pre-made crumbs, check that they are plain and not sweetened or spiced.
The butter acts as the binding agent. Use melted unsalted butter so you can control the salt level. If you only have salted butter, simply omit the extra salt called for in the recipe. The ratio of butter to crumbs is important: too little and the crust falls apart, too much and it becomes greasy.
If you cannot find graham crackers, digestive biscuits or plain biscuits work well as substitutes. Avoid using cookies with strong flavorings like chocolate or cinnamon, as they will compete with the cheesecake filling.
For the Cream Cheese Filling
The filling is the star of the show. Using full-fat brick-style cream cheese makes a huge difference in texture. Let me explain why this matters so much.
Brick-style cream cheese has a lower moisture content than whipped or tub varieties. This means your filling sets up firmly and has that dense, luxurious mouthfeel you expect from a bakery cheesecake. Whipped cream cheese has air beaten into it, which makes the filling too airy and prone to collapsing during baking.
24 ounces (680g) full-fat cream cheese, brick-style (not whipped or spreadable), at room temperature
1 cup (200g) granulated sugar
3 large eggs, at room temperature
1/2 cup (120ml) sour cream, at room temperature
1 teaspoon vanilla extract
1 tablespoon lemon juice (freshly squeezed)
1 cup (150g) fresh blueberries, rinsed and patted dry
The sour cream adds tanginess and moisture without thinning the batter. It also helps create a smoother texture. If you do not have sour cream, plain full-fat Greek yogurt works as a substitute. The flavor will be slightly tangier, but the texture remains creamy.
Lemon juice might seem like an unusual addition, but it brightens the entire filling and complements the blueberries. The acidity cuts through the richness of the cream cheese so the dessert does not feel heavy.
Important: Room temperature ingredients are critical. Cold cream cheese will leave lumps in your batter, and cold eggs can cause the mixture to curdle. Set your ingredients on the counter for at least 2 hours before baking. If you forget, you can place the eggs in a bowl of warm water for 10 minutes to bring them to room temperature quickly.
For the Blueberry Sauce Topping
This sauce takes the cheesecake to the next level. It cooks on the stovetop in about 10 minutes and can be made up to 2 days in advance.
2 cups (300g) fresh or frozen blueberries
1/3 cup (65g) granulated sugar
1 tablespoon lemon juice
1 tablespoon cornstarch mixed with 1 tablespoon cold water (cornstarch slurry)
1/4 cup (60ml) water
You can use either fresh or frozen blueberries for the sauce. Frozen berries release more liquid as they cook, so you may need to cook the sauce a minute longer to reach the right thickness. Fresh berries hold their shape better and create a chunkier sauce.
The cornstarch slurry is the thickening agent. Cornstarch must be dissolved in cold liquid before adding to hot mixtures, otherwise it clumps immediately and creates lumps. Stir the slurry right before pouring it in, because cornstarch settles to the bottom quickly.
One practical tip from our testing: use a stainless steel or ceramic spoon for stirring the blueberry sauce. Wooden spoons absorb the purple color and can become permanently stained. Blueberry juice is a powerful natural dye.
Equipment You Will Need
Having the right equipment makes the process smoother and more predictable. Here is what you should gather before starting:
9-inch springform pan (8-inch works too but will be taller)
Electric hand mixer or stand mixer with paddle attachment
Large mixing bowls (at least two)
Small saucepan for blueberry sauce
Rubber spatula for folding blueberries
Whisk for stirring the cornstarch slurry
Aluminum foil (if concerned about springform pan leaking)
Wire cooling rack
Plastic wrap for refrigerating
If you only have a 10-inch springform pan, the cheesecake will be slightly thinner and may bake 5 to 8 minutes faster. Check the center earlier and adjust accordingly. Our team tested this recipe in both 9-inch and 10-inch pans, and both produced excellent results.
An 8-inch pan produces a taller, more dramatic cheesecake. You may need to add 10 minutes to the baking time. Keep a close eye on the center jiggle test to know when it is done.
How to Make the Graham Cracker Crust
The crust comes together quickly and needs a short pre-bake to set. A pre-baked crust holds its shape better when you pour in the liquid filling and prevents the base from becoming soggy during the long bake.
Step 1: Preheat your oven to 350°F (175°C). Position the rack in the center of the oven for even heat distribution.
Step 2: In a medium bowl, combine the graham cracker crumbs, sugar, and salt. Pour in the melted butter and stir with a fork until all the crumbs are evenly moistened. The mixture should hold together when you squeeze a handful of it. If it feels too dry, add another tablespoon of melted butter.
Step 3: Press the mixture firmly into the bottom and about 1 inch up the sides of your springform pan. Use the bottom of a measuring cup or a glass to create an even, compact layer. Pressing firmly is important because a loose crust will crumble when you slice the cheesecake.
Step 4: Bake the crust for 8 to 10 minutes until it smells fragrant and looks slightly darker around the edges. Remove from the oven and let it cool while you prepare the filling. Reduce the oven temperature to 325°F (165°C) for the cheesecake bake.
The pre-bake step sets the butter and sugar so the crust holds together. Without this step, the crust can feel sandy and fall apart when the cheesecake is sliced. Let the crust cool for at least 10 minutes before pouring in the filling.
I recommend wrapping the outside of the springform pan with a double layer of heavy-duty aluminum foil at this point. This step is optional but provides insurance against any leaks if your pan is older or does not seal perfectly. It also helps if you decide to use a water bath later.
How to Make the Cream Cheese Filling
This is where technique matters most. Overmixing incorporates too much air into the batter, which leads to cracks during cooling. The air bubbles expand in the oven, then collapse as the cheesecake cools, pulling the surface apart.
Treat the batter gently throughout. Use low speeds and stop mixing the moment ingredients are combined.
Step 1: Place the room-temperature cream cheese in the bowl of your stand mixer (or a large bowl if using a hand mixer). Beat on medium speed for about 2 minutes until completely smooth and creamy. Scrape down the bowl and paddle once or twice during mixing to catch any stubborn lumps.
Step 2: Add the sugar and beat on medium-low speed for another minute until fully incorporated. The mixture should look smooth, glossy, and slightly fluffy. Take your time here because the sugar needs to dissolve completely into the cream cheese.
Step 3: Add the sour cream, vanilla extract, and lemon juice. Mix on low speed just until combined. Scrape the bowl again to make sure everything is evenly distributed.
Step 4: Add the eggs one at a time, beating on low speed after each addition just until blended. You want the eggs incorporated without overworking the batter. Stop mixing as soon as you no longer see streaks of egg.
This is the most common point where bakers go wrong. It is tempting to keep mixing to make the batter smoother, but each extra minute incorporates more air. The batter should look smooth but dense, not fluffy or whipped.
Step 5: Gently fold in the fresh blueberries using a rubber spatula. Do this by hand, not with the mixer, to avoid crushing the berries and turning the batter purple. A few gentle folds are all you need to distribute them evenly.
Step 6: Pour the batter over the cooled crust. Spread it evenly with your spatula, working gently to keep the blueberries distributed throughout. Tap the pan lightly on the counter once or twice to release any large air bubbles.
The batter will be thick. That is normal and helps create the dense, creamy texture you want in a classic baked cheesecake. If your batter seems thin or pourable, the cream cheese may not have been firm enough or you may have overmixed.
How to Make the Blueberry Sauce Topping
You can make the sauce while the cheesecake bakes, or prepare it up to 2 days in advance and store it in the refrigerator. The sauce actually improves in flavor after sitting overnight because the blueberry juices have time to meld with the lemon and sugar.
Step 1: Combine the blueberries, sugar, lemon juice, and water in a medium saucepan. Place over medium heat and bring to a gentle simmer. You will start to see the berries release their juice and the liquid turn a deep purple.
Step 2: Cook for about 5 minutes, stirring occasionally, until the blueberries start to burst and release their juices. The mixture will become liquidy and vibrant. Some berries will remain whole while others break down, which creates a pleasing texture.
Step 3: Give your cornstarch slurry a quick stir (cornstarch settles quickly) and pour it into the saucepan while stirring constantly. The sauce will thicken visibly within 30 seconds. The stirring prevents lumps from forming.
Step 4: Continue cooking for 1 to 2 more minutes, stirring gently. The sauce should coat the back of a spoon and have a jammy, glossy consistency. If you lift the spoon and the sauce runs off immediately, it needs another minute of cooking.
Step 5: Remove from heat and let it cool to room temperature. It will thicken further as it cools because cornstarch continues to set as the temperature drops. If it seems too thick after cooling, stir in a teaspoon of water to loosen it before serving.
Troubleshooting tip: If your sauce looks too runny after adding the cornstarch, you may not have cooked it long enough to activate the starch. Cornstarch needs to reach a full simmer to thicken properly. Bring it back to a simmer and cook for another minute.
Conversely, if your sauce is too thick or gloppy, simply stir in a tablespoon of water at a time until you reach the desired consistency. The sauce should be pourable but thick enough to sit on top of the cheesecake without sliding off.
Let the sauce cool completely before spreading it on the cheesecake. Warm sauce will melt the surface of the chilled cheesecake and create a messy, uneven layer. Room temperature or chilled sauce spreads cleanly and sets into a glossy finish.
Baking and Cooling Your Blueberry Cheesecake
Proper baking and cooling are the keys to a crack-free surface. The gradual temperature change prevents the rapid contraction that causes cracks. Understanding the science behind this will help you know exactly what to look for at each stage.
Baking Instructions
Step 1: Place the springform pan on the center rack of your preheated 325°F (165°C) oven. Bake for 55 to 65 minutes. The low temperature is deliberate because it allows the cheesecake to cook gently and evenly.
Step 2: Check for doneness starting at the 55-minute mark. The edges should be set and slightly puffed, while the center will still look wet and jiggly when you gently shake the pan. This is exactly what you want. The center finishes setting as the cheesecake cools.
The jiggle test is the most reliable way to know when your cheesecake is done. When you nudge the pan, the center 2 to 3 inches should wobble like Jell-O but not slosh like liquid. If the entire surface ripples, it needs more time. If the center does not move at all, it may be overbaked.
Step 3: When the edges are set and the center has a slight wobble, turn off the oven. Leave the cheesecake inside with the oven door cracked open about 2 inches. Let it cool gradually for 1 hour.
Do not open the oven door fully or remove the cheesecake yet. The sudden rush of cold air causes the surface to contract quickly, which is the leading cause of cracks. The cracked door lets heat escape slowly over an hour.
The Cooling Process
This slow cooling period is where crack prevention happens. The gradual temperature drop allows the cheesecake to contract evenly instead of shrinking suddenly at the edges while the center stays puffed.
Step 1: After 1 hour in the cooling oven, remove the cheesecake and place it on a wire rack to cool completely at room temperature. This takes another 1 to 2 hours depending on your kitchen temperature.
Step 2: Once the cheesecake is completely cool to the touch, run a thin knife around the edge to loosen it from the pan. This prevents the cheesecake from pulling away from the sides unevenly, which can create cracks as it contracts further during chilling.
Cover the top with plastic wrap (do not press down) and refrigerate for at least 6 hours, preferably overnight. Overnight chilling gives the filling time to set fully and the flavors time to develop. A cheesecake rushed through chilling will be soft and difficult to slice cleanly.
Step 3: To serve, remove the springform ring. Spread the cooled blueberry sauce over the top. You can also add fresh blueberries and a dollop of whipped cream for presentation.
For clean slices, dip a sharp knife in hot water, wipe it dry, and cut. Repeat between each slice. The warm knife glides through the chilled cheesecake without dragging or tearing the filling.
Water Bath vs No Water Bath
Many cheesecake recipes call for a water bath, also known as a bain-marie. The steam from the water creates a humid environment in the oven and insulates the cheesecake from harsh heat. This helps produce an even, creamy texture.
The problem is that springform pans often leak, and water seeping into the pan results in a soggy crust. This is a common frustration expressed by bakers in online forums. Even with foil wrapping, a small gap can let water in.
After testing both methods extensively, I found this recipe produces a crack-free result without a water bath. The key is baking at a low temperature and cooling gradually in the turned-off oven. These two steps provide enough protection against cracking for most home bakers.
If you prefer using a water bath for extra insurance, wrap your springform pan tightly with three layers of heavy-duty foil before placing it in a larger roasting pan filled with an inch of hot water. Some bakers also place the springform pan inside a silicone sleeve designed to prevent leaks.
For beginners or anyone frustrated by leaking pans, skip the water bath entirely and follow the cooling method described above. The results are just as creamy, and you avoid the risk of a waterlogged crust.
Ingredient Substitutions and Variations
One of the things I love about this blueberry cheesecake recipe is its flexibility. Here are some tested substitutions that work well.
Sour cream alternatives: Plain full-fat Greek yogurt substitutes perfectly for sour cream. The tanginess is slightly different, but the texture remains identical. Avoid using low-fat or fat-free yogurt because they contain stabilizers that can affect the set.
Graham cracker alternatives: Digestive biscuits, vanilla wafers, or Oreo cookies (with the filling removed) all make excellent crust bases. Each brings a different flavor profile. Oreo crusts pair especially well with blueberry cheesecake because the chocolate adds depth.
Fresh vs frozen blueberries in the filling: Fresh blueberries hold their shape and distribute evenly. If using frozen blueberries in the filling, thaw them first and drain the excess liquid. Fold them in gently to avoid bleeding color into the batter. Frozen berries tend to be softer and may sink during baking.
Lactose-free option: Several bakers in online communities report success using lactose-free cream cheese and lactose-free sour cream. The texture and flavor are nearly identical to the original.
Reduced sugar option: You can reduce the sugar in the filling by 25 percent without significantly affecting texture. The blueberry sauce can also be made with less sugar if your berries are naturally sweet. Avoid cutting sugar by more than half, as sugar contributes to the structure of the baked cheesecake.
Pro Tips for the Best Blueberry Cheesecake
These tips come from my own testing and from real bakers who shared their experiences in online baking communities.
Use brick-style cream cheese: Blocks of cream cheese have less moisture than whipped or tub varieties. This gives the filling the right density and texture. Whipped cream cheese will make the cheesecake too airy and prone to collapsing.
Room temperature is non-negotiable: Cold cream cheese will not blend smoothly, and cold eggs can cause the batter to seize. Plan ahead and set everything out 2 hours before you start. This single step solves most texture problems.
Do not overbeat: Once the eggs are added, mix on low speed and stop as soon as they disappear into the batter. Overbeating adds air bubbles that expand in the oven and then collapse, causing cracks on the surface.
Pan size adjustments: If you use a 10-inch pan instead of a 9-inch, the cheesecake will be thinner. Start checking at 45 minutes. For an 8-inch pan, the cheesecake will be taller and may need an extra 10 minutes.
Avoid opening the oven door: Every time you open the oven door, the temperature drops significantly. This temperature fluctuation is a major cause of cracks. Use the oven light to check progress instead of opening the door.
Prevent springform leaks: Some older pans do not seal tightly. Wrapping the outside with heavy-duty foil before baking creates a barrier that keeps water out if you use a water bath and also helps the pan conduct heat evenly.
Know when the cheesecake is done: The internal temperature of a fully baked cheesecake is around 150°F (65°C) if you have a thermometer. Visually, the edges should be set with a slight golden tint, and the center should jiggle but not slosh when nudged.
Storage and Serving Suggestions
Blueberry cheesecake stores beautifully and actually tastes better the next day after the flavors meld. Here is how to keep it fresh.
Refrigeration: Store the cheesecake covered in the refrigerator for up to 5 days. If you have already added the blueberry sauce, place plastic wrap directly on the surface of the sauce to prevent a skin from forming. Without the sauce, cover the whole pan with plastic wrap or transfer slices to an airtight container.
Freezing: Freeze the cheesecake without the sauce for best results. Wrap the whole cheesecake or individual slices in plastic wrap, then aluminum foil, and freeze for up to 3 months. Thaw overnight in the refrigerator before serving. Add the blueberry sauce after thawing for the freshest presentation.
Serving temperature: Let refrigerated cheesecake sit at room temperature for 15 to 20 minutes before serving. The texture softens and the flavors become more pronounced. Cheesecake served straight from the refrigerator can taste muted and feel too firm.
Garnish ideas: Top with fresh blueberries, lemon zest, whipped cream, or a sprig of mint. You can also drizzle extra blueberry sauce over each slice for a restaurant-style presentation. A sprinkle of graham cracker crumbs on top adds a nice textural contrast.
This cheesecake makes an excellent make-ahead dessert for potlucks, birthdays, and summer gatherings. The combination of creamy filling, crisp crust, and bright blueberry topping feels special without requiring advanced techniques. Because it needs to chill overnight, it is the perfect dessert to prepare the day before an event.
Nutrition Notes
While cheesecake is certainly a treat, understanding the nutritional profile can help you plan portions. A standard slice of this blueberry cheesecake (1/12 of the recipe) contains approximately 350 to 400 calories, depending on how generously you add the sauce.
The primary sources of calories are the cream cheese and sugar. Blueberries contribute antioxidants and vitamin C, making them the nutritional highlight of the dessert. Using fresh blueberries maximizes the nutrient content.
For those managing blood sugar, cheesecake has a lower glycemic index than many desserts because the fat and protein slow sugar absorption. However, portion control remains important. A thin slice paired with fresh berries on the side can satisfy a sweet tooth without overdoing it.
If sodium is a concern, use unsalted butter and reduce the added salt in the crust. The cream cheese and sour cream already contain some sodium naturally.
FAQs
How to make the best Blueberry Cheesecake?
Start with room temperature ingredients, especially brick-style cream cheese. Mix the filling just until combined to avoid incorporating air. Bake at 325°F until the edges are set and the center jiggles slightly. Cool gradually in the turned-off oven for 1 hour before refrigerating overnight.
What is the 3 ingredient cheesecake?
A 3 ingredient cheesecake typically refers to simplified recipes using only cream cheese, eggs, and sweetened condensed milk. While easy to make, these versions lack the depth of flavor and texture complexity that comes from adding sour cream, lemon juice, and a proper crust.
What is the secret to making a good cheesecake?
The three biggest secrets are using room temperature ingredients, avoiding overmixing after adding eggs, and cooling the cheesecake gradually. These steps prevent lumps, minimize air bubbles that cause cracks, and allow even contraction during cooling for a smooth, crack-free surface.
Why did my cheesecake crack?
Cracks usually happen from overbeating the batter (too much air), rapid temperature changes during cooling, or opening the oven door during baking. Cool the cheesecake gradually in the turned-off oven and avoid high-speed mixing after adding eggs.
Can I use frozen blueberries in cheesecake?
Yes. For the filling, thaw and drain frozen blueberries first to avoid excess moisture. For the sauce, frozen berries work well without thawing. They release more liquid, so cook the sauce a minute longer to thicken properly.
Do I need a water bath for cheesecake?
Not necessarily. This recipe produces a crack-free cheesecake without a water bath by using gradual cooling in the turned-off oven. A water bath provides more even heat but can leak if your springform pan is not perfectly sealed.
What cream cheese is best for cheesecake?
Use full-fat brick-style cream cheese, not whipped or spreadable varieties. Blocks contain less moisture and create the dense, creamy texture expected in baked cheesecake. Brands like Philadelphia work well.
How long to cool blueberry cheesecake before serving?
Cool in the turned-off oven for 1 hour, then at room temperature for 1 to 2 hours until completely cool. Refrigerate for at least 6 hours or overnight before serving. Rushing this process leads to cracks and uneven texture.
Is cheesecake good for diabetics?
Cheesecake has a lower glycemic index than many desserts because the fat and protein slow sugar absorption. However, it is still high in sugar and should be enjoyed in small portions. Consult a healthcare provider for personalized dietary guidance.
How to make blueberry sauce thicken?
Use a cornstarch slurry made by mixing 1 tablespoon cornstarch with 1 tablespoon cold water. Stir it into the simmering blueberry mixture and cook for 1 to 2 minutes until the sauce coats the back of a spoon. Cornstarch must reach a full simmer to activate fully.
Conclusion
This blueberry cheesecake recipe proves you can achieve bakery-quality results at home with simple ingredients and the right technique. The combination of a buttery graham cracker crust, creamy filling studded with blueberries, and glossy sauce creates a dessert that looks impressive and tastes even better. Take your time with the cooling process, use room temperature ingredients, and resist the urge to overmix. You will be rewarded with a smooth, crack-free cheesecake every single time.