
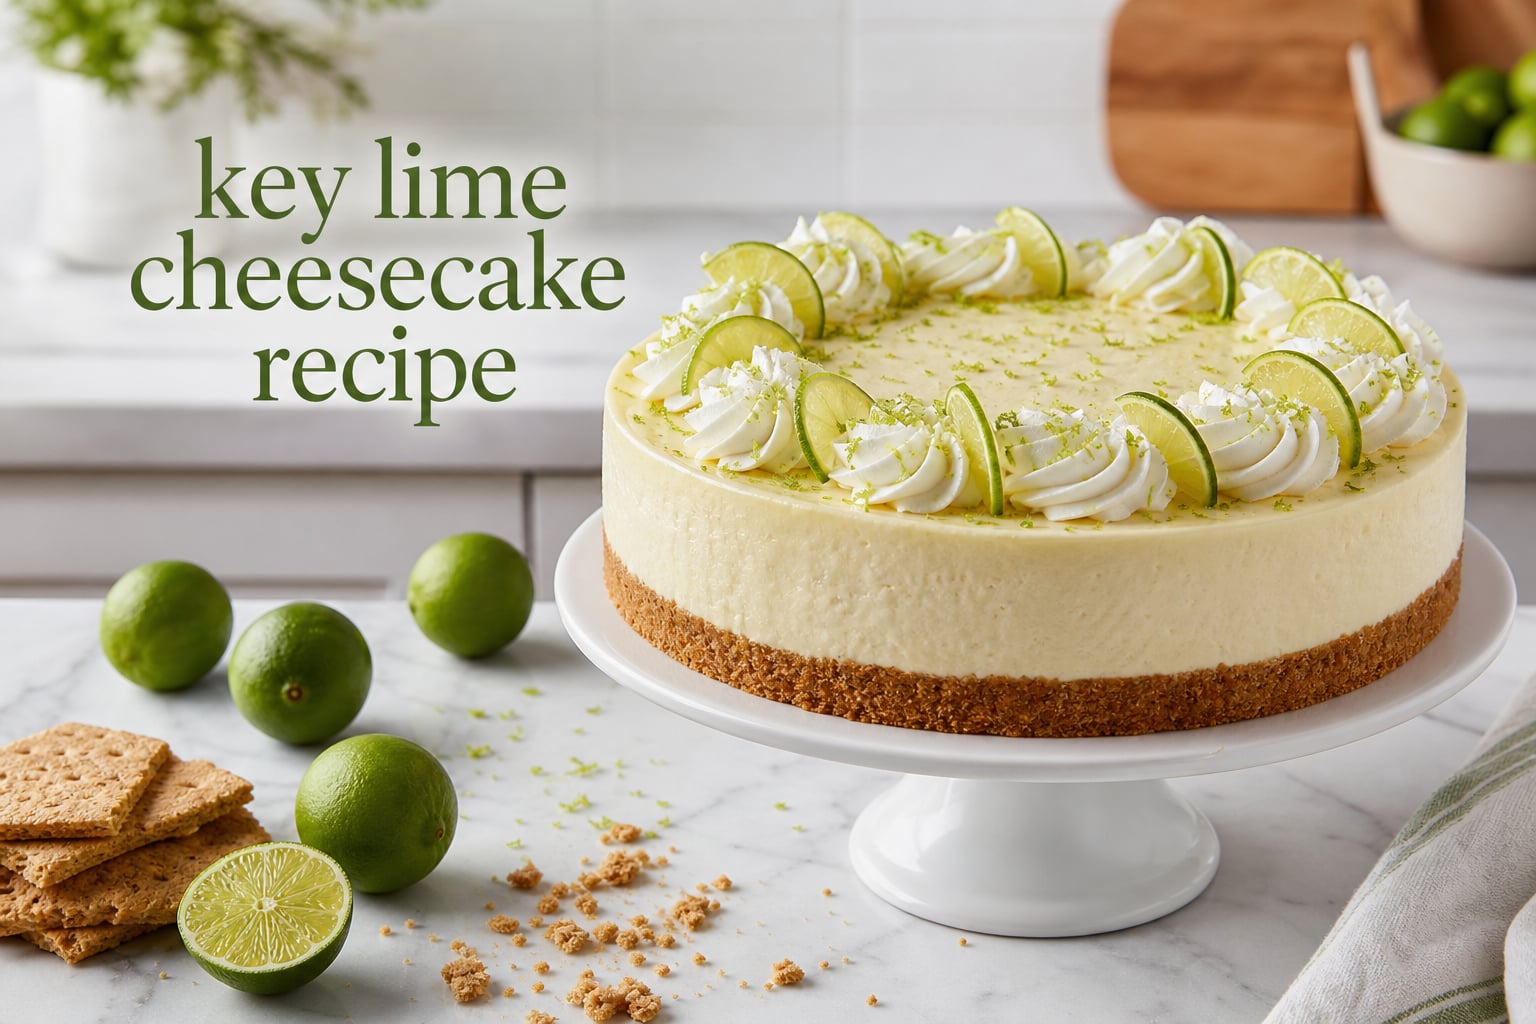
There’s a moment, somewhere around the first bite of homemade key lime cheesecake, when the tart citrus cuts through the rich cream cheese and you understand why this dessert has a permanent spot on my summer table. I’ve baked this recipe more than forty times over the past three years, tweaking the lime-to-cheese ratio and tightening the water bath technique until the texture came out silky every single time.
This key lime cheesecake recipe combines a buttery graham cracker crust with a velvety cream cheese filling brightened by fresh key lime juice and zest. The result is a sweet-tart dessert that looks bakery-worthy but uses pantry staples and a single 9-inch springform pan. I’ll walk you through every step, share the no-crack water bath method I rely on, and answer the questions readers send me most often.
Table of Contents
Why You’ll Love This Key Lime Cheesecake Recipe
This is the cheesecake I make when friends request “something impressive but not fussy.” It checks every box: rich without being heavy, tart without puckering, and forgiving enough for first-time bakers.
- Real lime flavor: Fresh key lime juice and zest give a bright, floral citrus note that bottled juice simply can’t match.
- Silky texture: The water bath technique keeps the filling custardy and crack-free from edge to center.
- Make-ahead friendly: The cheesecake actually tastes better on day two, so you can prep it the night before any dinner party.
- No specialty equipment: A 9-inch springform pan, a roasting pan for the water bath, and a stand mixer or hand mixer are all you need.
- Balanced sweetness: Sour cream in the filling softens the tang so each bite finishes with a creamy, mellow sweetness.
Key Lime Cheesecake Ingredients
Most of these ingredients are pantry staples. The one item worth sourcing carefully is the fresh key limes — they make a real difference in flavor. You’ll need three separate bowls: one for the crust, one for the filling, and one for the optional whipped cream topping.
For the Graham Cracker Crust
- 2 cups (about 18 full sheets) graham cracker crumbs
- 1/3 cup granulated sugar
- 1/2 cup unsalted butter, melted
- 1/4 teaspoon fine sea salt
For the Lime Cheesecake Filling
- 24 ounces (3 blocks) full-fat cream cheese, softened to room temperature
- 1 cup granulated sugar
- 1/4 cup sour cream, at room temperature
- 3 large eggs, at room temperature
- 1/2 cup fresh key lime juice (about 20-25 key limes)
- 2 tablespoons key lime zest (from about 10 limes)
- 1 tablespoon cornstarch
- 1 teaspoon pure vanilla extract
- 1/4 teaspoon fine sea salt
For the Whipped Cream Topping (Optional)
- 1 cup cold heavy whipping cream
- 2 tablespoons powdered sugar
- 1/2 teaspoon vanilla extract
- Lime zest and thin lime slices, for garnish
Substitutions: You can swap the graham crackers for Biscoff cookies or shortbread if you want a warmer, spiced crust. Persian limes work in a pinch — see the section below for ratios. Philadelphia brand cream cheese is my standard, but any full-fat block-style cream cheese works. Do not use whipped or low-fat cream cheese; the texture will be too soft.
Equipment You’ll Need
- 9-inch springform pan
- Heavy-duty aluminum foil
- Large roasting pan (for the water bath)
- Stand mixer with paddle attachment or hand mixer
- Microplane or fine zester
- Citrus juicer (optional but helpful)
How to Make Key Lime Cheesecake: Step-by-Step
Read through every step before starting. The active time is about 25 minutes, but you’ll need at least 6 hours of chill time before serving. Plan ahead.
Step 1: Prep the Oven and Pan
Preheat your oven to 325°F (163°C). Wrap the outside of the springform pan with two large sheets of heavy-duty aluminum foil, making sure the foil comes at least 2 inches up the sides. This waterproof layer prevents water from the bath from seeping into the crust.
Lightly grease the inside of the pan with butter or nonstick spray to help the slices release cleanly later.
Step 2: Make the Graham Cracker Crust
Pulse the graham crackers in a food processor until you have fine, even crumbs — about 2 cups. If you don’t have a food processor, place them in a zip-top bag and crush with a rolling pin.
Stir the crumbs, sugar, melted butter, and salt together until the mixture looks like wet sand and holds its shape when squeezed.
Press the crumb mixture firmly into the bottom and about 1 inch up the sides of the springform pan. Use the flat bottom of a measuring cup to compact it evenly. A tight crust is the secret to clean slices later.
Bake the crust for 10 minutes, then remove and set aside to cool slightly. Reduce the oven temperature to 300°F (150°C).
Step 3: Mix the Cream Cheese Filling
In a large mixing bowl, beat the softened cream cheese on medium speed for 3-4 minutes until completely smooth and lump-free. Stop and scrape down the bowl and paddle several times. This step matters more than any other — even small lumps of cold cream cheese will show up in the finished texture.
Add the sugar and beat for another 2 minutes until fluffy. Mix in the sour cream, vanilla, and salt on low speed until just combined.
Add the cornstarch and beat briefly to incorporate. Then add the eggs one at a time on low speed, mixing just until each egg disappears. Overmixing at this stage is the number one cause of cracks, so stop the mixer as soon as the egg is blended.
Finally, pour in the key lime juice and zest. Stir gently by hand with a spatula until the color is uniform and no streaks remain. The batter will look loose — that’s exactly right.
Step 4: Set Up the Water Bath
Place the foil-wrapped springform pan inside a large roasting pan. Pour the cheesecake batter into the prepared crust and smooth the top with an offset spatula.
Set the roasting pan on the oven rack, then carefully pour hot water into the roasting pan until it reaches about 1 inch up the sides of the springform. Hot tap water works fine — the goal is even, gentle heat around the cheesecake.
Step 5: Bake Low and Slow
Bake at 300°F (150°C) for 65-75 minutes. The cheesecake is done when the edges are set but the center 2 inches still jiggles slightly when you gently shake the pan. The center will continue to cook from residual heat as it cools, so resist the urge to bake until fully firm.
Turn off the oven, crack the door open with a wooden spoon, and let the cheesecake cool inside for 1 hour. This slow temperature drop is another crack-prevention trick — sudden temperature changes shock the custard.
Step 6: Chill Overnight
Remove the cheesecake from the water bath and water bath foil. Run a thin knife around the edge of the pan to loosen the sides, then let it cool to room temperature on a wire rack.
Cover loosely with plastic wrap and refrigerate for at least 6 hours, preferably overnight. Do not skip this step. The custard needs time to fully set, and the flavors deepen considerably with a long chill.
Step 7: Add the Whipped Cream and Serve
Just before serving, beat the heavy cream, powdered sugar, and vanilla in a chilled bowl until stiff peaks form — the cream should stand up straight when you lift the beaters.
Spread or pipe the whipped cream over the chilled cheesecake. Garnish with extra lime zest and thin lime slices. Slice with a sharp knife dipped in hot water and wiped dry between cuts for the cleanest slices.
Store any leftovers in the refrigerator, covered, for up to 5 days.
Key Limes vs Persian Limes: Which Should You Use?
Key limes are smaller, more aromatic, and noticeably tarter than the common Persian limes you find year-round in most grocery stores. They also have a thinner rind and a more floral, almost perfume-like citrus character.
If you can find fresh key limes, use them. They produce a brighter, more layered lime flavor. That said, Persian limes work well in this recipe — I tested both side by side and the difference is subtle rather than dramatic.
Substitution ratio: Use 1/2 cup Persian lime juice in place of 1/2 cup key lime juice. The flavor will be slightly less intense, so add an extra teaspoon of lime zest to bump up the aroma.
Never use bottled lime juice in this recipe. The pasteurization process dulls the bright citrus oils and leaves a faintly bitter aftertaste. One Reddit user described the bottled version as “lime-flavored water” — accurate, sadly.
Pro Tips for a Perfect Key Lime Cheesecake Every Time
These are the techniques that took my cheesecakes from “pretty good” to “consistently great.”
- Room temperature everything. Cold cream cheese is the #1 reason for lumpy batter. Set out the blocks 2 hours before you start baking.
- Don’t overmix after adding eggs. Excessive air in the batter rises in the oven and collapses into cracks. Mix on low and stop as soon as each egg disappears.
- Water bath is non-negotiable. The steam keeps the oven humid, which prevents the custard from drying out and cracking. A high-altitude baker in our community confirmed this works at 8,300 feet.
- Heavy-duty foil only. Regular foil can tear when you wrap the pan. Double-wrap with wide, heavy-duty sheets to keep water out.
- Cool slowly. That hour in the turned-off oven with the door cracked is not wasted time. It saves you from the heartbreak of a cracked top.
- Underbake slightly. Pull the cheesecake when the center 2 inches still jiggle. Carryover heat finishes the job.
- Chill overnight. Day-two cheesecake is meaningfully better than day-one. Plan accordingly.
Troubleshooting: Fixing Common Key Lime Cheesecake Problems
Even experienced bakers hit snags. Here’s how to recover from the most common issues.
Why Did My Cheesecake Crack?
Cracks come from three main culprits: overmixing the batter (too much air), overbaking, or sudden temperature changes. Prevention beats repair here, so use the water bath, don’t overmix the eggs, and cool gradually in the oven.
If a crack forms anyway, don’t panic. Press a thin layer of sour cream over the top, or pile on whipped cream and lime slices to disguise it. The dessert will still taste perfect.
Why Is My Crust Soggy?
Soggy bottom crust usually means water from the bath seeped in through a hole in the foil. Double-wrap with heavy-duty foil next time, and make sure the wrap comes at least 2 inches up the sides.
You can also pre-bake the crust a few extra minutes (12-15 instead of 10) to create a more moisture-resistant base.
Why Did the Filling Collapse When I Cut It?
A collapsed or soupy filling almost always means the cheesecake wasn’t fully chilled or was slightly underbaked. Give it at least 6 full hours in the refrigerator, or use the oven-cool trick: turn off the heat, leave the door closed, and let the cheesecake sit inside for another 30 minutes after baking.
Why Doesn’t My Cheesecake Taste Lemony Enough?
Two reasons. First, the limes might not be fully ripe or were sitting in your fridge too long. Second, you might have measured the zest after juicing the limes — zest loses potency quickly. Zest the limes first, then juice them.
You can bump up the lime flavor by adding an extra tablespoon of fresh zest on top of the finished cheesecake, right before serving.
Why Is the Texture Too Dense or Too Soft?
Too dense usually means the cream cheese was overmixed, or you added extra eggs. Too soft usually means underbaking or not enough chill time. Stick to the ingredient amounts and timing in this recipe, and you’ll hit the sweet spot.
Make-Ahead and Storage Guide
Key lime cheesecake is one of the best make-ahead desserts because the flavor actually improves with time.
- Refrigerator: Cover with plastic wrap or store in an airtight container. The cheesecake stays fresh for up to 5 days.
- Freezer: Wrap individual slices or the whole cheesecake (without topping) tightly in plastic wrap, then in aluminum foil. Freeze for up to 3 months. Thaw overnight in the refrigerator before serving.
- Add toppings fresh: Always add the whipped cream and lime garnish just before serving, not before freezing. They don’t survive the freeze well.
Serving Suggestions
This cheesecake is rich and tangy, so it pairs beautifully with fresh fruit and a hot drink. Try a few of these combinations:
- Top each slice with fresh raspberries or strawberries for color and tartness.
- Serve with a small espresso or cappuccino to balance the richness.
- Pair with a glass of sparkling wine for dinner parties.
- Add a drizzle of white chocolate or passion fruit coulis for an extra-luxe finish.
It works equally well as a summer cookout dessert, an Easter brunch centerpiece, or a Mother’s Day treat. I also love it for birthday cake alternatives when someone in my house doesn’t want traditional chocolate.
Frequently Asked Questions
What is the best key lime cheesecake recipe?
A great key lime cheesecake recipe balances tangy fresh key lime juice with rich cream cheese, uses a buttery graham cracker crust, and bakes in a water bath to prevent cracks. The filling should include sour cream for smoothness, cornstarch for structure, and eggs added one at a time on low speed to avoid incorporating too much air. Chill overnight for the best texture and flavor.
What is the difference between key lime pie and key lime cheesecake?
Key lime pie uses a custard of egg yolks and sweetened condensed milk, often without any dairy beyond the milk, and is traditionally topped with meringue. Key lime cheesecake combines that bright lime flavor with a baked cream cheese custard on a graham cracker crust, and is usually topped with whipped cream instead of meringue. The cheesecake version is richer, denser, and tangier.
Can I use regular limes instead of key limes?
Yes, you can substitute Persian limes for key limes using an equal amount of juice. The flavor will be slightly less floral and aromatic, so add an extra teaspoon of lime zest to compensate. Always use fresh juice — bottled lime juice produces noticeably inferior results in this recipe.
Why did my key lime cheesecake crack?
Cracks usually happen for three reasons: overmixing the batter after adding eggs, baking at too high a temperature, or cooling the cheesecake too quickly. Use a water bath, mix the eggs in on low speed just until combined, and let the cheesecake cool gradually in the turned-off oven with the door cracked for one hour.
Can I freeze key lime cheesecake?
Yes, key lime cheesecake freezes well for up to 3 months. Wrap the cheesecake (without whipped cream topping) tightly in plastic wrap, then in aluminum foil. Thaw overnight in the refrigerator and add fresh whipped cream and lime garnish just before serving.
How long does key lime cheesecake last in the fridge?
Properly covered, key lime cheesecake stays fresh in the refrigerator for up to 5 days. The flavor actually improves on day two and three, so it is an ideal make-ahead dessert. Cover loosely with plastic wrap or store in an airtight container.
Final Thoughts
This key lime cheesecake recipe has earned its place as my most-requested dessert, and I think you’ll see why after the first slice. The combination of tangy key lime, velvety cream cheese, and buttery graham cracker crust hits the sweet-tart balance that makes everyone reach for a second slice.
Give yourself a relaxed afternoon to bake and an overnight rest in the fridge. Follow the water bath steps, zest the limes before juicing them, and trust the slow cool-down. You’ll pull out a cheesecake that looks straight out of a bakery case — one your friends will ask about for years.
If you try this recipe, I’d love to hear how it turned out. Drop a note in the comments with your favorite garnish or any tweaks you made. Happy baking.