
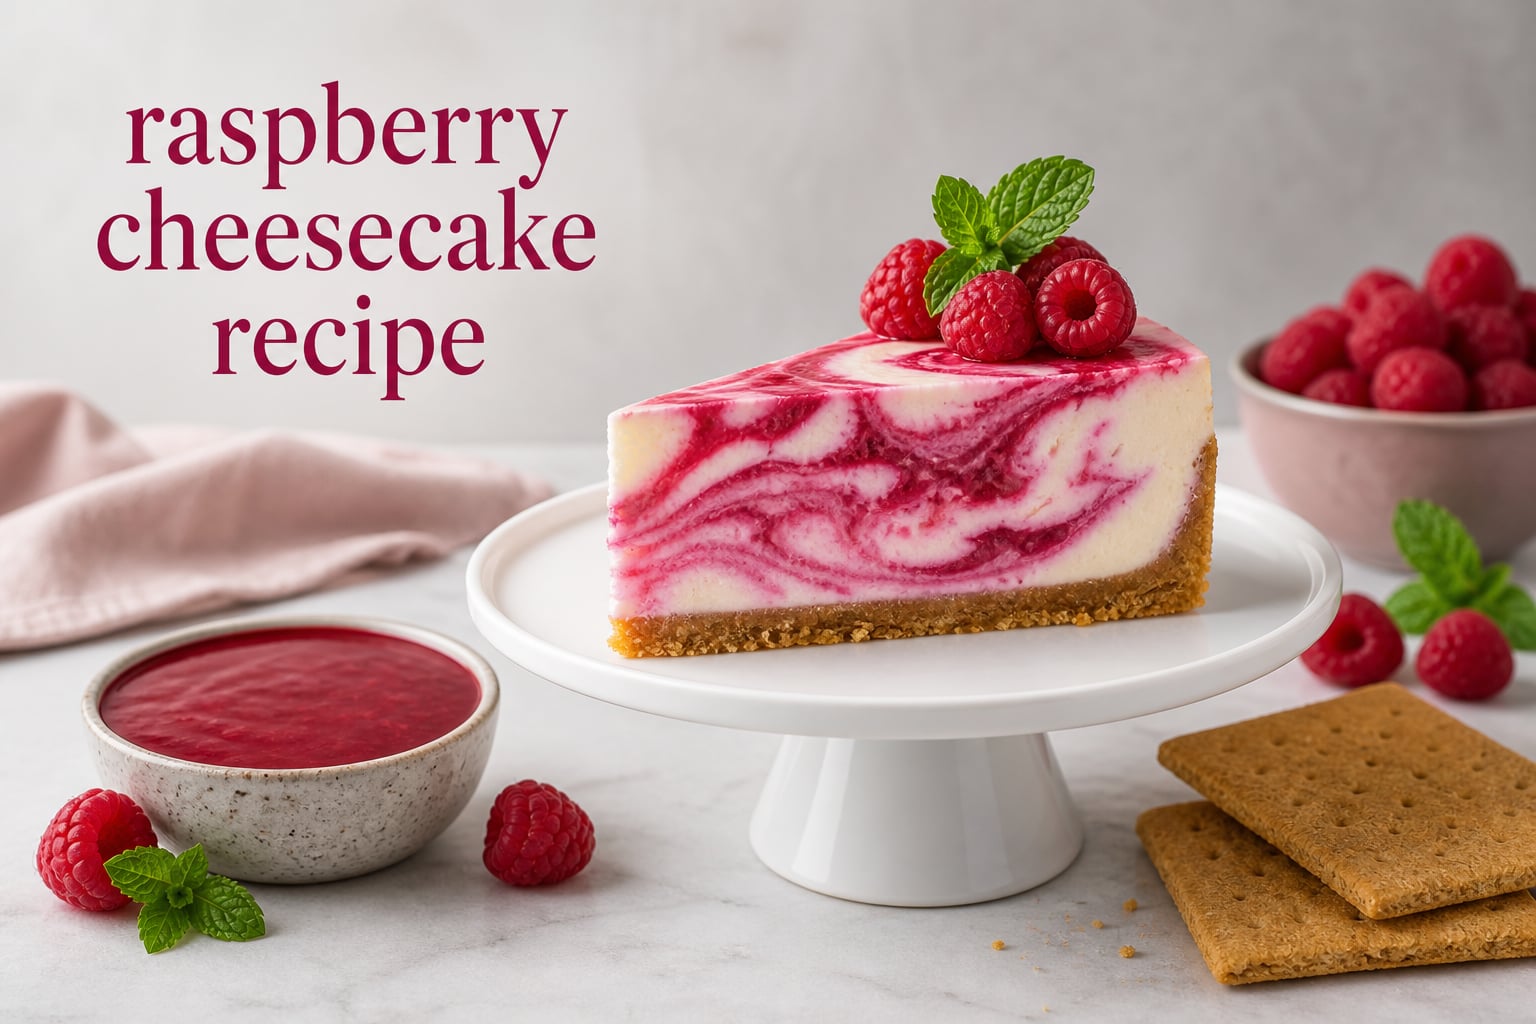
If you have been searching for the perfect raspberry cheesecake recipe, you are in the right place. This is the kind of dessert that makes people go quiet after the first bite — rich, creamy cheesecake with a bright raspberry swirl running through every slice. I have tested this recipe more times than I can count, tweaking the ratios until the filling stays silky and the raspberry flavor actually comes through.
What makes this version different from most raspberry cheesecake recipes online is that it does not require a water bath. I know the idea of skipping the water bath makes some bakers nervous, but I will walk you through a simpler method that still produces a crack-free, bakery-quality cheesecake. The raspberry sauce is cooked separately on the stovetop, so you get concentrated berry flavor swirled into a smooth cream cheese filling — not the washed-out taste you get from folding raw fruit into the batter.
You can use fresh or frozen raspberries for the sauce, and the whole thing can be made a day ahead. That makes this raspberry cheesecake ideal for dinner parties, birthdays, holidays, or any night you want something that feels special without spending all day in the kitchen.
Table of Contents
Why This Raspberry Cheesecake Recipe Works
Most raspberry cheesecake recipes fall into one of two traps: either the raspberry flavor is barely there, or the added moisture from the fruit turns the filling loose and weepy. I solved both problems by separating the raspberry sauce from the cheesecake batter entirely.
Cooking the raspberries down with sugar and a cornstarch slurry concentrates the flavor and controls the moisture. When you swirl this thickened sauce into the cream cheese filling, it holds its shape during baking instead of bleeding or sinking. You get clean, beautiful swirls and a punch of raspberry in every bite.
The crust uses a classic graham cracker base with melted butter and a touch of sugar. It gets pre-baked for about 8 minutes so it stays crisp under the wet filling. This small step makes a big difference — nobody wants a soggy bottom on their cheesecake.
For the filling, I use full-fat brick-style cream cheese, sour cream, granulated sugar, eggs, vanilla extract, and a splash of lemon juice. The sour cream adds a slight tang that balances the sweetness of the raspberry sauce. The lemon juice brightens everything up without making the filling taste like lemon.
Ingredients You Will Need
Gather everything before you start. Having all ingredients at room temperature is one of the most important steps for a smooth, lump-free cheesecake filling.
For the Graham Cracker Crust
1 and 1/2 cups graham cracker crumbs (about 10 full sheets, crushed fine) — you can also substitute Oreo cookies for a chocolate twist.
1/4 cup granulated sugar.
6 tablespoons unsalted butter, melted.
A pinch of salt.
For the Raspberry Sauce
12 ounces fresh or frozen raspberries (about 2 and 1/2 cups). Frozen works just as well as fresh for the sauce.
1/3 cup granulated sugar — adjust slightly depending on how tart your raspberries are.
1 tablespoon cornstarch mixed with 1 tablespoon cold water (this is your cornstarch slurry).
1 teaspoon fresh lemon juice.
For the Cheesecake Filling
32 ounces full-fat cream cheese (four 8-ounce bricks), at room temperature. Use brick-style, not the spreadable kind in a tub.
1 cup granulated sugar.
1 cup sour cream, at room temperature.
3 large eggs, at room temperature.
1 tablespoon vanilla extract.
1 tablespoon fresh lemon juice.
A pinch of salt.
Equipment Needed
You do not need fancy equipment for this recipe, but a few specific items will make the process smoother:
A 9-inch springform pan is essential for easy release. If you only have a regular cake pan, line the bottom and sides with parchment paper with overhang so you can lift the cheesecake out.
A hand mixer or stand mixer makes blending the cream cheese much easier, but you can use a whisk and some elbow grease if needed.
A small saucepan for the raspberry sauce and a fine mesh sieve if you want to strain out the raspberry seeds.
A rubber spatula for folding and swirling — this is better than a metal spoon because it will not scratch your pan.
How to Make Raspberry Sauce for Cheesecake
The raspberry sauce is the star of this recipe, so I like to make it first. You want it cooled to at least room temperature before you swirl it into the cheesecake batter. Warm sauce will melt the filling and create a mess.
Step 1: Combine the raspberries and sugar in a small saucepan over medium heat. Cook for about 8 to 10 minutes, stirring occasionally, until the raspberries break down and release their juice. The mixture will look bubbly and slightly reduced.
Step 2: If you want a seedless sauce, press the mixture through a fine mesh sieve into a bowl using the back of a spoon. This takes a few minutes but gives you a silky smooth sauce. If you do not mind seeds, skip this step entirely.
Step 3: Return the strained or unstrained sauce to the saucepan over low heat. Whisk in the cornstarch slurry and cook for another 1 to 2 minutes, stirring constantly, until the sauce thickens enough to coat the back of a spoon.
Step 4: Remove from heat and stir in the lemon juice. Let the sauce cool to room temperature while you prepare the crust and filling. You can also make this sauce up to 3 days ahead and store it in the fridge.
The consistency you are looking for is like a thick jam. If you dip a spoon in and draw a line with your finger, the line should hold. If the sauce is too runny, it will sink during baking. If it is too thick, it will be hard to swirl.
How to Make the Graham Cracker Crust
The crust comes together in minutes. Pre-baking it before adding the filling helps it stay firm and gives the cheesecake a solid foundation.
Step 1: Preheat your oven to 350 degrees F. Wrap the outside of your 9-inch springform pan tightly with heavy-duty aluminum foil. This is for the no-water-bath steam method I will explain in the baking section.
Step 2: In a medium bowl, mix the graham cracker crumbs, sugar, and salt. Pour in the melted butter and stir until the mixture feels like wet sand. When you squeeze a handful, it should hold its shape.
Step 3: Pour the crumb mixture into your springform pan. Use the bottom of a measuring cup or glass to press the crumbs firmly and evenly across the bottom. Press slightly up the sides if you like a taller crust edge.
Step 4: Bake the crust for 8 to 10 minutes until it smells toasted and looks set. Let it cool while you make the filling. Reduce the oven temperature to 325 degrees F after you take the crust out.
How to Make the Cheesecake Filling
This is where technique matters more than anything else. The goal is a smooth, creamy filling with zero lumps and minimal air — because air bubbles cause cracks.
Step 1: Make sure your cream cheese, sour cream, and eggs are truly at room temperature. Cold cream cheese will not blend smooth no matter how long you beat it. I take mine out of the fridge at least 2 hours before baking. If you forget, you can cut the cream cheese into small cubes and let it sit for 30 minutes — that speeds things up.
Step 2: In a large bowl, beat the cream cheese with a hand mixer or stand mixer on medium speed until smooth and creamy, about 2 minutes. Scrape down the sides and bottom of the bowl halfway through. You want it completely smooth before adding anything else.
Step 3: Add the sugar and salt. Beat on medium speed until combined, about 1 minute. Scrape the bowl again.
Step 4: Add the sour cream, vanilla extract, and lemon juice. Mix on low speed just until incorporated.
Step 5: Add the eggs one at a time, mixing on low speed just until each egg is blended in. Stop the mixer as soon as the last egg disappears. This is the single most important moment in the entire recipe — over-mixing at this stage incorporates air that will expand in the oven and crack your cheesecake.
Step 6: Give the bowl one final scrape and fold everything together by hand with a spatula. The filling should be silky, smooth, and pourable.
Assembling and Baking Your Raspberry Cheesecake
Now the fun part — putting it all together and getting that beautiful raspberry swirl.
Creating the Raspberry Swirl
Pour about two-thirds of the cheesecake filling over the pre-baked crust. Spread it evenly with a spatula. Next, drop spoonfuls of the cooled raspberry sauce over the filling — use about half of your sauce. Pour the remaining cheesecake filling on top, then add more spoonfuls of raspberry sauce.
Take a butter knife or a thin skewer and gently drag it through the filling in a figure-eight motion. Do not over-swirl — 4 to 5 passes is enough. You want distinct ribbons of raspberry running through the cheesecake, not a solid pink color.
Save any leftover raspberry sauce for serving. It makes a gorgeous topping when drizzled over each slice.
Baking Instructions
Place the assembled cheesecake in the oven at 325 degrees F. Here is where I use a no-water-bath method that still protects against cracking. Place a roasting pan filled with boiling water on the rack below the cheesecake. The steam from that water creates a humid environment in the oven, which helps the cheesecake bake gently and evenly — the same benefit as a water bath, but without the risk of water seeping into your pan.
Bake for 55 to 70 minutes. The edges should be set and slightly golden, but the center 2 to 3 inches should still have a slight jiggle when you gently shake the pan. It should look like set gelatin that wobbles but does not ripple. If the center ripples like liquid, it needs more time.
How to Tell When It Is Done
The visual jiggle test is the most reliable method. You can also use an instant-read thermometer — the cheesecake is done when the center hits 150 degrees F. This is the temperature at which the eggs set fully without overcooking.
Do not use the toothpick test for cheesecake. A toothpick will come out clean long before the cheesecake is actually done because the center is supposed to be soft.
How to Prevent Cracks in Your Cheesecake
Cracks are the number one complaint I hear from home bakers making cheesecake. The good news is they are completely preventable once you understand what causes them.
Cracks happen when the edges of the cheesecake set and pull away from the still-soft center. The most common causes are over-mixing the batter, sudden temperature changes, and over-baking. Here is how to avoid each one.
First, never over-mix once the eggs go in. Eggs hold air, and that air expands in the oven. Too much air means the cheesecake puffs up, then collapses and cracks as it cools. Mix on low speed and stop the instant the eggs are incorporated.
Second, use the steam method described above or a traditional water bath. Both create a humid oven environment that lets the cheesecake bake slowly and evenly. The gentle, even heat prevents the edges from setting too fast.
Third, cool the cheesecake gradually. When the baking time is up, turn the oven off and crack the door open about an inch. Leave the cheesecake inside for 30 minutes. This slow temperature drop prevents thermal shock, which is a major crack trigger.
Fourth, run a thin knife around the edge of the cheesecake right after it comes out of the oven. As the cheesecake cools, it contracts. If it is stuck to the pan rim, that pulling force can crack the surface. Loosening it from the pan eliminates that stress.
And here is a reassuring thought: even if a crack does happen, the raspberry swirl does a fantastic job of hiding it. A few fresh raspberries on top and nobody will ever know.
Cooling and Chilling Process
Patience is the secret ingredient in every great cheesecake. The cooling and chilling process is not optional — it is what transforms a soft, jiggly filling into a dense, sliceable cheesecake.
After the 30-minute oven cooling with the door cracked, transfer the cheesecake to a wire rack and let it cool to room temperature, about another hour. Do not rush this by putting it in the fridge while it is still warm. Rapid chilling causes condensation, which can make the surface weep and ruin the texture.
Once it is completely at room temperature, cover the pan loosely with plastic wrap and refrigerate for at least 6 hours. Overnight is even better. I know it is hard to wait, but the flavor and texture improve dramatically after a full night in the fridge. The filling firms up, the flavors meld, and the raspberry swirl sets into clean, beautiful layers.
How to Serve Raspberry Cheesecake
To get clean slices, dip a sharp knife in hot water, wipe it dry, and cut. Repeat between each cut. The warm blade glides through the filling without dragging, giving you bakery-perfect slices.
Top each slice with a spoonful of the leftover raspberry sauce, a dollop of fresh whipped cream, and a few whole fresh raspberries. The combination of the swirled filling, the bright sauce, and the creamy topping is what takes this dessert from good to memorable.
This cheesecake is rich, so I usually cut 12 slices from a 9-inch pan. For a crowd, you can easily stretch it to 14 thinner slices.
Storage and Make-Ahead Instructions
Raspberry cheesecake is one of the best make-ahead desserts you can make. The flavor actually improves after a day in the fridge, so it is perfect for preparing the night before a gathering.
To store in the refrigerator, keep the cheesecake in the springform pan with the sides on, loosely covered with plastic wrap, for up to 5 days. You can also remove the sides, transfer the cheesecake to a cake plate, and cover it with a cake dome. If you have leftover slices, store them in an airtight container in the fridge for up to 5 days.
To freeze, wrap individual slices tightly in plastic wrap, then place them in a freezer-safe container or zip-top bag. Frozen cheesecake keeps well for up to 2 months. Thaw slices overnight in the refrigerator — do not thaw at room temperature, as the texture will suffer.
If you are making this for an event, I recommend baking it the day before, chilling overnight, and serving the next day. This takes all the stress out of timing and lets you focus on everything else.
Troubleshooting Common Cheesecake Problems
Even experienced bakers run into issues sometimes. Here are solutions to the most common problems I hear about from readers and on baking forums.
My raspberry sauce sank to the bottom during baking. This happens when the sauce is too thin. Make sure your cornstarch slurry has fully thickened the sauce before swirling. The sauce should coat a spoon and hold a line when you draw your finger through it. Also, make sure the sauce has cooled to room temperature before adding it to the batter — warm sauce will sink right through.
My cheesecake cracked on top. Review the crack prevention section above. The most likely culprits are over-mixing the eggs, skipping the gradual cooling step, or baking at too high a temperature. Your oven should be at 325 degrees F — confirm with an oven thermometer if your oven runs hot or cold.
My cheesecake is runny in the center. It was under-baked. The center should jiggle like set gelatin, not ripple like liquid. If you pull it too early, the center will not set during chilling. When in doubt, give it 5 more minutes and check again.
My filling has lumps. Your cream cheese was too cold. Next time, let it sit at room temperature for at least 2 hours. You can rescue a lumpy batter by pressing it through a fine mesh sieve before pouring it into the crust, but prevention is easier.
My crust is soggy. Make sure you pre-bake the crust for the full 8 to 10 minutes before adding the filling. Also, check that your foil wrap is tight if you use the steam method — any moisture that gets inside the pan can soften the crust.
There are air bubbles in my filling. You likely over-mixed the batter, especially after adding the eggs. Tap the pan firmly on the counter a few times before baking to release trapped air bubbles. This simple step makes a noticeable difference.
Recipe Variations to Try
Once you master the base recipe, there are plenty of ways to customize it. Here are my favorite variations.
White Chocolate Raspberry Cheesecake: Add 6 ounces of melted and slightly cooled white chocolate to the filling after the cream cheese and sugar are blended. The white chocolate adds richness and sweetness that pairs beautifully with the tart raspberry swirl. Reduce the granulated sugar in the filling to 3/4 cup if you go this route.
Chocolate Crust: Swap the graham crackers for chocolate cookie crumbs — Oreos work great. Just scrape out the cream filling first, then crush the cookies and proceed with the recipe. This gives the cheesecake a brownie-like base that chocolate lovers will appreciate.
Mini Raspberry Cheesecakes: Use the same recipe to make individual portions. Line a muffin tin with paper liners, press about 1 tablespoon of crust mixture into each cup, and fill about 3/4 full with batter. Add a small dollop of raspberry sauce and swirl with a toothpick. Bake at 325 degrees F for 18 to 22 minutes. This yields about 18 mini cheesecakes.
Gluten-Free Raspberry Cheesecake: Use gluten-free graham crackers for the crust — there are several good brands available now. Everything else in the recipe is naturally gluten-free. Just double-check your labels on the vanilla extract and sour cream.
Mixed Berry Swirl: Replace half the raspberries with blueberries or blackberries for a more complex berry flavor. The cooking method stays the same.
Frequently Asked Questions
How to make the best raspberry cheesecake?
The best raspberry cheesecake starts with full-fat brick-style cream cheese at room temperature, a pre-baked graham cracker crust, and a separately cooked raspberry sauce that gets swirled into the filling. Avoid over-mixing once eggs are added, bake at 325 degrees F using a steam method for gentle heat, and chill overnight before serving.
What is the secret to making good cheesecake?
The secret is room temperature ingredients and minimal mixing after adding eggs. Cold cream cheese creates lumps, and over-mixing incorporates air that causes cracks. Mix on low speed, stop as soon as eggs are blended, and cool the cheesecake gradually to prevent thermal shock.
Can I use frozen raspberries for cheesecake?
Yes, frozen raspberries work just as well as fresh for the raspberry sauce. Cook them straight from frozen with sugar and a cornstarch slurry until thickened. Do not thaw first, as thawing releases water and dilutes the flavor. For the topping, fresh raspberries look better but frozen can be used if that is what you have.
Can I freeze raspberry cheesecake?
Yes, raspberry cheesecake freezes well for up to 2 months. Cut it into individual slices, wrap each tightly in plastic wrap, and place them in a freezer-safe container. Thaw overnight in the refrigerator rather than at room temperature for the best texture.
How long does raspberry cheesecake last in the fridge?
Raspberry cheesecake lasts 4 to 5 days in the refrigerator when stored in an airtight container or covered loosely with plastic wrap. The flavor actually improves on the second day after baking, making it an excellent make-ahead dessert.
Why did my raspberry sauce sink during baking?
Raspberry sauce sinks when it is too thin or too warm. Make sure the cornstarch slurry has fully thickened the sauce before swirling — it should coat a spoon and hold a line when you draw your finger through it. Also, let the sauce cool completely to room temperature before adding it to the cheesecake batter.
Conclusion
This raspberry cheesecake recipe delivers everything you want in a show-stopping dessert: a buttery graham cracker crust, a rich and tangy cream cheese filling, and a vibrant raspberry swirl that runs through every slice. By cooking the raspberry sauce separately and using the steam-bake method instead of a traditional water bath, you get all the flavor and texture without the common headaches.
Remember the three rules that make the biggest difference: use room temperature ingredients, stop mixing the instant the eggs are blended in, and let the cheesecake chill overnight before slicing. Follow those steps and you will have a crack-free, bakery-quality cheesecake every single time.
Whether you are making this for a birthday, a holiday dinner, or just because you love raspberry dessert, this recipe is one you will come back to again and again. Give it a try, and if you experiment with any of the variations — especially the white chocolate or mini cheesecake versions — let me know how it turns out. Happy baking.