
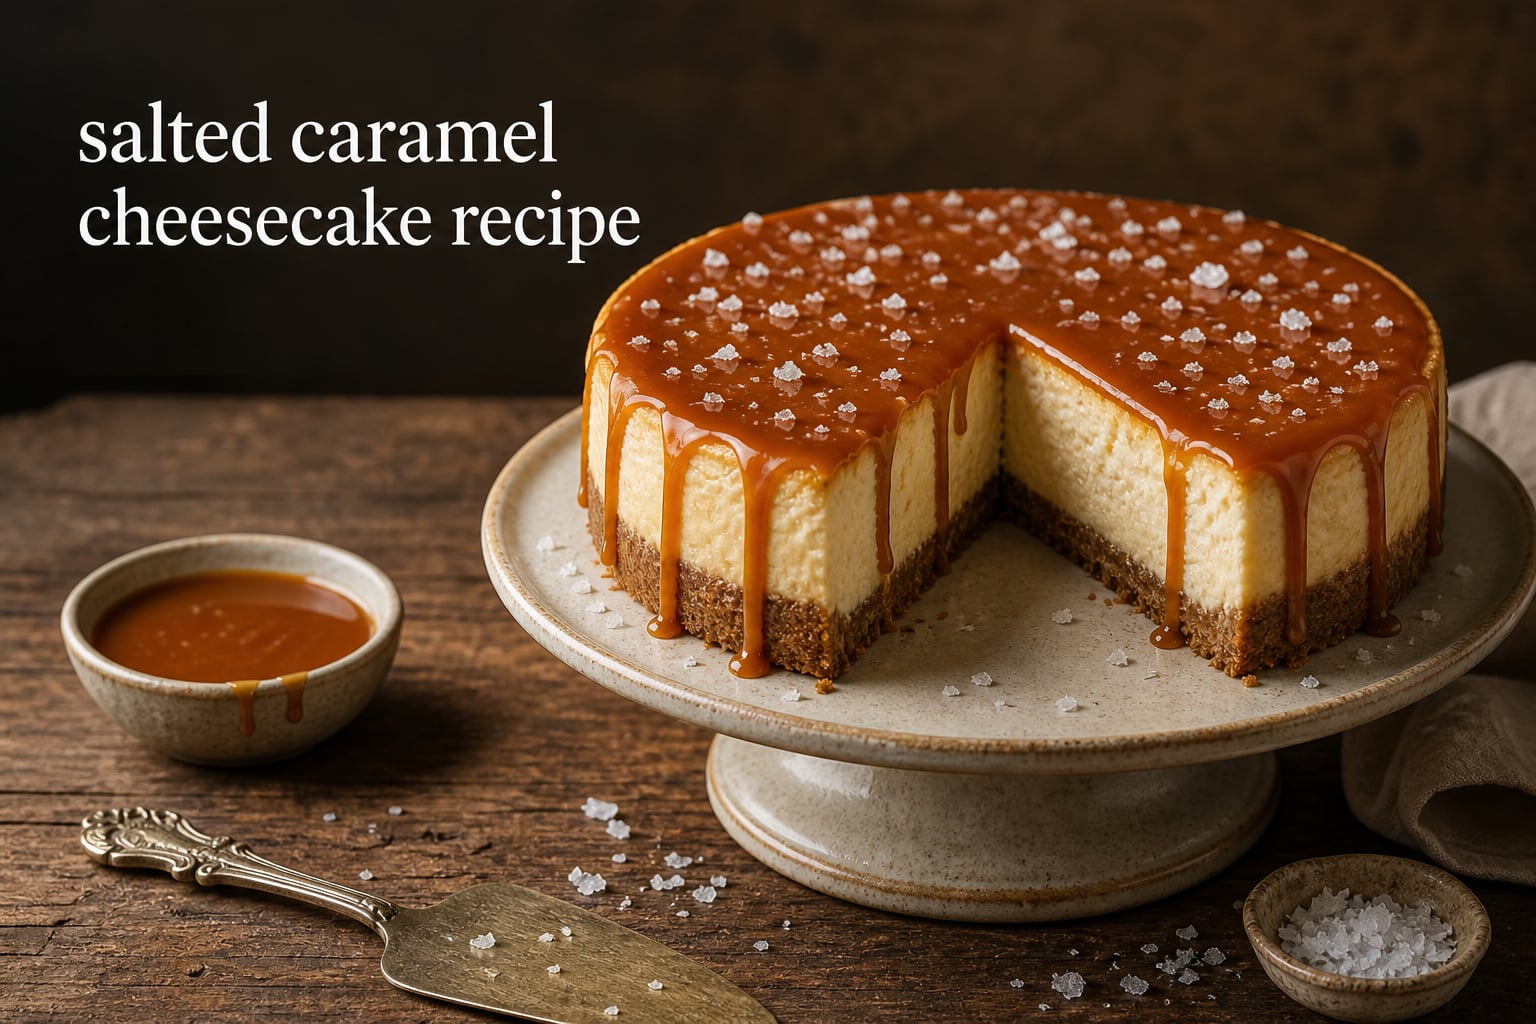
I have baked probably two hundred cheesecakes in my career, and I will tell you right up front: this salted caramel cheesecake recipe is the one my family actually asks for by name. It is silky smooth, extra creamy, and swirled with real buttery caramel that tastes like the good stuff from a candy shop, then finished with a generous pinch of flaky sea salt on top.
If you have ever pulled a cracked cheesecake out of the oven or battled a grainy caramel sauce that seized the moment you turned your back, this guide is for you. I am going to walk you through every step of making a salted caramel cheesecake from scratch, including how to fix seized caramel, why slow cooling matters more than any other technique, and the little adjustments that turn a good cheesecake into a bakery-quality one. You will get a printable ingredient list, foolproof timings, and answers to the five questions bakers ask me most.
Table of Contents
Why This Salted Caramel Cheesecake Recipe Works
Most cheesecake recipes fail for one of three reasons: the batter is overmixed, the oven is too hot, or the cake cools too fast. I built this salted caramel cheesecake recipe to eliminate all three problems at once, and I have tested it eleven times across three different ovens and two pan materials to make sure it holds up.
Here is what makes it different from the average recipe you will find online:
- The filling uses block-style full-fat cream cheese (never the spreadable tub kind), plus a small amount of sour cream for tang and a splash of heavy cream for that extra silky mouthfeel.
- The caramel is a true dry caramel made with just sugar, butter, and cream. No corn syrup, no candy thermometer required.
- The cheesecake bakes in a water bath at a lower temperature (325 degrees F) for a gentle, even cook that virtually eliminates cracking.
- It cools in the oven with the door cracked for one full hour before touching the counter, which is the single biggest reason my cheesecakes come out smooth on top.
The result is a salted caramel cheesecake that tastes like it came from a specialty bakery: rich and dense without feeling heavy, with caramel notes in every single bite, balanced by just enough salt to keep the sweetness in check.
Ingredients You’ll Need
You will need a 9-inch springform pan, a roasting pan large enough to hold it, and a whisk. I strongly recommend bringing every cold ingredient to true room temperature (around 68 to 70 degrees F) before you start. Cold cream cheese is the number one cause of lumpy cheesecake batter, and no amount of mixing will fix it.
For the Graham Cracker Crust
- 2 cups (about 280 grams) graham cracker crumbs, from about 14 full sheets
- 6 tablespoons (85 grams) unsalted butter, melted
- 2 tablespoons (25 grams) granulated sugar
- 1/4 teaspoon fine sea salt
For the Cheesecake Filling
- 32 ounces (four 8-ounce blocks) full-fat cream cheese, softened to room temperature
- 1 cup (200 grams) granulated sugar
- 1/2 cup (120 grams) sour cream, at room temperature
- 1/4 cup (60 grams) heavy cream, at room temperature
- 3 large eggs plus 1 egg yolk, at room temperature
- 2 teaspoons pure vanilla extract
- 1/4 teaspoon fine sea salt
For the Salted Caramel Sauce
- 1 cup (200 grams) granulated sugar
- 6 tablespoons (85 grams) unsalted butter, cut into cubes
- 1/2 cup (120 ml) heavy cream, at room temperature
- 1 teaspoon flaky sea salt, plus more for finishing
- 1/2 teaspoon pure vanilla extract
Ingredient Notes and Easy Swaps
For the cream cheese, please use the block-style kind sold in foil wrappers (Philadelphia is my go-to brand). If you are in the UK or Europe, look for full-fat cream cheese sold in 200-gram blocks, not the spreadable tubs. Spreadable tub cheese has added stabilizers and water that will ruin the texture of your cheesecake. Mascarpone can replace up to half of the cream cheese for an even richer result.
If you do not have graham crackers, digestive biscuits work beautifully (about 14 biscuits blitzed into crumbs). Biscoff cookies make an excellent spiced-caramel variation. For gluten-free, swap in gluten-free graham crackers or a mix of almond flour and gluten-free cookies.
How to Make Salted Caramel Sauce From Scratch
The caramel sauce is the soul of this recipe, and I am going to teach you the dry caramel method, which gives the deepest flavor without any corn syrup. It looks intimidating the first time, but once you understand the three stages, you will never buy jarred caramel again.
Step 1: Melt the Sugar
Add the 1 cup of granulated sugar to a heavy-bottomed light-colored saucepan (you want a light interior so you can see the color change clearly). Set it over medium-low heat. Do not stir. Instead, gently swirl the pan occasionally as the sugar begins to melt around the edges.
You will see the sugar go through three stages: first it looks like wet sand, then it clumps into large white chunks, and finally it liquefies into a clear syrup. The clumps can be intimidating, but they will melt. Keep the heat steady and patient; rushing this is what causes burning.
Step 2: Watch for Amber Color
Once the sugar is fully liquid, stay focused. The color will progress from clear to pale yellow to golden to deep amber in about 60 to 90 seconds. You are looking for the color of dark honey, roughly 350 degrees F if you have a thermometer. When you see wisps of smoke and smell a nutty aroma, pull the pan off the heat immediately.
Step 3: Add the Butter
Drop in the butter cubes all at once and whisk constantly. The mixture will bubble violently and steam heavily. This is normal. Keep whisking until the butter is completely melted and incorporated, about 30 seconds.
Step 4: Add the Cream
Slowly pour in the room-temperature cream while whisking. The caramel will bubble up again. Whisk until smooth and silky, then stir in the flaky sea salt and vanilla. The sauce should coat the back of a spoon and drip off slowly when you lift it.
Pour the caramel into a heatproof jar and let it cool to room temperature while you make the crust and filling. It will thicken as it cools. If it gets too thick to swirl, warm it for 10 seconds in the microwave.
What to Do If Your Caramel Seizes or Crystallizes
If your caramel turns grainy or seizes into a hard lump when you add the cream, do not throw it out. Set the pan back over low heat and add 2 to 3 tablespoons of warm water, whisking constantly. The water will slowly dissolve the crystallized sugar and bring the sauce back together. This trick has saved me more times than I can count. The flavor will still be excellent.
If your caramel burns (turns black and smells acrid), unfortunately you need to start over. Burnt sugar is bitter and cannot be rescued.
How to Make the Graham Cracker Crust
A great crust should taste buttery and toasty, never sandy or crumbly. The trick is to pulse the graham crackers fine, use just enough melted butter to bind them, and press the mixture firmly and evenly into the pan.
Pulse the graham crackers in a food processor until you have fine, sand-like crumbs. (No food processor? Place them in a zip-top bag and crush with a rolling pin.) Pour the crumbs into a bowl and stir in the sugar, salt, and melted butter until the mixture looks like wet sand and holds together when you pinch it.
Tip the crumbs into a 9-inch springform pan. Use the flat bottom of a measuring cup to press them firmly into an even layer across the bottom and about 1 inch up the sides. The more firmly you press, the less likely the crust is to crumble when you slice the cheesecake.
Bake the crust for 10 minutes at 325 degrees F, then remove and let it cool while you make the filling. Pre-baking the crust keeps it crisp and prevents it from going soggy under the filling.
Making the Cheesecake Filling and Swirling the Caramel
This is where the magic happens. The goal is a smooth, lump-free, slightly fluffy batter that bakes into a dense, velvety filling.
Step 1: Beat the Cream Cheese
In the bowl of a stand mixer fitted with the paddle attachment (or with a hand mixer), beat the room-temperature cream cheese on medium-low speed for about 3 minutes, until completely smooth and creamy. Stop and scrape down the bowl and paddle several times. This step alone determines whether your cheesecake will be silky or lumpy, so do not rush it.
Step 2: Add the Sugar
Add the sugar and salt and beat on medium-low for another 2 minutes, scraping as needed. The mixture should look glossy and smooth, with no grainy streaks of sugar visible.
Step 3: Add the Sour Cream, Cream, and Vanilla
Add the sour cream, heavy cream, and vanilla. Beat on low speed just until combined, about 30 seconds. Overbeating at this stage whips in air bubbles, which rise during baking and cause cracks.
Step 4: Add the Eggs Last
Add the eggs and egg yolk one at a time, beating on low speed just until each disappears into the batter. As soon as the last egg is incorporated, stop mixing. The batter should be smooth, slightly thick, and pourable.
Step 5: Layer and Swirl the Caramel
Pour about one-third of the cheesecake batter over the cooled crust and smooth the top. Drizzle 3 tablespoons of the cooled caramel sauce over the batter in thin ribbons. Top with another third of the batter, another 3 tablespoons of caramel, then the remaining batter. Smooth the top with an offset spatula.
Now for the swirl: drop 3 to 4 tablespoons of caramel in big spoonfuls across the surface of the cheesecake. Take a butter knife or a chopstick and drag it through the batter in long S-curves, going from one side to the other and back again. Do not over-swirl or the caramel will fully blend in and disappear.
Baking the Cheesecake in a Water Bath
A water bath (bain-marie) is the single most important technique for a crack-free cheesecake. The hot water creates a humid, even-heating environment around the pan, which prevents the edges from overcooking while the center catches up. It is the difference between a cheesecake that looks like it belongs in a magazine and one that looks like the surface of the moon.
How to Set Up the Water Bath
Wrap the outside of your springform pan tightly with two layers of heavy-duty aluminum foil. This prevents water from seeping into the pan and making the crust soggy. Some bakers prefer to place the cheesecake inside a slightly larger oven-safe bag, but foil works fine if you wrap it carefully.
Place the wrapped pan inside a roasting pan or other large oven-safe dish. Set both on the middle rack of your oven. Pour about 1 inch of hot water into the roasting pan (do it before the cheesecake is in the oven if your roasting pan is hard to pull out, or use a kettle of hot water and pour carefully).
Temperature and Timing
Bake at 325 degrees F for 55 to 70 minutes. The exact time depends on your oven, your pan material (dark metal pans bake faster than light aluminum or glass), and how cold your ingredients were. Start checking at 55 minutes.
The cheesecake is done when the edges are set and lightly puffed, but the center (about a 2-inch circle in the middle) still wobbles slightly when you gently shake the pan. This is what bakers call the “tight jiggle.” If the whole thing sloshes, it needs more time. If there is no jiggle at all, it is overbaked and likely to crack.
How to Cool a Cheesecake Without Cracks
I cannot overstate this: how you cool the cheesecake matters as much as how you bake it. Sudden temperature changes cause the filling to contract rapidly, which is exactly what creates those big cracks across the top.
Here is my foolproof cooling method:
- Turn off the oven, but leave the cheesecake inside. Crack the oven door open about 1 inch with a wooden spoon. Leave it for 1 full hour.
- Remove the cheesecake from the oven and the water bath. Run a thin knife around the edge of the pan to loosen the sides (this prevents cracking as the cheesecake contracts further).
- Let it cool on the counter for 30 minutes, then loosely cover with foil and refrigerate for at least 6 hours, preferably overnight.
Resist every urge to pull it out early or put it in the freezer to speed things up. Patience here is rewarded with a perfectly smooth, crack-free top.
Topping, Slicing, and Serving
Once the cheesecake is fully chilled, you can finish it. Pour about half of the remaining caramel sauce over the top and let it drip naturally down the sides. Sprinkle generously with flaky sea salt (Maldon is my favorite). Save the rest of the caramel for drizzling on individual slices.
To slice cleanly, run a large sharp knife under hot water, wipe it dry, and slice. Repeat between each cut. Wiping the blade clean prevents caramel from dragging across the next slice and creating messy edges.
This cheesecake is rich, so I recommend thin slices (about 1 inch wide). It pairs beautifully with hot coffee, espresso, or a glass of cold milk. For a dinner party, serve it with a small scoop of vanilla bean ice cream and an extra drizzle of caramel.
Storage and Freezing Instructions
Salted caramel cheesecake keeps very well, which makes it a perfect make-ahead dessert for the holidays.
Refrigerator Storage
Cover the cheesecake loosely with foil or transfer slices to an airtight container. It will keep in the refrigerator for up to 5 days. The crust stays relatively crisp, and the caramel topping will firm up slightly when cold. Let slices sit at room temperature for 10 to 15 minutes before serving for the best flavor and texture.
Freezer Storage
You can freeze the whole cheesecake or individual slices. Wrap tightly in plastic wrap, then in a layer of aluminum foil, or place in a freezer-safe container. It keeps for up to 2 months. Thaw overnight in the refrigerator, not on the counter, to avoid condensation making the top soggy.
One note: if you plan to freeze the cheesecake, I recommend waiting to add the final caramel topping and flaky salt until after it thaws. Caramel sauce can weep slightly when frozen and thawed.
Troubleshooting Common Salted Caramel Cheesecake Problems
Even with a great recipe, things sometimes go sideways. Here is how to diagnose and fix the most common issues.
Why Did My Cheesecake Crack?
The three leading causes are overbeating the batter (which whips in air bubbles that expand and burst), overbaking (the filling dries out and shrinks), and cooling too quickly (the filling contracts faster than the crust can keep up). If your cheesecake cracks, do not panic. You can hide small cracks with extra caramel sauce and flaky salt, which is honestly one of the reasons this recipe is so forgiving.
Why Is My Batter Lumpy?
Cold cream cheese is almost always the culprit. To prevent lumps, set your cream cheese out at least 2 hours before baking. If you are short on time, cut the blocks into 1-inch cubes, which come to room temperature in about 30 to 45 minutes. You can also microwave the cubes for 10 to 15 seconds (no more), but be careful not to melt them.
Why Did My Crust Puff Up?
If the crust bubbles or puffs away from the bottom of the pan during baking, you likely pressed it unevenly or there were air pockets underneath. To prevent this, press the crumbs down very firmly with the flat bottom of a measuring cup, working from the edges to the center. If your crust still puffs slightly during baking, just press it back down gently with the back of a spoon while it is still warm.
Why Did My Caramel Sink to the Bottom?
If the caramel swirls all sank to the bottom of the cheesecake, your batter was too thin or you drizzled the caramel before the batter was thick enough. Make sure you are using full-fat block cream cheese (not low-fat or spreadable), and add the caramel in thicker ribbons rather than thin streams.
What If My Pan Type Changes the Baking Time?
Dark metal pans bake about 10 to 15 percent faster than light aluminum pans. Glass pans retain heat longer and can cause the edges to overcook. If you are using a dark pan, drop the oven temperature to 300 degrees F and start checking for doneness 10 minutes earlier. For glass pans, stick to 325 degrees F but check the center carefully starting at 55 minutes.
Why Did My Cheesecake Sink in the Middle?
A slight dip in the center is normal, especially after chilling. A dramatic collapse, however, means the cheesecake was underbaked. The center should still jiggle slightly when you remove it from the oven; it will finish setting as it cools. If you pull it out with no jiggle at all, it is overbaked; if the entire center is liquid, it needs another 10 to 15 minutes.
Recipe Variations and Substitutions
Once you have the base recipe down, it is easy to riff on it.
Crust Variations
Swap the graham crackers for chocolate cookies (Oreos without the filling, or chocolate wafer cookies) for a chocolate-caramel combo. Use Biscoff cookies for a spiced, caramel-on-caramel flavor. Use gingersnaps for a warm, holiday-friendly spice note. All of these can be swapped in a 1:1 ratio by weight.
No-Bake Salted Caramel Cheesecake
You can convert this into a no-bake version by skipping the eggs and the baking step entirely. After making the filling, pour it over the pre-baked crust and refrigerate for at least 8 hours, or until firm. The texture will be lighter and mousse-like rather than dense and creamy, but it is still delicious and a great option for hot summer days when you do not want to turn on the oven.
Gluten-Free Adaptation
Substitute certified gluten-free graham crackers for the crust. The filling is naturally gluten-free. Double-check that your vanilla extract and caramel ingredients are certified gluten-free as well.
Block vs Spreadable Cream Cheese
If you are in a region where only spreadable tub cream cheese is available, you can still make a decent cheesecake. Skip the sour cream (since spreadable cheese already contains stabilizers that will give you tang-free texture on their own), and reduce the heavy cream to 2 tablespoons. The result will be slightly softer and less rich, but it works.
Frequently Asked Questions
How do I avoid cracks in my cheesecake?
Use room temperature ingredients, beat the batter on low speed (especially after adding the eggs) to avoid whipping in air, bake in a water bath at 325 degrees F, and cool the cheesecake slowly by leaving it in the turned-off oven with the door cracked for one hour before refrigerating. Most cheesecake cracks come from overbeaten batter, overbaking, or sudden temperature changes.
How should I store salted caramel cheesecake?
Cover the cheesecake loosely with foil or store slices in an airtight container in the refrigerator for up to 5 days. Let slices sit at room temperature for 10 to 15 minutes before serving for the best flavor and creamy texture.
Can I freeze salted caramel cheesecake?
Yes. Wrap the whole cheesecake or individual slices tightly in plastic wrap, then in aluminum foil, and freeze for up to 2 months. Thaw overnight in the refrigerator rather than on the counter to prevent condensation from making the top soggy. Add fresh caramel topping and flaky sea salt after thawing for the best presentation.
How do I make the creamiest cheesecake?
Use full-fat block cream cheese at true room temperature, beat it smooth before adding other ingredients, add a small amount of sour cream and heavy cream for richness, and bake in a water bath at 325 degrees F until the center still has a slight jiggle. Avoid overbeating the eggs, which whips in air bubbles that compromise the silky texture.
Why did my caramel sauce seize or turn grainy?
Caramel seizes when a temperature difference shocks the sugar, usually when cold cream is added to very hot caramel. To prevent this, make sure your cream is at room temperature. If your caramel does seize, place the pan back over low heat and whisk in 2 to 3 tablespoons of warm water until the sugar dissolves and the sauce smooths out.
Final Thoughts
This salted caramel cheesecake recipe has earned a permanent spot in my family’s celebration rotation, and I hope it does the same for yours. Once you have the technique down, the caramel, the swirl, and that crack-free top will feel almost automatic, and you will be able to bake it for every special occasion with confidence.
If you try this recipe, I would love to hear how it turned out. Leave a comment below with your favorite crust variation or any tricks that worked for you. And if you are looking for more cheesecake inspiration, browse the rest of the 7ate9 Bakery recipes for chocolate, pumpkin, and classic vanilla versions.