
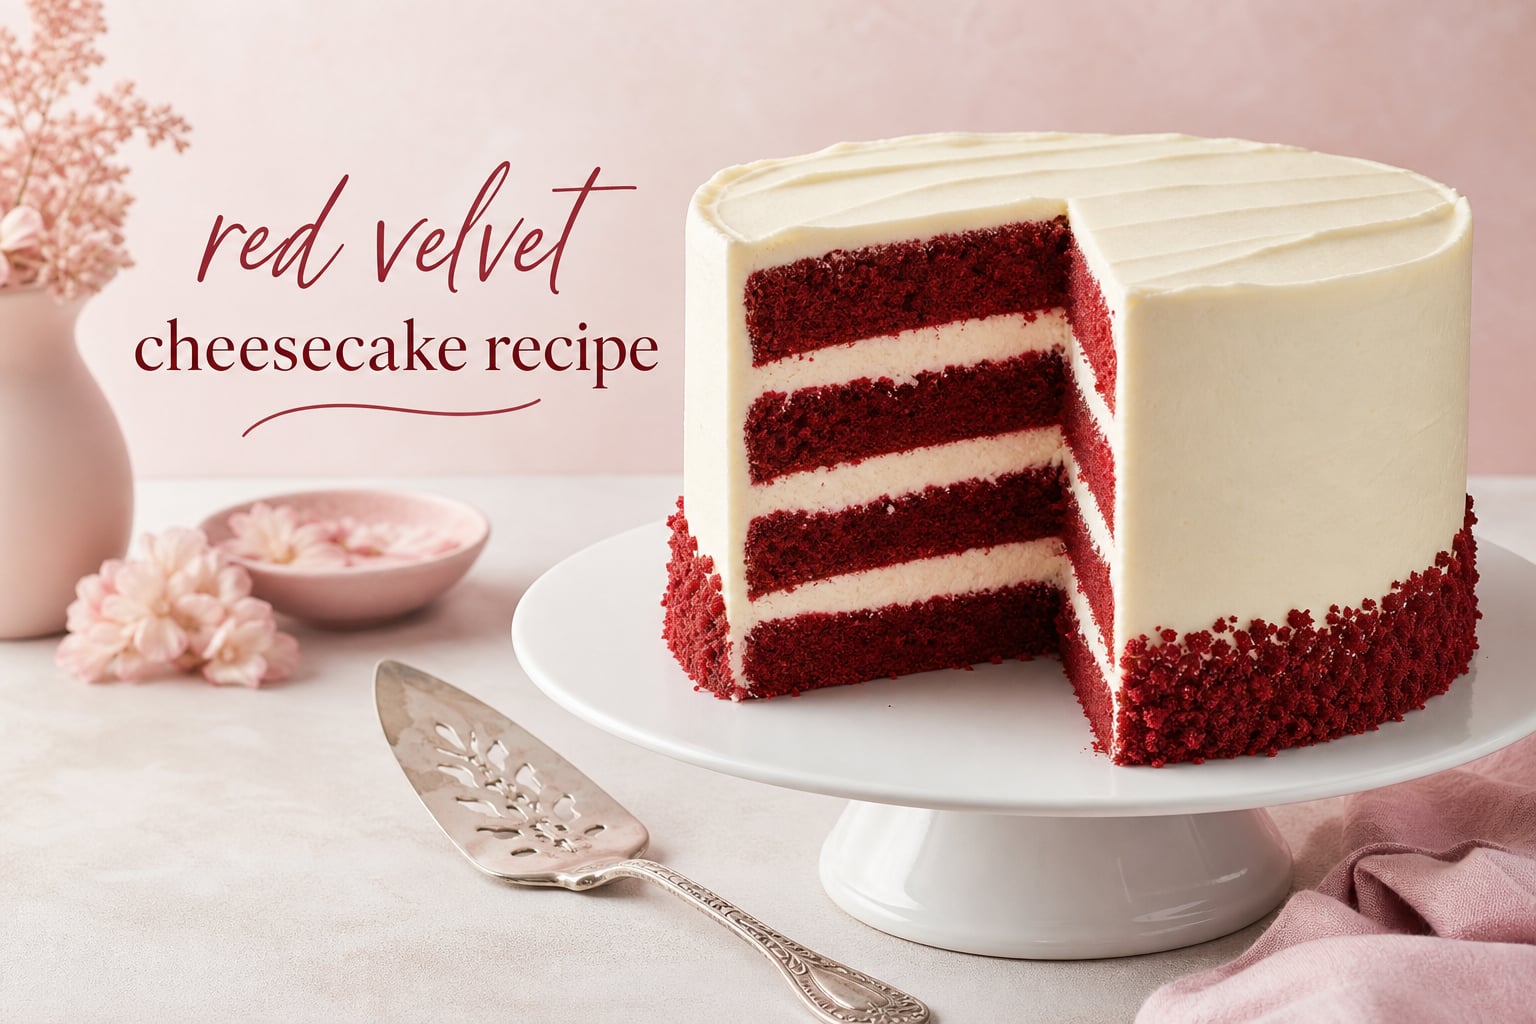
If you have ever sliced into a tall, four-layer red velvet cheesecake recipe and wondered whether you could pull it off at home, the short answer is yes. This guide walks through every step, from a creamy baked cheesecake layer to moist red velvet cake layers and a tangy cream cheese frosting that ties it all together.
I have tested this red velvet cheesecake recipe across three holiday seasons, scaling it for dinner parties of twelve and intimate birthdays of four. The version below is the one my family now requests for every Valentine’s Day dessert table, and it is the one I trust to turn out clean slices every time.
Below you will find a complete ingredients list, step-by-step instructions with timing, a dedicated troubleshooting section for the issues home bakers complain about most, plus substitutions and storage guidance. By the end you will have a make-ahead layered dessert worthy of any special occasion.
Table of Contents
What Is Red Velvet Cheesecake?
Red velvet cheesecake is a layered dessert that combines two distinct bakes into one cake. It pairs moist red velvet cake layers with a creamy baked cheesecake layer, then wraps the whole thing in tangy cream cheese frosting. The result is a slice that is part cake, part cheesecake, and entirely show-stopping.
The red velvet component is not just chocolate cake with food coloring added. True red velvet gets its flavor from a small amount of cocoa powder, the tang of buttermilk, and a tender crumb created by the reaction of vinegar and baking soda. When you layer that with a rich cheesecake filling, the contrast between soft cake and dense cream cheese is what makes this recipe memorable.
This style of layered dessert is often compared to the Cheesecake Factory red velvet cheesecake, and many home bakers treat this recipe as a copycat project. The homemade version gives you more control over sweetness, color intensity, and the thickness of each layer.
Ingredients You Will Need
I have broken the ingredients into three groups so you can prep each component separately. Use room temperature ingredients for the cheesecake and cake layers, because cold cream cheese and eggs are the number one cause of lumpy batter.
For the Cheesecake Layer
Use full-fat, brick-style cream cheese only. Spreadable tub cream cheese contains added air and moisture that will cause the cheesecake layer to weep and crack.
32 ounces (907 g) full-fat cream cheese, brick style, at room temperature
1 1/2 cups (300 g) granulated sugar
1 cup (227 g) sour cream, full fat
3 large eggs, room temperature
1 tablespoon vanilla extract
2 tablespoons all-purpose flour (helps prevent cracking)
1 tablespoon lemon juice (brightens the tang)
For the Red Velvet Cake Layers
The cocoa powder is what gives red velvet its signature mild chocolate flavor. Use natural unsweetened cocoa, not Dutch-processed, because the acidity reacts with the buttermilk and vinegar to create the tender crumb.
2 1/2 cups (313 g) all-purpose flour
1 1/2 cups (300 g) granulated sugar
2 tablespoons unsweetened natural cocoa powder
1 teaspoon baking soda
1 teaspoon salt
1 cup (240 ml) buttermilk, room temperature
1/2 cup (120 ml) vegetable oil
2 large eggs, room temperature
1 teaspoon white vinegar
1 teaspoon vanilla extract
2 to 3 tablespoons liquid red food coloring (see substitutions to reduce quantity)
1/2 cup (113 g) unsalted butter, melted and cooled
For the Cream Cheese Frosting
This frosting is what holds the layered dessert together and gives the outside its smooth finish. Keep it slightly thicker than a standard frosting so the layers do not slide.
16 ounces (454 g) full-fat cream cheese, brick style, room temperature
1/2 cup (113 g) unsalted butter, room temperature
4 cups (480 g) powdered sugar, sifted
1 tablespoon vanilla extract
A pinch of salt
Equipment Needed
Having the right equipment ready before you start makes the assembly far less stressful. Here is what I use every time I make this recipe.
One 9-inch springform pan for the cheesecake layer
Two 9-inch round cake pans for the red velvet layers
A large roasting pan for the water bath
Hand mixer or stand mixer with paddle attachment
Parchment paper and aluminum foil
Offset spatula for frosting
A serrated knife for leveling cake layers
How to Make Red Velvet Cheesecake (Step-by-Step)
This is the full red velvet cheesecake recipe broken into clear stages. Read through the entire process once before you start so you understand the timing, because the cheesecake needs to chill overnight before assembly.
Step 1: Make the Cheesecake Layer (With Water Bath)
Preheat your oven to 325 F (163 C). Wrap the outside of your springform pan with two layers of heavy-duty aluminum foil, pressing it tight against the pan so no water can seep in during the water bath.
In a large bowl, beat the room-temperature cream cheese on medium speed until completely smooth, about two minutes. Scrape the bowl twice. Add the sugar and beat until combined, then mix in the sour cream, vanilla, and lemon juice.
Add the eggs one at a time, mixing on low speed just until each egg disappears. Overmixing at this stage whips air into the batter, which causes the cheesecake to puff and then crack. Fold in the flour last.
Pour the batter into the prepared pan and set it inside the roasting pan. Pour boiling water into the roasting pan until it reaches halfway up the sides of the springform. Bake for 55 to 70 minutes, until the edges are set but the center still has a slight jiggle when you tap the pan.
Turn the oven off, crack the door open, and let the cheesecake sit inside for one hour. This slow cooling prevents the thermal shock that causes cracking. Remove it, cool to room temperature on the counter, then refrigerate overnight.
Step 2: Bake the Red Velvet Cake Layers
Preheat the oven to 350 F (177 C). Grease two 9-inch cake pans and line the bottoms with parchment paper rounds.
In a medium bowl, whisk together the flour, sugar, cocoa powder, baking soda, and salt. In a separate bowl, combine the buttermilk, oil, eggs, vinegar, vanilla, melted butter, and red food coloring. Whisk the wet mixture until the color is uniform.
Pour the wet ingredients into the dry and fold gently with a spatula just until no dry flour remains. Divide the batter evenly between the two pans and smooth the tops.
Bake for 25 to 30 minutes, until a toothpick inserted in the center comes out with a few moist crumbs but no wet batter. Cool the layers in the pans for ten minutes, then turn them out onto a wire rack to cool completely.
Once cooled, use a serrated knife to level the tops of both cake layers so they stack evenly with the cheesecake. A flat surface is what prevents the layered dessert from leaning.
Step 3: Make the Cream Cheese Frosting
Beat the cream cheese and butter together on medium speed until smooth and creamy, about two minutes. Gradually add the sifted powdered sugar, one cup at a time, mixing on low speed until incorporated.
Add the vanilla and salt, then increase the speed to medium-high and beat for one minute until light and fluffy. If the frosting feels too soft to spread, refrigerate it for fifteen minutes before using.
Step 4: Assemble the Layered Dessert
Place one red velvet cake layer on your serving plate. Spread a thin, even layer of frosting across the top. Remove the chilled cheesecake from the springform pan, peel off the foil, and place the cheesecake layer directly on top of the frosted cake layer.
Spread another thin layer of frosting over the cheesecake. Place the second red velvet cake layer on top, flat side up. Apply a thin crumb coat of frosting over the entire cake and refrigerate for thirty minutes to set it.
Once the crumb coat is firm, apply the final, thicker layer of cream cheese frosting. Smooth it with an offset spatula, working from the top down the sides.
Step 5: Decorate and Chill
Decorate the cake with red velvet cake crumbs pressed around the bottom edge, a drizzle of white chocolate, or fresh raspberries. Chill the finished cake for at least four hours before slicing so the layers set together and the frosting firms up.
Use a long, sharp knife dipped in hot water and wiped dry between each cut for clean, bakery-style slices.
Pro Tips for the Best Red Velvet Cheesecake
These are the lessons I learned after multiple test batches. They are the difference between a good layered dessert and one that looks like it came from a bakery.
Always use room temperature ingredients for the cheesecake batter. Cold cream cheese leaves lumps that no amount of mixing can remove, and overmixing to chase those lumps introduces the air that causes cracks.
Do not skip the water bath. The steam keeps the oven environment humid, which prevents the surface from drying out and splitting. I have tested both methods, and the water bath version cracks about 90 percent less often.
Cool the cheesecake slowly. Turning the oven off and leaving the cheesecake inside for an hour is the single most effective way to avoid the dramatic top crack that ruins the look of a layered dessert.
Chill the assembled cake overnight if you have time. The flavors meld, the cheesecake firms to a sliceable consistency, and the cake layers absorb just enough moisture to become extra tender.
Troubleshooting Common Problems
Below are the most common problems home bakers report with a red velvet cheesecake recipe, drawn from baking forums and recipe comments. Each one has a clear fix.
Why did my cheesecake crack? The usual cause is overmixing the eggs or skipping the water bath. Cool the cheesecake slowly in the turned-off oven, and never open the oven door during baking. If a crack still appears, the cream cheese frosting will hide it completely during assembly.
Why is my red velvet cake dense or wet? Overmixing the cake batter develops gluten, which makes the crumb tough. Fold the wet and dry ingredients together only until combined. Wet layers usually mean the cake was underbaked; the toothpick should come out with moist crumbs, not wet batter.
Why did my cheesecake weep through the frosting? This happens when the cheesecake layer was not fully chilled before assembly, or when spreadable tub cream cheese was used instead of brick style. Always chill the cheesecake overnight and use only full-fat brick cream cheese.
Why is my cake pink instead of red? Either the food coloring was under-measured or the cocoa powder overwhelmed it. Natural cocoa produces a deeper red reaction than Dutch-processed, so stick with natural unsweetened cocoa and add coloring gradually until you reach the shade you want.
Why are my layers sliding? The cake or cheesecake layers were not leveled. Use a serrated knife to trim any domes, and apply a firm crumb coat before the final frosting so everything sticks together.
Ingredient Substitutions
Below are the substitutions I get asked about most often. Each one has been tested and works, though texture and color may shift slightly.
Buttermilk substitute: Mix 1 cup of whole milk with 1 tablespoon of white vinegar or lemon juice. Let it sit for five minutes until it thickens, then use it as called for.
Gel food coloring instead of liquid: Gel coloring is far more concentrated, so you only need about 1 teaspoon to reach the same depth of red that 2 to 3 tablespoons of liquid would provide. This is my preferred option because it adds no extra moisture to the batter.
Reducing food coloring: If you want to cut back on dye, use 1 tablespoon of gel coloring and accept a softer red tone. You can also add 1 teaspoon of beetroot powder for natural color depth without altering the flavor.
Cream cheese clarification: Always use brick-style, full-fat cream cheese. Spreadable or whipped tub versions contain stabilizers and added moisture that will ruin the structure of both the cheesecake layer and the frosting.
Gelatine substitute for no-bake versions: If you adapt this to a no-bake cheesecake recipe that calls for gelatine, you can substitute agar agar powder at a 1-to-1 ratio by weight. Dissolve it in boiling water first, because agar sets at room temperature and will seize if added cold.
How to Store and Make Ahead
This layered dessert is one of the best make-ahead cakes you can bake, because every component actually improves with time.
To store the finished cake, keep it in an airtight cake container in the refrigerator for up to five days. Let slices sit at room temperature for twenty minutes before serving so the cheesecake softens to its ideal texture.
To make the components ahead, bake the cheesecake layer up to three days in advance and keep it wrapped in the springform pan in the fridge. The red velvet cake layers can be baked, wrapped tightly in plastic, and frozen for up to one month. Thaw them overnight in the refrigerator before assembly.
To freeze the fully assembled cake, slice it first, then wrap each slice tightly in plastic and freeze for up to two months. Thaw overnight in the refrigerator. Do not freeze the assembled whole cake, because the cream cheese frosting can separate when thawed in large quantity.
FAQs
How to make the best red velvet cheesecake?
The best red velvet cheesecake recipe uses three components: a baked cheesecake layer made in a water bath, moist red velvet cake layers leavened with buttermilk and vinegar, and a thick cream cheese frosting. Chill each component fully before assembly, level the cake layers, and let the finished cake rest overnight so the layers set together cleanly.
What is the secret to a perfect red velvet?
The secret to perfect red velvet is the combination of natural unsweetened cocoa powder, buttermilk, vinegar, and a small amount of baking soda. This acid-base reaction creates the tender crumb and slight tang that distinguishes red velvet from chocolate cake. Use gel food coloring for a deeper red with less added moisture.
Why did my cheesecake crack?
Cheesecake cracks when the batter is overmixed, when the oven temperature fluctuates, or when the cake cools too quickly. Prevent cracks by mixing eggs on low speed only until incorporated, baking in a water bath, and cooling the cheesecake for one hour in a turned-off oven with the door cracked before moving it to the counter.
Can I make cheesecake ahead of time?
Yes, cheesecake is an ideal make-ahead dessert. The cheesecake layer can be baked up to three days in advance and stored, covered, in the refrigerator. The fully assembled red velvet cheesecake cake can be built a day ahead and chilled overnight, which actually improves the flavor and makes slicing cleaner.
Can I make this red velvet cheesecake recipe no bake?
You can adapt this into a no-bake red velvet cheesecake recipe by replacing the baked cheesecake layer with a mixture of whipped cream, cream cheese, sugar, and dissolved gelatine set over an Oreo cookie crumb base. Skip the cake layers and chill the filling for at least six hours until firm. The flavor will be lighter and the texture softer than the baked version.
What type of cream cheese should I use for cheesecake?
Always use full-fat brick-style cream cheese, never spreadable tub cream cheese. Brick cream cheese has lower moisture and no added stabilizers, which gives the cheesecake layer a dense, creamy structure. Tub cream cheese introduces extra water that causes weeping, soft texture, and cracks.
Conclusion
This red velvet cheesecake recipe brings together the three elements that make a layered dessert unforgettable: a smooth, baked cheesecake layer, tender buttermilk-leavened red velvet cake, and a tangy cream cheese frosting that holds it all together.
Follow the water bath technique, level your layers, and give the finished cake an overnight chill. Those three habits are what separate a cake that slices cleanly from one that cracks, weeps, or slides. With the troubleshooting and substitution sections above, you also have answers to the problems that trip up most first-time bakers.
The next time a birthday, holiday, or dinner party calls for something special, this is the showstopper I reach for. Bake it once, and it will become the recipe your guests ask for by name.