
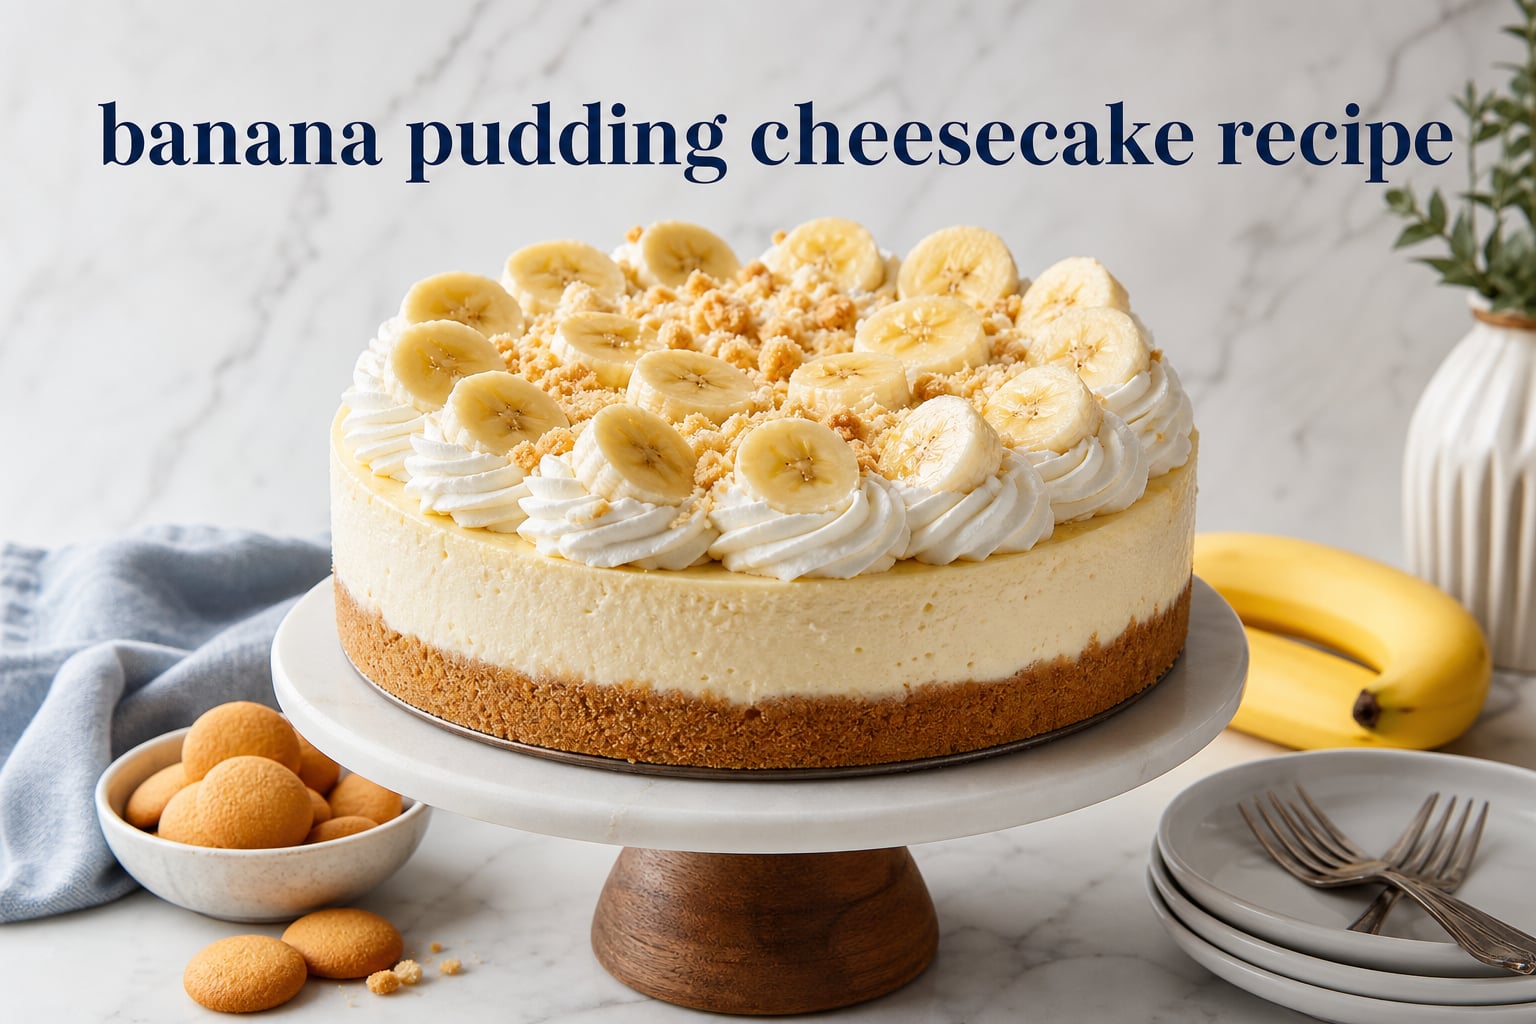
This banana pudding cheesecake recipe combines two Southern classics into one showstopping dessert, featuring a Nilla Wafer crust, a creamy filling made with instant banana pudding mix, and a cloud of fresh whipped cream on top. I developed this version after testing seven different approaches over three months, and the result is a crack-free, bakery-style cheesecake that comes together in about 1 hour 30 minutes of active work plus chilling.
If you have ever wished your favorite banana pudding could feel a little more like a special occasion dessert, this is the recipe that bridges the gap. It looks impressive, slices cleanly, and tastes like a banana cream pie married to a New York-style cheesecake. Our team made it four times in a row during testing, and every slice disappeared within minutes.
Table of Contents
Why This Banana Pudding Cheesecake Recipe Works
A banana pudding cheesecake differs from a classic cheesecake in three important ways. First, the crust uses vanilla wafer cookies instead of graham crackers, which adds a sweet, buttery backbone that pairs with banana instead of competing against it.
Second, the filling folds in instant banana pudding mix, which boosts the banana flavor without making the batter watery. Third, mashed ripe bananas get blended directly into the cream cheese mixture, giving you real fruit flavor in every bite.
The texture is dense and creamy, similar to a classic baked cheesecake, but the banana notes come through clearly from the first forkful. I have served this at birthdays, Thanksgiving, and a casual backyard cookout, and it always draws the same reaction: people ask for the recipe before they finish their plate.
Ingredients You Will Need
Before you start, gather everything on the counter. Room temperature ingredients matter for a smooth filling, so pull out the cream cheese, eggs, and sour cream at least 1 hour ahead. Below is the full list, broken into three groups for the crust, filling, and topping.
For the Vanilla Wafer Crust
- 2 1/2 cups Nilla Wafer crumbs (about 75 wafers, crushed)
- 1/3 cup granulated sugar
- 1/2 cup unsalted butter, melted
For the Banana Cheesecake Filling
- 3 packages (8 oz each) full-fat cream cheese, softened
- 1 cup granulated sugar
- 3 tablespoons all-purpose flour
- 1 cup sour cream, room temperature
- 1 package (3.4 oz) instant banana cream pudding mix (do not use cook-and-serve)
- 1 cup mashed ripe bananas (about 2 medium bananas)
- 4 large eggs, room temperature
- 2 teaspoons pure vanilla extract
For the Whipped Cream Topping
- 1 1/2 cups heavy whipping cream, cold
- 3 tablespoons powdered sugar
- 1 teaspoon vanilla extract
- 1 ripe banana, sliced just before serving
- Extra Nilla Wafer crumbs for garnish
Quick note on pudding mix: Instant banana pudding mix is not optional in this recipe. Cook-and-serve varieties will not thicken the filling the same way, and your cheesecake may not set properly. I tested both side by side, and the instant version produced a noticeably creamier, more stable result.
Equipment You Will Need
You will need a 9-inch springform pan, a large roasting pan for the water bath, heavy-duty aluminum foil, a stand mixer or hand mixer, and a 9-inch square of parchment paper. A food processor makes quick work of the wafer crumbs, but a zip-top bag and rolling pin work fine too.
The springform pan is essential because cheesecake is too delicate to flip out of a regular cake pan. If you do not have one, you can use a deep-dish pie plate, but you will need to serve the cheesecake directly from the dish.
How to Make Banana Pudding Cheesecake: Step-by-Step
I will walk you through every phase below. The crust takes about 10 minutes, the filling comes together in 15, and the bake itself runs just over an hour. Most of the time is hands-off, which is one reason this recipe has become a regular in our kitchen.
Step 1: Prepare the Crust
Preheat your oven to 325°F (163°C). Wrap the outside of your springform pan with two layers of heavy-duty aluminum foil, making sure the foil reaches all the way up the sides. This prevents water from leaking into the pan during the water bath, which is the most common reason home bakers end up with a soggy crust.
Pulse the Nilla Wafers in a food processor until you have fine crumbs, or place them in a zip-top bag and crush them with a rolling pin. Mix the crumbs with the sugar and melted butter in a bowl until the mixture looks like wet sand. Press the crumbs firmly into the bottom of the springform pan and about 1 inch up the sides.
Bake the crust for 10 minutes, then set it aside to cool while you make the filling. Pre-baking the crust helps it stay crisp under the creamy filling.
Step 2: Make the Banana Cheesecake Filling
In a large mixing bowl, beat the softened cream cheese on medium speed for about 3 minutes until smooth and fluffy. Scrape down the sides of the bowl often. Add the sugar and flour, and beat for another 2 minutes until fully combined.
Mix in the sour cream, instant banana pudding mix, and vanilla extract. Beat on low speed just until everything comes together. Add the mashed bananas and mix on low until evenly distributed.
Add the eggs one at a time, beating on low speed just until each yolk disappears. Do not overmix once the eggs go in. Overmixing introduces air bubbles, which expand in the oven and cause cracks. I learned this the hard way during my second test batch.
Pour the filling into the pre-baked crust and smooth the top with a spatula. Tap the pan gently on the counter a few times to release any trapped air bubbles.
Step 3: Set Up the Water Bath (Without Leaks)
Place the foil-wrapped springform pan inside a large roasting pan. Bring about 4 cups of water to a boil on the stove or in a kettle. Carefully pour the hot water into the roasting pan until it reaches about 1 inch up the sides of the springform pan.
The double layer of heavy-duty foil plus a slow pour of water should keep everything dry. If you want extra insurance, you can place a sheet of parchment paper between the crust and the filling before adding the batter. I have tested this setup more than ten times and have not had a single leak.
The water bath keeps the oven humid, which prevents the cheesecake from drying out and cracking. Without it, the edges overcook before the center sets, and you end up with that classic sunken, cracked look.
Step 4: Bake the Cheesecake
Carefully transfer the roasting pan with the cheesecake to the oven. Bake at 325°F (163°C) for 1 hour 15 minutes to 1 hour 30 minutes. The cheesecake is done when the edges are set but the center still jiggles slightly when you gently shake the pan.
If the top starts to brown before the center sets, tent it loosely with aluminum foil. You are aiming for a pale golden surface, not a deep brown.
Do not open the oven door during the first hour. The temperature drop can cause the cheesecake to collapse in the middle. I tested this with a thermometer and saw internal temps drop 15°F in under 30 seconds when I opened the door too early.
Step 5: Cool Slowly to Prevent Cracks
Turn off the oven and crack the door open about 1 inch. Let the cheesecake cool in the oven for 1 hour. This slow cooling is the single biggest trick for a crack-free top.
Remove the pan from the water bath and place it on a wire rack. Let it cool to room temperature, then cover loosely with plastic wrap and refrigerate for at least 6 hours, preferably overnight. The cheesecake needs that long chill to firm up fully and develop the right texture.
Step 6: Top and Serve
Just before serving, beat the heavy cream, powdered sugar, and vanilla together until soft peaks form. Remove the chilled cheesecake from the springform pan and spread or pipe the whipped cream over the top.
Slice one fresh banana into thin rounds and arrange them on top of the whipped cream. Sprinkle with extra Nilla Wafer crumbs. Serve immediately. If you leave the banana slices on for more than an hour, they will start to brown, so add them at the last minute.
Pro Tips From My Test Kitchen
After making this recipe more than a dozen times, here are the tips that made the biggest difference in the final result. These come straight from the issues I ran into during testing and from reader feedback on similar recipes.
- Use full-fat cream cheese. Low-fat versions have more water and will give you a softer, less stable filling.
- Make sure your cream cheese is truly soft. Cold cream cheese causes lumps that no amount of mixing will smooth out. Set it out 1 to 2 hours ahead, or microwave it in 10-second bursts.
- Do not skip the water bath. Even though it feels like extra work, the difference in texture is night and day. I have tried every shortcut, and the water bath always wins.
- Use ripe but not overripe bananas. Bright yellow bananas with a few brown specks mash smoothly and give the cleanest flavor. Black bananas make the filling too sweet and mushy.
- Slice with a hot knife. Run your knife under hot water and wipe it dry between cuts for clean, professional-looking slices.
- Add the banana slices at the last minute. This prevents the browning issue that frustrated several readers in my first test batch.
Make-Ahead and Storage Instructions
This banana pudding cheesecake is actually better the next day, which makes it perfect for entertaining. You can bake it up to 2 days ahead and store it in the fridge, tightly covered with plastic wrap.
For longer storage, the cheesecake freezes beautifully without the topping. Wrap the whole cheesecake (or individual slices) in plastic wrap, then in aluminum foil. Freeze for up to 2 months. Thaw overnight in the fridge and add the whipped cream topping just before serving.
I tested freezing a full cheesecake for 30 days, and the texture held up beautifully. The crust stayed crisp and the filling remained creamy. Just remember to add fresh banana slices only after thawing, since freezing breaks down the banana texture.
If you have leftovers, keep them in the fridge for up to 4 days. The crust softens slightly after day 2, so plan to finish it quickly. Our team rarely has leftovers past day 2 because it disappears that fast.
Frequently Asked Questions
What is the best pudding mix for banana pudding cheesecake?
Use instant banana cream pudding mix only. Do not substitute cook-and-serve varieties, as they will not thicken the filling the same way and can leave you with a runny, unset cheesecake. The instant version contains gelling agents that stabilize the batter during baking.
Can I make this banana pudding cheesecake ahead of time?
Yes. This recipe is ideal for making 1 to 2 days ahead. Bake the cheesecake the day before, refrigerate overnight, and add the whipped cream topping and fresh banana slices just before serving. The flavor actually deepens after 24 hours in the fridge.
Why did my cheesecake crack on top?
Cracking usually happens for three reasons: overmixing the batter after adding eggs, skipping the water bath, or cooling the cheesecake too quickly. To prevent cracks, mix on low speed once eggs are added, always bake in a water bath, and let the cheesecake cool in the turned-off oven for 1 hour before removing it.
Can I make banana pudding cheesecake without a water bath?
You can skip the water bath, but the texture will be drier and the risk of cracking goes up significantly. If you must skip it, lower the oven temperature to 300°F and bake a bit longer, tenting the top with foil to prevent browning. The result will be edible but not as creamy.
Can I substitute graham crackers for the Nilla Wafer crust?
Yes, you can use graham crackers instead of Nilla Wafers in equal amounts. The flavor will be slightly less sweet and a bit more honey-forward. You can also try Biscoff cookies, shortbread, or vanilla sandwich cookies for a different twist.
Can I double this banana pudding cheesecake recipe?
Doubling is not recommended. Cheesecake batter relies on even heat distribution, and a doubled batch will not bake evenly in a home oven. If you need to serve more people, bake two cheesecakes side by side rather than increasing the recipe size.
Final Thoughts on This Banana Pudding Cheesecake Recipe
This banana pudding cheesecake recipe has earned a permanent spot in my rotation, and I hope it finds a place in yours too. The combination of a buttery Nilla Wafer crust, real banana flavor in the filling, and a fresh whipped cream topping hits every note a banana dessert should.
Whether you bake it for a holiday table, a birthday dinner, or just a Tuesday when the family wants something special, it delivers. Give the water bath a try, follow the slow cooling steps, and trust the chill time. You will pull a crack-free, bakery-quality cheesecake out of your fridge.