
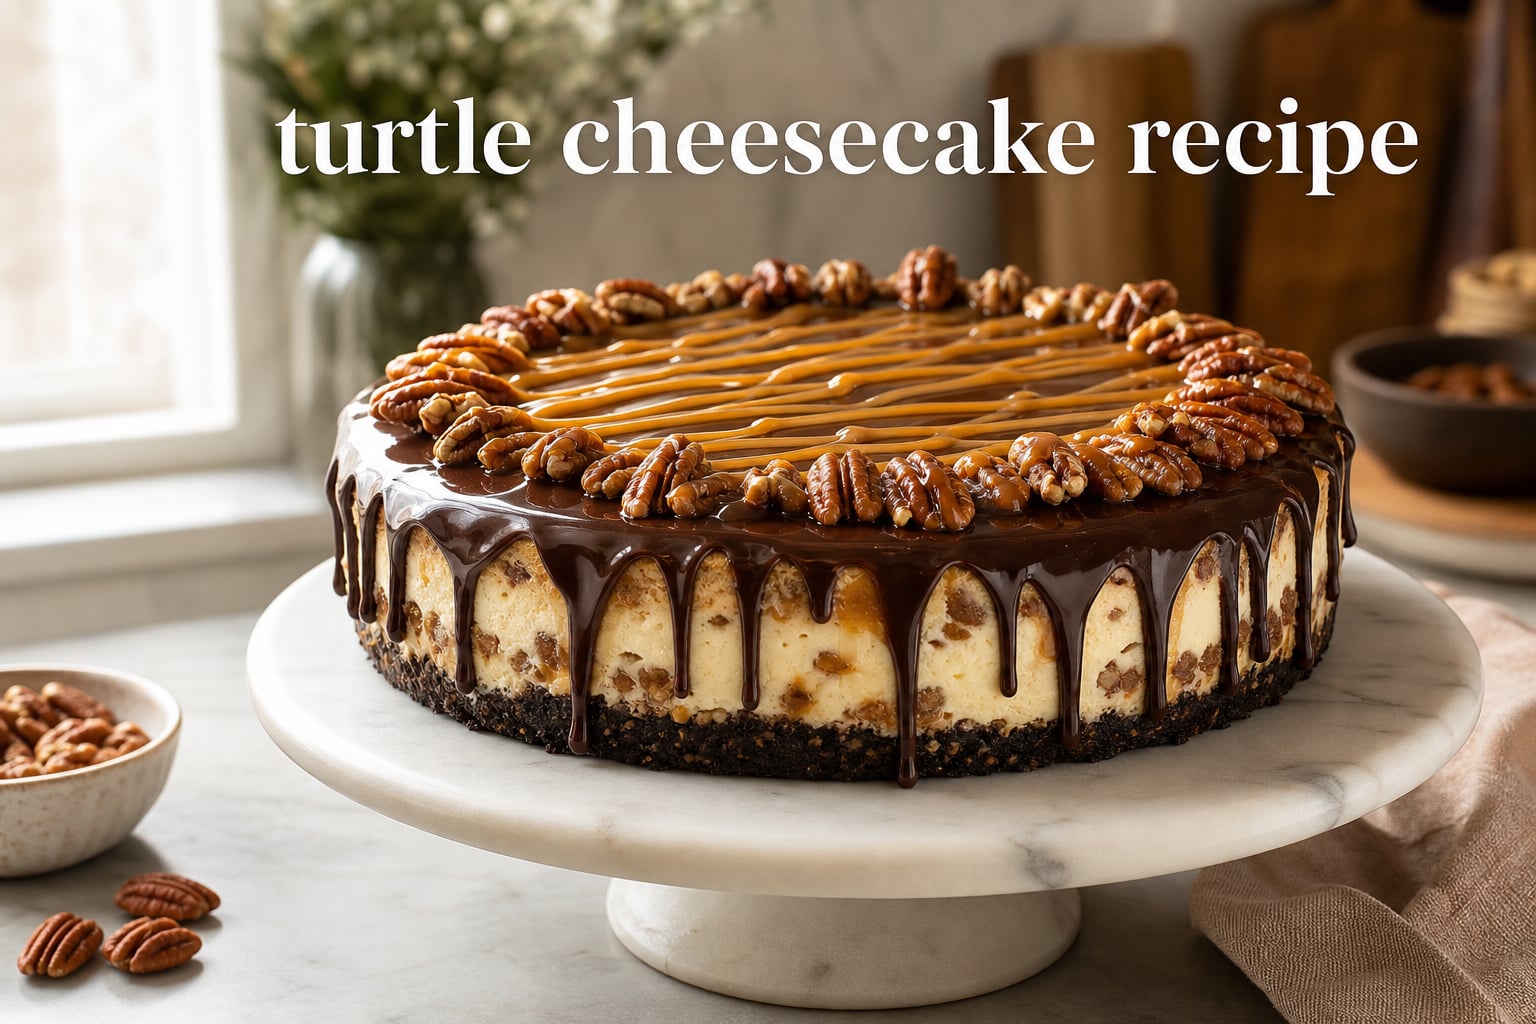
If you’re searching for a dessert that looks impressive but tastes like pure comfort, this turtle cheesecake recipe is the one. It takes everything people love about classic turtle candy (caramel, chocolate, and toasted pecans) and layers it into a creamy, baked cheesecake that holds together slice after slice.
I’ve baked this cheesecake for Thanksgiving, Christmas, and at least one very memorable birthday dinner. Every single time, plates come back empty. In this guide, I’ll walk you through every step of making turtle cheesecake from scratch, including the homemade caramel sauce, the chocolate ganache topping, and the small tricks that keep the top crack-free.
Table of Contents
What Is Turtle Cheesecake (and Why the Name?)
Turtle cheesecake is a baked cheesecake flavored with the three signature ingredients found in classic turtle candies: caramel, chocolate, and pecans. The name comes from a chocolate candy first created in the early 1900s. The candy maker supposedly thought the cluster of pecans peeking out from under chocolate and caramel looked like a tiny turtle.
Turtle candies themselves are simply pecan clusters dipped in caramel, then covered with chocolate. When bakers started building cheesecake versions, they kept the same flavor trio and built it into creamy layers. The result is a rich, layered dessert where every bite gets a little caramel, a little chocolate, and a little nutty crunch.
Expect a velvety cream cheese base, ribbons of salted caramel sauce, a glossy chocolate ganache topping, and toasted pecans for that signature crunch. If you love turtles candy or pecan pie, you will love this cheesecake.
Ingredients You’ll Need
Below is everything required for one 9-inch springform pan, which serves about 12 generous slices. I recommend weighing ingredients with a kitchen scale for the most consistent results, especially for cream cheese and sugar.
For the Graham Cracker Crust
- 2 cups (240g) graham cracker crumbs (about 14 full sheets)
- 3 tablespoons granulated sugar
- 6 tablespoons (85g) unsalted butter, melted
- 1/4 teaspoon fine sea salt
For the Homemade Caramel Sauce
- 1 cup (200g) granulated sugar
- 2 tablespoons light corn syrup
- 4 tablespoons (56g) unsalted butter, cubed
- 1/2 cup (120ml) heavy cream, warmed
- 1 teaspoon vanilla extract
- 1/2 teaspoon fine sea salt
For the Cheesecake Filling
- 32 oz (907g) full-fat brick-style cream cheese, softened to room temperature
- 1 cup (200g) granulated sugar
- 1/2 cup (100g) packed light brown sugar
- 1 cup (240g) sour cream, room temperature
- 2 teaspoons vanilla extract
- 4 large eggs, room temperature
- 1/4 cup (30g) all-purpose flour
- 1/2 teaspoon fine sea salt
For the Chocolate Ganache Topping
- 6 oz (170g) semi-sweet chocolate chips or finely chopped chocolate
- 1/2 cup (120ml) heavy cream
- 1 tablespoon unsalted butter
For the Topping
- 1 cup (115g) pecan halves, toasted and roughly chopped
- Flaky sea salt for finishing (optional)
Equipment Needed
You don’t need any fancy gadgets for this recipe. Here is the basic equipment list:
- 9-inch springform pan
- Heavy-duty aluminum foil (for the water bath)
- Large roasting pan (for the water bath)
- Stand mixer or hand mixer
- Medium heavy-bottom saucepan (for caramel)
- Whisk and rubber spatula
- Fine-mesh sieve
- Instant-read thermometer (helpful but not required)
- Kitchen scale (recommended for accuracy)
How to Make Turtle Cheesecake: Step-by-Step
This recipe moves in five stages: crust, caramel, filling, baking, and topping. Read through once before starting so you know what comes next. Mise en place matters here more than for most desserts.
Step 1: Prep the Pan and Oven
Preheat your oven to 325 degrees F (163 C). Wrap the outside of the springform pan with two layers of heavy-duty aluminum foil, making sure the foil reaches all the way up the sides. A water bath is optional for this recipe, but if you choose to use one, the foil wrap prevents leaks.
If you don’t want to use a water bath, skip the foil wrapping and just grease the pan lightly. The lower oven temperature and gentle baking still produce a creamy, crack-free result.
Step 2: Make the Graham Cracker Crust
Combine the graham cracker crumbs, sugar, salt, and melted butter in a bowl. Stir until the crumbs feel like wet sand and hold together when pinched. Press the mixture firmly into the bottom of the springform pan and about 1 inch up the sides.
Use the flat bottom of a measuring cup to really pack the crust down. A loosely packed crust will crumble into your filling later. Bake the crust for 10 minutes, then set it aside to cool while you make the caramel.
Step 3: Make the Homemade Caramel Sauce
Heat the sugar and corn syrup in a heavy-bottom saucepan over medium heat. Stir gently only until the sugar starts to melt, then stop stirring and swirl the pan as needed. Cook until the mixture turns a deep amber color, about 6 to 8 minutes total.
Add the butter and whisk until melted. Slowly pour in the warmed cream while whisking constantly. The mixture will bubble up dramatically, so use a tall pan and stand back. Whisk until smooth, then remove from heat and stir in the vanilla and salt.
Pour the caramel into a heatproof bowl and let it cool to room temperature. It will thicken as it cools. Reserve about 1/2 cup for swirling into the filling and save the rest for drizzling on top.
Troubleshooting tip: If your caramel seizes up (turns hard and grainy) when you add the cream, it usually means the cream was too cold or you added it too quickly. Warm the cream to 110 degrees F before adding, and pour it in a slow, steady stream while whisking constantly. If it still seizes, gently rewarm the whole pan over low heat and whisk until it smooths out.
Step 4: Toast the Pecans
Spread the pecan halves on a baking sheet and toast in the oven (or toaster oven) for 6 to 8 minutes at 325 degrees F, until fragrant and slightly darker in color. Let them cool completely, then chop them roughly for the topping. Toasted pecans have a deeper flavor and extra crunch compared to raw nuts.
Step 5: Mix the Cheesecake Filling
In a stand mixer fitted with the paddle attachment, beat the cream cheese on medium-low until completely smooth, about 2 minutes. Scrape down the bowl and paddle frequently. Lumps at this stage mean lumps in the finished cheesecake.
Add both sugars and the salt, then beat on medium-low until smooth and fluffy. Add the sour cream and vanilla, mixing just until combined. Sprinkle the flour over the top and mix briefly to incorporate.
Add the eggs one at a time, mixing on low just until each one disappears into the batter. Over-mixing adds too much air, which expands in the oven and causes cracks. Stop the moment you no longer see streaks of egg.
Pour about half the cheesecake batter over the cooled crust. Drizzle about 1/3 cup of the cooled caramel sauce over the batter and gently swirl with a knife. Pour the remaining batter on top and smooth the surface.
Step 6: Bake (With or Without a Water Bath)
Water bath method: Place the foil-wrapped pan inside a large roasting pan. Pour hot water into the roasting pan until it reaches about 1 inch up the sides of the springform pan. Carefully transfer to the oven.
No water bath method: Place the springform pan directly on the oven rack and bake as directed below.
Bake for 55 to 70 minutes, until the edges are set but the center 2 inches still wobble slightly when you gently shake the pan. The cheesecake will firm up as it cools. The internal temperature should read 150 to 155 degrees F on an instant-read thermometer.
Turn off the oven, crack the door open about 1 inch with a wooden spoon, and let the cheesecake cool inside for 1 hour. This slow cooling is the most important step to avoid cracks.
Step 7: Chill the Cheesecake
After 1 hour in the oven, remove the cheesecake from the water bath (if used) and let it cool to room temperature on the counter, about 1 more hour. Cover loosely with plastic wrap and refrigerate for at least 6 hours, ideally overnight. The flavors need time to meld and the texture needs to fully set.
Step 8: Make the Chocolate Ganache
Heat the heavy cream and butter in a small saucepan until it just starts to simmer. Pour the hot cream over the chocolate in a heatproof bowl. Let it sit for 2 minutes, then whisk until smooth and glossy. Let the ganache cool for 10 to 15 minutes so it thickens slightly before pouring.
Step 9: Assemble and Decorate
Remove the chilled cheesecake from the springform pan. Pour the slightly cooled ganache over the top and use an offset spatula to spread it just to the edges, allowing some to drip down the sides naturally.
Drizzle the reserved caramel sauce over the ganache in long, sweeping lines. Sprinkle the toasted pecans around the outer edge of the cheesecake and finish with a pinch of flaky sea salt. Slice with a hot, dry knife for clean cuts, wiping the blade between slices.
Tips for a Crack-Free Cheesecake
A crack on top of a cheesecake can feel like a personal failure, but it doesn’t have to happen. Here are the rules I follow every time I bake this turtle cheesecake recipe:
- Use room temperature ingredients. Cold cream cheese will leave lumps. Cold eggs will cause the batter to curdle or sink unevenly, both of which lead to cracks. Pull cream cheese, sour cream, and eggs out 2 to 3 hours before baking.
- Use full-fat brick cream cheese. Do not substitute low-fat, whipped, or spreadable cream cheese. They have too much water and air, and the texture will never be right.
- Mix on low and stop early. Every time you whip air into the batter, that air expands in the oven. The surface sets before the air can escape, and the top cracks. Mix just until combined and stop.
- Bake low and slow. 325 degrees F is the sweet spot. Higher temperatures cook the outside too fast and trap steam in the center.
- Use a water bath (or don’t open the door). Steam from the water bath keeps the surface moist and flexible while the inside cooks. If you skip the water bath, don’t open the oven door for the first 50 minutes.
- Cool gradually. Going from hot oven to cold fridge is the #1 cause of cracks. Cool in the oven with the door cracked, then on the counter, then the fridge.
- Don’t over-bake. Pull the cheesecake when the center still wobbles. Carry-over heat finishes the job. An over-baked cheesecake is dry and cracked every time.
- Run a knife around the edge. Right after baking, run a thin knife around the inside edge of the pan. As the cheesecake cools, it contracts. The knife gives it room to pull away from the pan instead of cracking across the top.
Storage, Make-Ahead & Freezing
This turtle cheesecake recipe is perfect for making ahead because the flavor actually improves after a day in the fridge. The caramel melds with the cream cheese and the ganache firms up to the perfect sliceable consistency.
Refrigerator: Cover the cheesecake loosely with plastic wrap or store slices in an airtight container. It keeps for up to 5 days. For best texture, let slices sit at room temperature for 15 minutes before serving.
Freezer: For longer storage, freeze the cheesecake (without the pecan topping) for up to 2 months. Wrap the whole cheesecake or individual slices tightly in plastic wrap, then in a layer of aluminum foil. Thaw overnight in the refrigerator before adding the toasted pecans.
Make-ahead tip: Bake the cheesecake 1 to 2 days in advance and keep it covered in the fridge. Add the ganache, caramel drizzle, and toasted pecans within 2 hours of serving for the freshest-looking presentation.
FAQ
What are the ingredients in turtle cheesecake?
The main ingredients in turtle cheesecake are cream cheese, sugar, eggs, sour cream, and vanilla for the filling. The signature turtle flavors come from caramel sauce, chocolate ganache, and toasted pecans layered throughout. Most recipes also use a graham cracker or chocolate cookie crust as the base.
Why do they call it turtle cheesecake?
Turtle cheesecake is named after turtle candies, which combine caramel, chocolate, and pecans. The original candies were created in the early 1900s, and the name comes from the way the pecans peek out from under the caramel and chocolate, resembling a tiny turtle’s shell.
What does turtle cheesecake taste like?
Turtle cheesecake tastes like a cross between classic cheesecake and turtle candy. Expect a creamy, lightly tangy cream cheese base with rich caramel notes, smooth chocolate flavor, and the buttery crunch of toasted pecans. It is rich, sweet, and deeply flavored without being overly heavy.
What are some tips for making turtle cheesecake?
The most important tips for making turtle cheesecake are: use room temperature cream cheese and eggs, mix on low speed to avoid over-whipping, bake at 325 degrees F (not higher), cool the cheesecake slowly in the oven with the door cracked, and chill the finished cake overnight before slicing. Toasted pecans add significantly more flavor than raw.
Can you freeze turtle cheesecake?
Yes, turtle cheesecake freezes very well for up to 2 months. Wrap the whole cheesecake or individual slices in plastic wrap and then in aluminum foil. Thaw overnight in the refrigerator before serving and add the toasted pecan topping just before serving for the freshest crunch.
Can you make turtle cheesecake ahead of time?
Absolutely. Turtle cheesecake is an ideal make-ahead dessert. Bake it 1 to 2 days in advance and store covered in the refrigerator. The flavor improves overnight as the caramel, chocolate, and pecans meld with the cheesecake. Add the ganache and pecan topping within a few hours of serving.
Can I use store-bought caramel instead of homemade?
Yes, you can substitute a thick, high-quality store-bought caramel sauce in this turtle cheesecake recipe to save time. Use about 1.5 cups total, reserving most for the top drizzle. Avoid thin caramel ice cream toppings, as they won’t swirl properly into the filling and may make the cake runny.
What is the 3 ingredient cheesecake?
A 3-ingredient cheesecake is a simplified no-bake version made with just cream cheese, sweetened condensed milk, and lemon juice or vanilla. It does not include the caramel, chocolate, and pecans that make this a true turtle cheesecake recipe. The classic turtle version is a baked cheesecake with many more ingredients for the layered flavors.
Final Thoughts
This turtle cheesecake recipe is the dessert I pull out when I want to wow a crowd without stress. The actual hands-on time is only about 30 minutes, and the rest is waiting, baking, and chilling. Bake it the day before, top it the morning of, and serve it that evening for perfect slices every time.
If you try this recipe, I’d love to hear how it turned out. Drop a comment with your favorite turtle dessert twist, or pin this recipe so it shows up when Thanksgiving and Christmas planning starts again.