
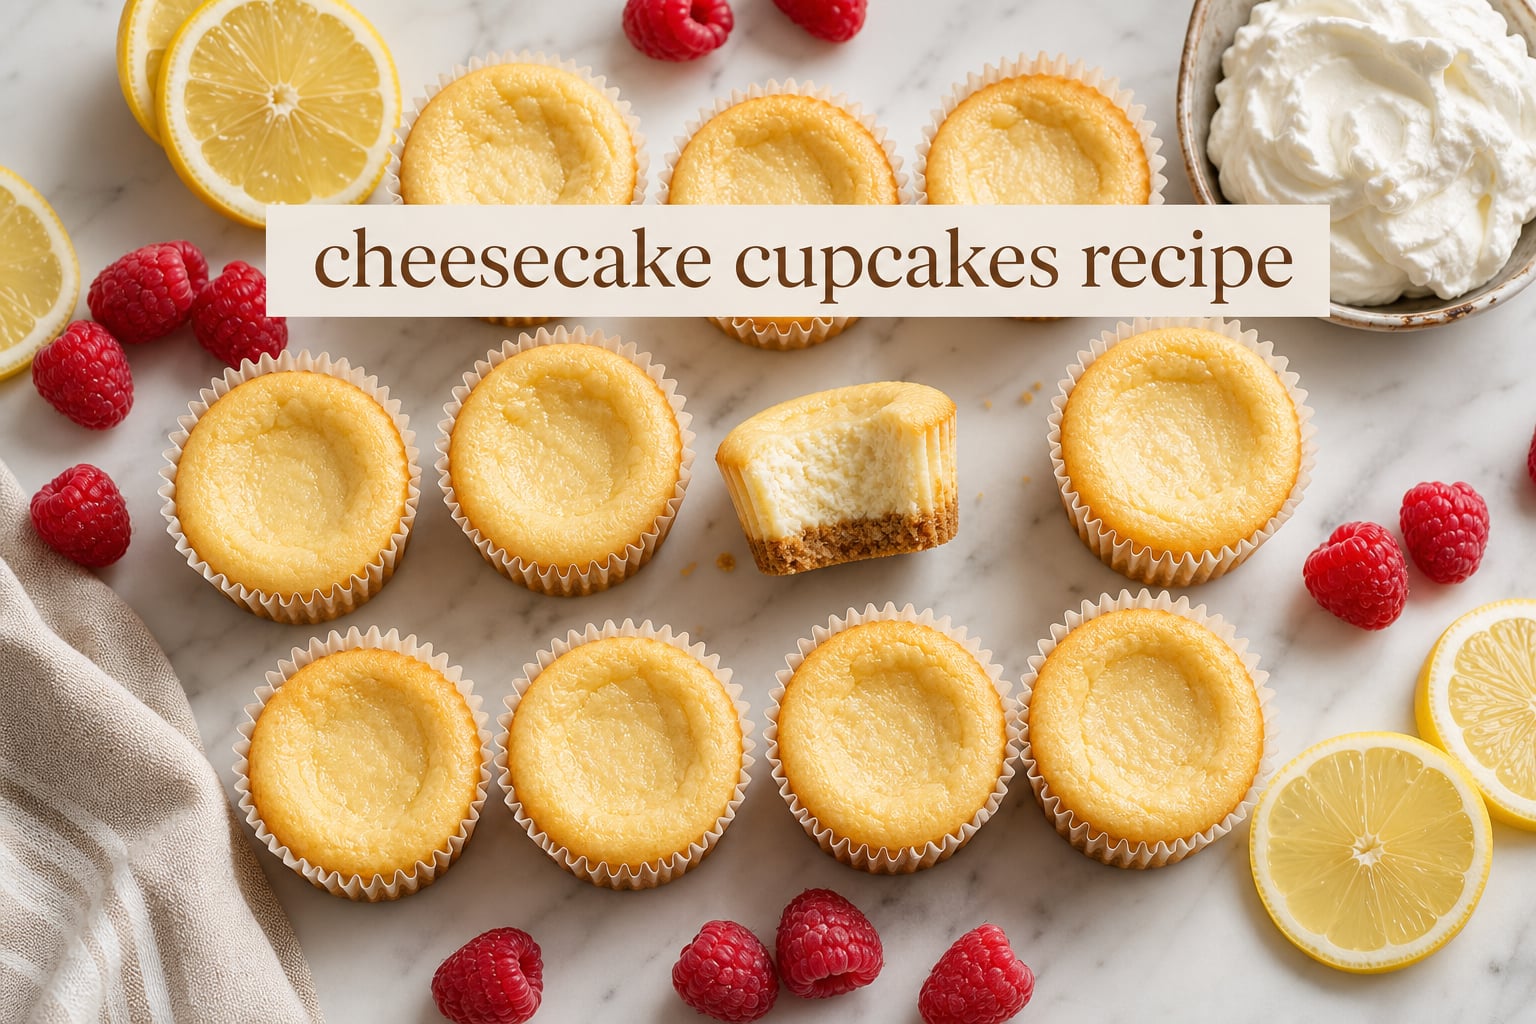
I still remember the first time I tried to make a full-size cheesecake for a friend’s birthday. I cracked the oven door for an hour, prayed to the baking gods, and somehow produced a lopsided disc with a crack running straight through the middle. Ever since then, I’ve leaned hard into the cheesecake cupcakes recipe approach – same creamy payoff, way less stress, and everyone gets their own perfect portion.
These mini cheesecakes bake in a standard muffin pan with paper liners, and the process is forgiving enough that even a first-timer can pull them off. I tested this recipe three times in my own kitchen over the past month – once with a graham cracker crust, once with vanilla wafers, and once with an Oreo bottom – and each batch came out creamy, smooth, and crack-free. Below is the exact version that earned the most compliments at a baby shower last weekend, plus all the tips, troubleshooting, and flavor swaps I’ve learned along the way.
Table of Contents
Why This Cheesecake Cupcakes Recipe Works
Cheesecake cupcakes are basically individual cheesecakes baked in a muffin pan. They use the same ingredients as a full-size cheesecake – cream cheese, sugar, eggs, and flavorings – but the smaller format means they bake faster, chill faster, and serve a crowd without slicing.
Here’s what makes this recipe reliable on the first try:
No water bath required. The smaller surface area helps the centers set evenly without the dry-heat issues that plague big cheesecakes.
Forgiving bake time. You’re aiming for a slight jiggle in the middle – it’s almost impossible to overbake within a 5-minute window.
Make-ahead friendly. These chill overnight in the fridge and freeze beautifully for up to 2 months.
Easy to customize. One base recipe, four flavor variations I’ll cover below.
Perfect individual portions. No slicing, no plates – just pick up and enjoy.
Less than 30 minutes of active work. The rest is chilling, which is hands-off.
Ingredients You’ll Need
Before you start, pull everything out and let it come to room temperature. I cannot stress this enough – cold cream cheese is the number one reason cheesecake batter ends up lumpy. Plan for about 60 minutes on the counter for the cream cheese, eggs, and sour cream.
For the Graham Cracker Crust
1 and 1/2 cups (150g) graham cracker crumbs (about 12 full sheets)
2 tablespoons granulated sugar
5 tablespoons (70g) unsalted butter, melted
Pinch of salt
For the Cheesecake Filling
16 ounces (452g) full-fat brick cream cheese, softened (Philadelphia is my go-to)
3/4 cup (150g) granulated sugar
1/4 cup (60g) sour cream, room temperature
2 large eggs, room temperature
1 tablespoon lemon juice, freshly squeezed
2 teaspoons pure vanilla extract
Pinch of salt
Equipment Notes
You’ll need a standard 12-cup muffin pan, paper liners (foil ones hold their shape best), a food processor for the crumbs, and an electric mixer – either stand or hand-held works fine. A 1/4 cup measuring cup makes filling the liners quick and even. If you don’t have a food processor, a zip-top bag and a rolling pin do the job nicely for crushing the crackers.
How to Make Cheesecake Cupcakes (Step-by-Step)
Here’s the full walkthrough. The active time is only about 20 minutes – the rest is chilling, which is hands-off. Read through the steps once before you start so you know what’s coming.
Step 1: Prep the Pan and Oven
Preheat your oven to 325°F (163°C). Line a 12-cup muffin pan with paper liners. I prefer foil liners because they don’t wrinkle or let butter leak through the way some parchment ones do. If you’re doubling the recipe for a party, prep two pans at once – the bake time stays the same.
Step 2: Make the Crust
Pulse the graham crackers in a food processor until you have fine crumbs. Add the sugar, melted butter, and salt, and pulse a few more times until the mixture looks like wet sand. If you don’t have a food processor, put the crackers in a zip-top bag and crush them with a rolling pin, then stir in the wet ingredients in a bowl.
Scoop about 1 and 1/2 tablespoons of crumb mixture into each liner. Press down firmly with the back of a small measuring cup or your fingers. The crust layer should be compact, not fluffy – if it crumbles when you lift the measuring cup, you didn’t press hard enough.
Bake the crusts for 5 minutes, then remove from the oven and set aside. This short pre-bake keeps the crust from getting soggy under the filling. It also helps the butter solidify so it doesn’t seep up into the cheesecake.
Step 3: Mix the Filling
In a large bowl, beat the softened cream cheese with an electric mixer on medium speed for about 2 minutes until completely smooth. Scrape down the sides of the bowl with a spatula halfway through, then add the sugar and beat for another 2 minutes until fluffy and lump-free. Resist the urge to rush this step – the smoother your cream cheese, the smoother your finished cupcakes.
Add the sour cream, lemon juice, vanilla extract, and salt. Beat on low speed just until combined – about 30 seconds. You don’t want to whip a lot of air into the batter at this stage.
Add the eggs one at a time, mixing on low speed just until each egg disappears into the batter. Stop the mixer as soon as the last streak of egg yolk is gone. Overmixing is the silent killer of cheesecake cupcakes – it pushes air into the batter, which expands in the oven and then collapses, leaving you with sunken centers.
Step 4: Fill and Bake
Divide the batter evenly among the 12 liners. I use a 1/4 cup measure and it fills each liner about 3/4 full. The tops should look smooth. If you see air bubbles on the surface, tap the pan firmly on the counter two or three times to pop them before baking.
Bake for 18 to 22 minutes. The cheesecake cupcakes are done when the edges look set but the centers still have a slight jiggle – about a 1-inch circle in the middle should wobble when you gently shake the pan. They will continue to set as they cool, so err on the side of underbaking if you’re unsure.
Do not open the oven door during the first 15 minutes. Sudden temperature drops cause cracks. I set a kitchen timer and only start checking around the 17-minute mark.
Step 5: Cool and Chill
Let the pan cool on a wire rack for 30 minutes at room temperature. Then transfer the pan to the refrigerator and chill for at least 3 hours, or overnight. I know this is the hard part, but the texture only fully sets during this chill – cutting in early will leave you with a soft, soupy center.
Once chilled, lift the cupcakes out by the liners and add your favorite toppings just before serving. If you’re storing them in the fridge, leave them in the pan covered with plastic wrap to keep them from absorbing other food odors.
Water Bath Method (Optional but Helpful)
If you’ve had cheesecake cupcakes crack on you in the past, a water bath adds moisture to the oven and helps them bake evenly. Here’s how to do it without a fancy setup:
Place your filled muffin pan inside a larger roasting pan or broiler-safe skillet.
Pour hot water into the outer pan until it reaches about halfway up the sides of the muffin tin.
Bake as directed above – the steam does the work of keeping the surface moist while the eggs set.
You can also place a separate pan of hot water on the lower oven rack to create steam without disturbing the cheesecake pan directly. I use this trick when I’m baking a few dozen for a party, and it cuts down on sinking noticeably. Just be careful when pulling the pan out – the water is hot.
For most home bakers, the no-water-bath method works fine. But if you’re baking for a special occasion and want insurance against cracks, the water bath is worth the extra five minutes of setup.
Troubleshooting: Why Your Cheesecake Cupcakes Sink or Crack
These are the most common issues home bakers run into, and the fixes are easier than you think. I’ve personally hit every single one of these at least once, usually in a rush the night before an event.
Sinking centers: Almost always caused by overmixing the eggs, which traps air that escapes as the cupcake cools. Mix on low speed and stop the second the eggs disappear. Underbaking can also cause sinking – if the centers wobble like liquid rather than soft Jell-O, they need 2 to 3 more minutes. A properly baked cupcake should jiggle only in the very middle, about the size of a quarter.
Cracking on top: Rapid temperature change is the culprit. Don’t open the oven door during baking, and let the cupcakes cool gradually in the pan rather than moving them straight to the fridge. If cracks appear despite your best efforts, a layer of whipped cream or sour cream topping hides them completely.
Lumpy batter: Your cream cheese wasn’t soft enough. Set it on the counter a full hour before starting, or microwave it in 10-second bursts (unwrapped) until a finger pressed in leaves a clear dent. Cold cream cheese will not smooth out no matter how long you beat it – the lumps are fat pockets that stay solid until they hit the oven, where they melt unevenly.
Oily or gummy texture: Usually a sign of underbaking or using low-fat cream cheese. Stick with full-fat Philadelphia brick-style – the tub spread won’t set properly because it has more water and less fat. Also check that you’re measuring your cream cheese by weight, not by volume, since the foil-wrapped bricks can vary slightly.
Crust falling apart: You didn’t press the crumbs firmly enough, or you skipped the pre-bake. Compact the crust layer with real pressure and bake it 5 minutes before adding the filling. The pre-bake drives off excess moisture from the butter so the crust stays crisp under the wet filling.
Sticking to the liners: Run a thin knife around the edge of each cupcake before lifting, or use parchment liners which release more cleanly than paper. Foil liners tend to stick the most, so I save those for recipes where presentation matters less and flavor comes first.
Flavor Variations Worth Trying
Once you’ve mastered the base cheesecake cupcakes recipe, these swaps are the fun part. Each makes enough for 12 standard cupcakes. I’ve tested all four of these in my own kitchen, and they’re all crowd-pleasers.
Oreo Cheesecake Cupcakes: Skip the graham crust. Press one whole Oreo cookie into the bottom of each liner. Add 1/2 cup of crushed Oreos to the filling and top with whipped cream and a mini Oreo. This is the most popular variation at kids’ birthday parties.
Strawberry Cheesecake Cupcakes: Stir 1/3 cup of finely chopped fresh strawberries into the filling. Top with a thin layer of strawberry jam and a fresh berry just before serving. For best results, pat the chopped strawberries dry with a paper towel before folding them in – extra moisture is the enemy here.
Lemon Cheesecake Cupcakes: Increase the lemon juice to 2 tablespoons and add 1 tablespoon of lemon zest to the filling. Top with a teaspoon of lemon curd for a bright, tangy finish. This version is especially good in spring and summer when citrus is in season.
Chocolate Cheesecake Cupcakes: Replace 2 tablespoons of the graham cracker crumbs with 2 tablespoons of unsweetened cocoa powder for the crust. Add 1/3 cup of melted and cooled semi-sweet chocolate to the filling. Top with chocolate ganache. Make sure the melted chocolate is fully cooled before folding it in, or it will scramble the eggs.
Mini Muffin Pan Version: Use a 24-cup mini muffin pan and reduce the bake time to 11 to 13 minutes. These are perfect for parties because they go further – and they’re adorable. Cut the crust and filling quantities in half if you only want a small batch.
Topping and Serving Ideas
Cheesecake cupcakes are basically a blank canvas. Here are the combinations I come back to most often, depending on the season and occasion:
Classic: A swirl of freshly whipped cream with a single raspberry or strawberry.
Salted caramel: Drizzle of warm salted caramel sauce and flaky sea salt.
Berry compote: Spoon over macerated strawberries, blueberries, or a mixed berry compote.
Chocolate ganache: Spoon over a thin layer of ganache and sprinkle with chocolate shavings.
Lemon curd: A small dollop right in the center with a thin lemon slice.
Holiday: Cranberry sauce and sugared rosemary for Thanksgiving or Christmas.
Birthday: Rainbow sprinkles on whipped cream for a fun, festive look.
Fall: Spiced apple compote with a dusting of cinnamon.
For parties, I set out a topping bar and let guests customize their own. It’s interactive and takes the pressure off serving. Place the chilled cupcakes on a platter, set out 3 to 4 topping options in small bowls, and add a stack of small spoons.
How to Store and Freeze Cheesecake Cupcakes
These hold up beautifully, which is one of the biggest perks of the format. Here’s how to keep them fresh for days or even months.
Refrigerator: Store in an airtight container for up to 5 days. Keep the toppings separate and add them just before serving so the crust stays crisp. If you stack them in the container, place a layer of parchment paper between layers to prevent sticking.
Freezer: Wrap each cheesecake cupcake individually in plastic wrap, then place them in a freezer-safe bag or container. They keep for up to 2 months. I usually date the bag with a marker so I know how long they’ve been in there.
Thawing: Move them to the refrigerator the night before you want to serve. They thaw in about 6 to 8 hours. If you’re in a hurry, leave them on the counter for 30 to 45 minutes – they’ll soften up nicely. Avoid microwaving them to thaw, as this creates an uneven texture and can cause weeping.
One of my favorite tricks is to freeze a batch plain, then pull out exactly what I need for an event. They’re ready to top and serve with zero last-minute baking. For a dinner party of eight, I pull out 8 cupcakes the morning of, and by dessert they’re perfectly thawed and ready for toppings.
Cheesecake cupcakes also make a great homemade gift. Stack three in a small bakery box, tie it with ribbon, and you’ve got a thoughtful present that costs a fraction of what you’d pay at a bakery.
FAQs
What are common cheesecake cupcake mistakes?
The most common mistakes are using cold cream cheese (causes lumpy batter), overmixing the eggs (traps air that escapes as the cupcakes cool and leads to sinking), opening the oven door too early (causes cracking), and underbaking (leaves a wet center that collapses). Using full-fat brick cream cheese and mixing on low speed solves most of them.
Can you bake cheesecake in cupcake liners?
Yes, baking cheesecake in paper cupcake liners works well as long as you use sturdy foil or parchment liners. The crust and filling go directly into the liner, and the liner peels away cleanly after chilling. Regular thin paper liners can leak butter, so stick with foil for best results.
How to make easy cheesecake cupcakes?
Use room-temperature cream cheese, beat it smooth before adding other ingredients, mix the eggs in last on low speed just until combined, bake at 325°F until the centers still jiggle slightly, and chill for at least 3 hours. Skip the water bath – the small size means they bake evenly without it.
How long to bake cheesecake cupcakes?
Bake cheesecake cupcakes at 325°F (163°C) for 18 to 22 minutes in a standard muffin pan, or 11 to 13 minutes in a mini muffin pan. They are done when the edges look set but the centers still have a 1-inch wobble when you gently shake the pan.
Final Thoughts on This Cheesecake Cupcakes Recipe
This cheesecake cupcakes recipe has become my default for almost any occasion that calls for dessert. They’re easier than a full cheesecake, faster than pie, and the individual portions make serving a crowd completely painless. The base recipe is dependable, and the variations mean I can roll out a different flavor every time without anyone getting bored.
If you make these, I’d love to hear how they turned out. Try them plain the first time, then experiment with the Oreo or lemon variations once you’ve got the technique down. And remember – room temperature cream cheese, low-speed mixing, and patience during the chill are the three things that separate a good cheesecake cupcake from a great one.
Once you’ve made this cheesecake cupcakes recipe a few times, it’ll become second nature. The whole process takes about 30 minutes of active work, and the reward is a tray of beautiful, individual desserts that look like they came from a bakery. Happy baking.