
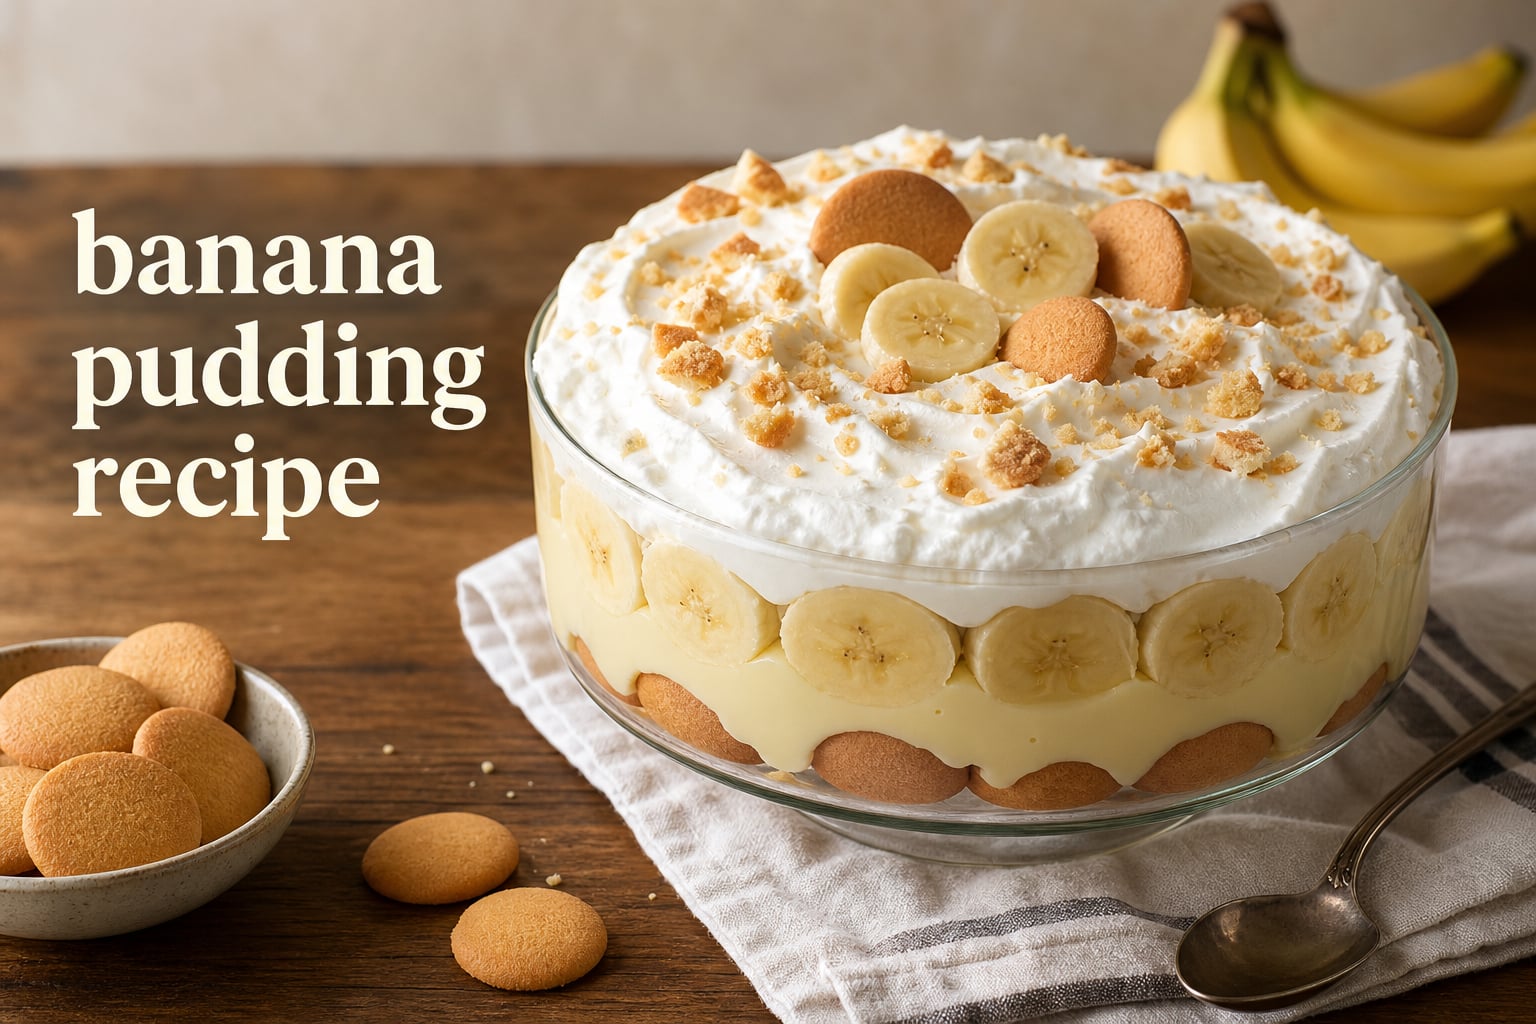
This banana pudding recipe makes the classic Southern-style dessert with vanilla custard, ripe banana slices, and vanilla wafers that soften into the pudding as it chills. The from-scratch route takes more attention than a no-bake version, but egg yolks, cornstarch, milk, sugar, and vanilla give the filling a clean, old fashioned flavor.
Banana pudding is a layered dessert, not simply a bowl of banana-flavored pudding. The balance matters: the custard should be thick enough to hold the layers, the bananas should stay pale and fresh, and the wafers should soften without turning into mush.
I favor a simple vanilla base here because it puts the bananas and cookies first. This guide explains how to make the custard, how to layer it well, how to plan ahead for a potluck or family gathering, and how to correct the problems cooks mention most often.
Table of Contents
A homemade banana pudding recipe starts with a vanilla custard and simple layers
The confirmed custard base for this method uses 2 cups whole milk, 1/4 cup sugar, 2 large egg yolks, 3 tablespoons cornstarch, 1 teaspoon vanilla extract, and 1/4 teaspoon salt. Add 2 ripe bananas plus vanilla wafers for the familiar layered dessert.
Whipped cream makes a light finish, while a meringue topping creates a more traditional Southern banana pudding presentation. Neither topping changes the set of the custard, so choose the finish that fits the occasion and serve the dessert cold.
The custard ingredients create the pudding base
- Whole milk: 2 cups form the creamy liquid base.
- Sugar: 1/4 cup sweetens the custard without hiding the banana flavor.
- Large egg yolks: 2 yolks add richness and help the pudding feel silky.
- Cornstarch: 3 tablespoons thicken the mixture when it is heated.
- Vanilla extract: 1 teaspoon gives the pudding its classic vanilla character.
- Salt: 1/4 teaspoon keeps the sweetness from tasting flat.
- Ripe bananas: 2 bananas provide the fresh fruit layers.
- Vanilla wafers: Layer these with the bananas and custard; Nilla wafers are a familiar choice for many cooks.
- Optional topping: Whipped cream, whipped topping, or meringue can finish the dish.
Choose bananas that are yellow and fragrant, with a few small brown freckles rather than heavily browned skins. Very green fruit lacks sweetness, while very soft fruit can collapse as you arrange the slices.
Vanilla extract belongs in the custard after the heat is off or near the end of cooking, when its aroma stays noticeable. Vanilla flavoring can work in a pinch, but extract has the clearer flavor people expect in homemade banana pudding.
The right equipment makes smooth banana pudding easier
You do not need specialty equipment for an easy banana pudding, but a few basic tools prevent common texture problems. A heavy saucepan spreads heat more evenly than a thin pan, which reduces the chance of scorching the milk at the bottom.
- A medium heavy-bottomed saucepan for cooking the custard
- A whisk for blending the cornstarch and egg yolks
- A heat-safe bowl for tempering yolks and cooling the pudding
- A silicone spatula for scraping the pan and folding topping
- A fine-mesh strainer for rescuing a custard with tiny cooked-egg bits
- A shallow serving dish, trifle bowl, or individual cups for the layers
A shallow dish gives more banana-and-wafer layers in each spoonful. Individual cups are useful when you want tidy portions, while a larger dish makes serving at a birthday dessert table or holiday meal simple.
Keep plastic wrap nearby for cooling the custard. Pressing it directly against the surface limits the skin that can form as the mixture cools.
These steps make old fashioned banana pudding from scratch
The method is straightforward: combine the custard ingredients, heat and whisk until thick, cool it slightly, layer it with wafers and bananas, then chill it. Read all six steps once before starting so the egg yolks and cornstarch get the attention they need.
Step 1 starts the custard with a smooth cornstarch mixture
Put the sugar, cornstarch, and salt in the saucepan, then whisk them together before adding liquid. This dry mixing breaks up cornstarch clumps early, which gives you a much better chance of a smooth pudding.
Whisk in enough of the whole milk to make a lump-free slurry, then slowly whisk in the remaining milk. Keep the 2 egg yolks in a separate heat-safe bowl for the next step.
The goal at this point is not to cook anything. It is to dissolve the thickener evenly so it can swell gradually in the milk instead of making gel-like pockets.
Step 2 thickens the custard slowly over moderate heat
Set the pan over moderate heat and whisk steadily, reaching into the corners and across the bottom. Heat turns cornstarch into the thickener that gives banana pudding structure, but rushing with very high heat can scorch the milk or create lumps.
Watch for the mixture to change from thin milk to a coating that clings to the whisk and leaves a brief trail across the pan. Once it begins to thicken, keep whisking because the transition can happen quickly.
Step 3 protects the egg yolks by tempering them first
When the milk mixture is hot and beginning to thicken, slowly whisk some of it into the bowl with the 2 egg yolks. Add it in a thin stream while whisking the yolks constantly; this gradual warming is called tempering.
Pour the warmed yolk mixture back into the saucepan while whisking. Continue cooking only until the pudding is visibly thick and smooth, then remove the pan from the heat.
Tempering is the difference between a custard that tastes rich and a custard with scrambled-egg flecks. If you see a few tiny bits anyway, pour the finished pudding through a fine-mesh strainer before you add the vanilla.
Step 4 finishes the pudding with vanilla and a short cooling period
Stir in the 1 teaspoon vanilla extract after removing the pan from the heat. Scrape the custard into a bowl, press plastic wrap against its surface, and let it cool until it is no longer steaming heavily.
Do not layer piping-hot pudding over bananas if you can avoid it. The heat softens the fruit fast and makes browning and watery layers more likely.
The custard does not need to be completely cold before assembly, but it should be calm enough that it will not melt a whipped-cream topping. If time is short, cool it in a wide bowl rather than a deep narrow one.
Step 5 keeps banana slices pale before they meet the custard
Slice the 2 ripe bananas shortly before assembly. If the slices will sit exposed for more than a moment, lightly coat the cut surfaces with lemon or lime juice, a practical step repeatedly recommended by home cooks who have dealt with browned fruit.
Use a light hand with citrus. Too much juice changes the dessert from mellow and vanilla-forward to sharply tart, so a thin coating is enough.
Another useful approach is to keep every slice tucked between custard and wafers rather than leaving fruit on top. Less contact with air means fewer brown spots on the finished banana pudding.
Step 6 builds the layers and lets them settle in the refrigerator
Spread a thin layer of custard in the base of your serving dish, then add vanilla wafers and banana slices. Cover them with more custard and repeat until the ingredients are layered, ending with custard to protect the fruit.
Add whipped cream, whipped topping, or meringue only when the topping suits your serving plan. A meringue version can go on close to serving, while whipped cream is nicest when folded or spooned gently over fully cooled pudding.
Cover the dish and chill it until the custard is cold and the wafers have softened. Chilling also lets the vanilla, banana, and cookie layers taste like one dessert rather than three separate components.
The chill and layering choices control banana pudding texture
Chilling is not a passive final step. The custard firms as it cools, the wafers absorb moisture, and the banana flavor moves into the vanilla base.
Forum discussions point to two opposite complaints: cookies that stay too crisp and cookies that go completely soggy. Neither is a sign that the recipe failed; it usually means the dessert needs a different assembly schedule for the texture you enjoy.
A short assembly window keeps the wafers more distinct
If you enjoy contrast between creamy pudding and a little cookie bite, wait to build the layers until the custard has cooled and plan to serve after the wafers have only begun to soften. Keep a few extra wafers aside for a final garnish just before serving.
That garnish is also useful when you are carrying the dessert to a potluck. It gives the top a clean look even after the covered pudding has traveled.
A longer chill creates the softer classic texture
If the appeal is old fashioned banana pudding with tender, cake-like wafers, build the dish ahead and let the custard work into the cookies in the refrigerator. The important detail is to keep the top fruit covered by custard or topping so it has less air exposure.
I would not add an uncovered banana garnish far in advance. Save a few fresh slices for the last moment if the dessert needs a decorative top.
A make-ahead plan separates the custard from the freshest fruit
For a party, make the custard ahead, cool it with wrap touching the surface, and refrigerate it covered. Slice bananas and build the final layers nearer to serving when appearance matters most.
For a holiday dessert, this split plan gives you room in the kitchen without asking the bananas to look perfect for too long. It also means you can decide at the last moment whether the wafers should be tender or still a little firm.
These fixes solve thin, thick, lumpy, and brown banana pudding
Most banana pudding problems have a clear cause. A few quick checks before layering can save an entire dish.
A thin pudding needs enough cooking to activate cornstarch
When pudding does not set, the usual issue is that the cornstarch did not heat long enough after the mixture thickened. Return the custard to moderate heat and whisk continuously until it is clearly thicker, then cool it again before layering.
Do not try to repair a loose custard by adding dry cornstarch straight into the hot pan. It will make stubborn clumps; cornstarch needs to be blended with cool liquid first.
A pudding that is too thick can loosen with milk
If the custard becomes tighter than you want, whisk in a small amount of milk while the pudding is still warm. Add only enough to restore a spoonable texture, because the custard will also change as it chills.
Thick pudding is usually easier to repair than thin pudding. The key is to make the change gradually instead of adding a large splash all at once.
A lumpy custard can pass through a fine-mesh strainer
Small lumps often come from uneven cornstarch mixing or egg bits that formed during heating. Straining the warm pudding into a clean bowl is the simplest rescue and gives the finished dessert a smoother texture.
For the next batch, whisk the dry ingredients before liquid goes in, temper the yolks, and keep the whisk moving around the edges of the saucepan. Those three habits address the most common causes at their source.
Brown bananas need less air and gentler citrus treatment
Bananas brown when their cut surfaces meet air. Keep the slices inside the layers, cover the dish, and use a light lemon or lime coating when the fruit must wait before it goes into the pudding.
Some cooks blend a fresh banana into the pudding for a stronger banana note. That option changes the appearance and can make the base feel more fruit-forward, so use it when that is the flavor you want rather than as a fix for browned slices.
Deflated whipped cream needs a cooler, gentler finish
Whipped cream loses volume when it meets warm custard or is stirred aggressively. Let the pudding cool first, then fold or spoon the topping over it with a spatula instead of beating it into the base.
Whipped topping is a reasonable choice when convenience matters, while freshly whipped cream gives a lighter dairy flavor. The better option is the one that matches your timing and preferred finish.
These banana pudding variations fit different tastes and dietary needs
The classic version is flexible once you understand what each layer contributes. Keep the custard, fruit, cookie, and topping roles in mind as you make changes.
A from-scratch version gives the deepest vanilla-custard flavor
Banana pudding from scratch uses egg yolks and cornstarch for the thickening work. It takes active stovetop attention, but it gives you control over sweetness, thickness, and the cooked vanilla character.
An instant-pudding version is faster and makes sense for a no-bake banana pudding when you need a shortcut. It will not have the same egg-yolk custard profile, so think of it as a different approach rather than an inferior one.
A cream cheese version makes the filling richer
Cream cheese banana pudding is popular with people who like a tangier, denser filling. Let softened cream cheese become fully smooth before combining it with other cold filling components; little cold lumps are hard to hide once the dessert is layered.
This variation pairs especially well with a whipped topping, because the lighter top keeps the richer filling from feeling heavy. Keep the banana slices tucked into the filling just as you would in the traditional version.
A dairy-free version swaps every dairy layer thoughtfully
For dairy-free banana pudding, choose a dairy-free milk suitable for pudding, a dairy-free whipped topping or whipped coconut-based topping, and cookies that do not contain dairy. Read each label because wafers and toppings vary by brand.
Make the custard in the same general order: dissolve the cornstarch, heat while whisking, and cool before layering. The set can differ by milk choice, so judge the pudding by visible thickness rather than assuming every alternative behaves exactly like whole milk.
A gluten-free version begins with certified gluten-free cookies
Bananas, milk, sugar, egg yolks, cornstarch, vanilla, and salt can fit a gluten-free plan, but standard vanilla wafers may not. Substitute certified gluten-free vanilla-style cookies and check the vanilla extract and topping labels if cross-contact matters for the people eating it.
The assembly and chilling method stay the same. Gluten-free cookies may absorb moisture at a different rate, so reserve some for garnish and check the softness earlier than you would with standard wafers.
A crowd-size version multiplies each measured custard ingredient evenly
When you need more banana pudding for a larger gathering, multiply the milk, sugar, egg yolks, cornstarch, vanilla, salt, bananas, and wafers by the same factor. Cook the custard in batches if one pan would be crowded, since a crowded pan heats unevenly and makes whisking harder.
Use more than one shallow dish instead of one very deep dish when possible. Guests get a better mix of cookies, fruit, and custard, and the dessert cools and chills more evenly.
Serving and storage work best when the pudding stays cold
Serve banana pudding cold with a large spoon for a family-style dish or assemble it in cups for individual portions. A dusting of crushed vanilla wafers on top adds a little texture, and fresh banana slices look best when added just before the dish reaches the table.
Cover leftovers and keep them refrigerated. The banana slices will naturally soften and darken over time, and the wafers will continue to absorb custard, so this dessert is at its prettiest and most texturally balanced soon after it is assembled.
Nutrition figures depend on the wafers, topping, milk, and any variation you choose, so a generic calorie total would be misleading. If you need a dietary calculation, enter the exact labels and amounts from your finished version into a reliable nutrition tool.
These banana pudding recipe questions have direct answers
What are the ingredients for banana pudding?
A from-scratch banana pudding base uses 2 cups whole milk, 1/4 cup sugar, 2 large egg yolks, 3 tablespoons cornstarch, 1 teaspoon vanilla extract, and 1/4 teaspoon salt. Layer the cooled vanilla custard with 2 ripe bananas and vanilla wafers, then finish with optional whipped cream, whipped topping, or meringue.
What are the four ingredients in a banana pudding recipe?
A very simple banana pudding can be framed as four main parts: vanilla pudding, bananas, vanilla wafers, and a whipped topping. A from-scratch version expands the pudding part into milk, sugar, egg yolks, cornstarch, vanilla, and salt so the custard can be cooked rather than made from a mix.
How to make old fashioned banana pudding?
Make a vanilla custard by whisking sugar, cornstarch, salt, and milk over moderate heat, then temper in egg yolks and cook until thick. Stir in vanilla, cool the pudding with wrap on its surface, then layer it with banana slices and vanilla wafers. Cover and chill until cold and the wafers have softened; top with whipped cream or meringue when serving.
How do you make pudding from scratch?
For this custard, combine 1/4 cup sugar, 3 tablespoons cornstarch, and 1/4 teaspoon salt before whisking in 2 cups whole milk. Heat while whisking until it thickens, slowly whisk hot mixture into 2 egg yolks to temper them, return everything to the pan, and cook until smooth and thick. Remove from heat, stir in 1 teaspoon vanilla extract, then cool with plastic wrap touching the surface.
This banana pudding recipe succeeds when the custard, bananas, and wafers stay in balance
A good homemade banana pudding does not need complicated extras. Cook the cornstarch-and-yolk custard patiently, protect the banana slices from excess air, and choose your assembly timing based on whether you want tender wafers or a little crunch.
Make the pudding base first, then decide how close to serving you want to add the fruit, cookies, and topping. That simple plan turns this banana pudding recipe into a dependable dessert for a summer table, a holiday meal, or any gathering that calls for a familiar creamy classic in 2026.