
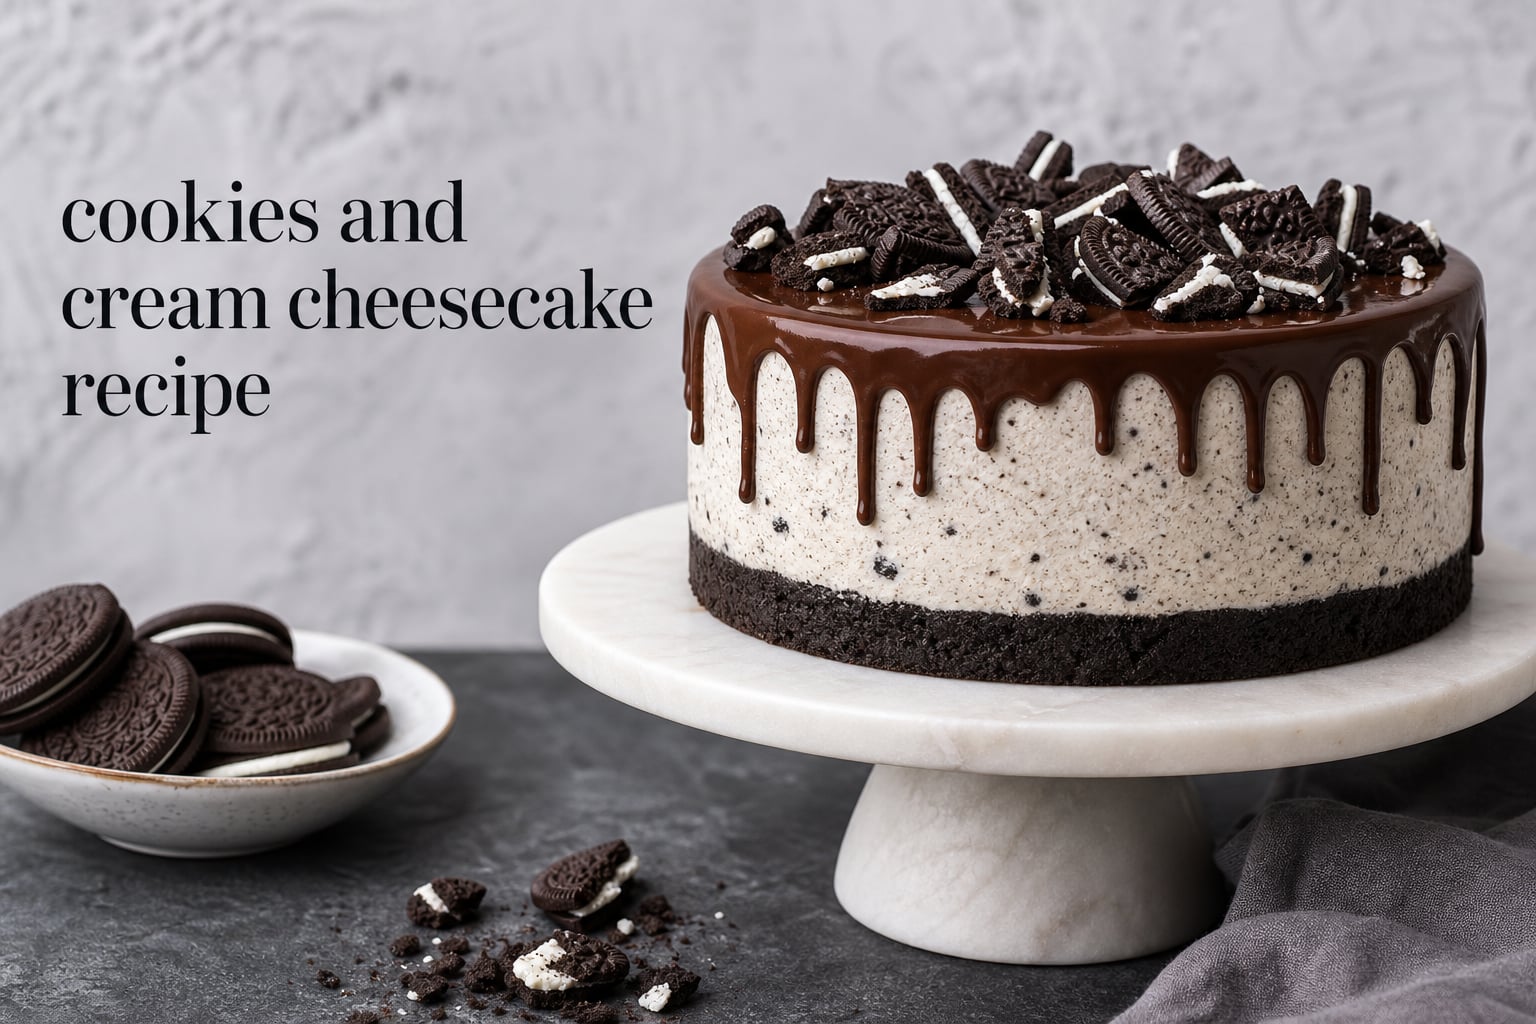
This cookies and cream cheesecake recipe makes a tall, creamy baked cheesecake with a chocolate sandwich cookie crust and cookies folded through the cream cheese filling. It has the familiar cookies-and-milk flavor people want from an Oreo cheesecake, but the texture stays sliceable after a proper chill.
The key is not complicated: use softened full-fat cream cheese, mix the eggs gently, bake with gentle moisture around the pan, and give the cheesecake time to cool. I make room on the schedule for that final chill because it turns a soft, warm filling into clean, rich slices.
This is a fitting make-ahead dessert for 2026 birthdays, holiday tables, and dinner parties. The active work is manageable for a beginner, while the slow cooling period does most of the work for you.
Table of Contents
This cookies and cream cheesecake recipe makes one 9-inch cake.
Use a 9-inch springform pan and plan for 12 generous slices. The cake needs about 30 minutes of hands-on preparation, 60 to 70 minutes in the oven, 1 hour of gradual oven cooling, and at least 6 hours in the refrigerator.
- Yield: 12 slices
- Pan: 9-inch springform pan
- Oven temperature: 325°F
- Method: baked cheesecake with a water bath
- Chill time: 6 hours minimum, or overnight
Quick answer: For a smooth cookies and cream cheesecake, press the cookie crust firmly into the pan, beat room-temperature cream cheese with sugar until smooth, add eggs on low speed, fold in chopped cookies, then bake until the outside is set and the center still gives a small wobble.
You need full-fat dairy and chocolate sandwich cookies for the right texture.
Use full-fat block cream cheese rather than a spread from a tub. Block cream cheese has less added moisture, so the cream cheese filling bakes into the dense, velvety texture expected of a classic cheesecake.
The Oreo crust needs cookies, butter, and a pinch of salt.
- 20 chocolate sandwich cookies, filling included
- 5 tablespoons unsalted butter, melted
- Pinch of fine salt
Pulse the cookies until they look like damp sand after the butter is mixed in. Keeping the cookie filling in the crumbs gives the Oreo crust its familiar sweetness and helps it hold together.
The cream cheese filling needs these measured ingredients.
- 32 ounces full-fat block cream cheese, softened
- 1 cup granulated sugar
- 1/2 cup full-fat sour cream, at room temperature
- 1 tablespoon vanilla extract
- 4 large eggs, at room temperature
- 16 chocolate sandwich cookies, roughly chopped
- Pinch of fine salt
The cookies mixed into the batter should be chopped, not turned to dust. A mix of small pieces and pea-size chunks puts cookies in every bite without making the filling muddy.
The optional topping adds a bakery-style finish.
- 4 ounces semisweet chocolate, finely chopped
- 1/2 cup heavy cream
- Whipped cream and extra cookie pieces for serving
Chocolate ganache is optional, not a fix for a cracked top. It does make a simple finish when you want this cheesecake with Oreos to look dressed up for a special occasion.
You make the cookies and cream cheesecake in seven simple stages.
Set the cream cheese, sour cream, and eggs on the counter before you begin. Softened ingredients combine without the stubborn little lumps that can show up when cold cream cheese meets sugar.
Step 1: Build and bake the Oreo crust.
Heat the oven to 325°F and place a rack in the lower-middle position. Grease the bottom and sides of a 9-inch springform pan, then line the base with a round of parchment if you want extra help lifting slices later.
Combine the 20 cookie crumbs, melted butter, and salt in a bowl until every crumb looks moistened. Press the mixture firmly across the bottom and about 1 inch up the sides of the pan, using a flat-bottomed measuring cup to compact it.
Bake the crust for 8 to 10 minutes, then set it on a rack while you make the filling. A brief pre-bake helps the crust stay distinct rather than turning soft beneath the cream cheese filling.
Step 2: Beat the cream cheese and sugar until smooth.
Put the softened cream cheese in a large bowl and beat on low to medium-low speed until smooth. Add the sugar and salt, then beat only until the mixture is creamy, stopping once or twice to scrape the bowl and beater.
Add the sour cream and vanilla, and mix on low until no streaks remain. Keep the mixer speed modest; high-speed mixing whips extra air into cheesecake batter, which can contribute to puffing and cracks later.
Step 3: Add eggs gently and fold in the cookies.
Add the eggs one at a time, mixing on low just until each egg disappears before adding the next. Scrape the bowl after the final egg, then use a spatula to fold in the 16 chopped cookies.
Pour the batter over the warm or cooled crust and smooth the surface. Tap the pan on the counter two or three times to bring any large air bubbles to the top.
Tip: Stop mixing as soon as the last egg is incorporated. The batter does not need to look fluffy; a dense, smooth batter is exactly what creates a creamy cheesecake.
Step 4: Set up a water bath cheesecake without letting water into the pan.
For the traditional method, wrap the outside of the springform pan in two wide, overlapping sheets of heavy-duty foil. Bring the foil all the way up the sides, set the pan in a larger roasting pan, and pour hot water into the roasting pan until it reaches about 1 inch up the springform sides.
The water bath, also called a bain marie, surrounds the cake with gentle heat and adds humidity to the oven. That slower heat reduces the chance that the outside will overbake before the center is ready.
Step 5: Bake until the edges are set and the middle still wobbles.
Bake for 60 to 70 minutes. Start checking near 60 minutes: the outer 2 to 3 inches should look set, while a 2-inch circle in the center should tremble like soft gelatin when the pan is nudged.
If you use an instant-read thermometer, check the center without scraping the crust; 145°F is a useful doneness reference. Do not wait for the entire top to look firm, because carryover heat continues the set as the cheesecake cools.
Step 6: Cool the cheesecake slowly before chilling it.
Turn the oven off, crack the door open a few inches, and leave the cheesecake in the water bath for 1 hour. This gentle transition is one of the easiest ways to reduce a dramatic temperature change that can split the top.
Remove the springform pan from the water bath and take off the foil. Let the cake cool on a rack until it is no longer warm, then cover it and refrigerate for at least 6 hours or overnight.
Step 7: Add topping and slice with a hot, dry knife.
For ganache, warm the heavy cream until steaming, pour it over the chopped chocolate, and let it sit for 2 minutes. Stir from the middle outward until smooth, cool it until slightly thickened, then spread it over the chilled cheesecake.
Run a thin knife around the pan edge before releasing the ring. For neat slices, dip a knife in hot water, dry it completely, make one cut, and repeat between slices.
You can use either a foil-wrapped or no-foil water bath method.
The foil-wrapped method puts the springform pan directly in hot water, which gives very even baking. Its weak point is leakage: a springform pan is not naturally watertight, and a small tear or low foil edge can let water soften the crust.
The no-foil option is to put a roasting pan filled with hot water on the rack below the cheesecake rather than placing the cake in the water. It adds oven humidity and avoids water touching the pan, although the heat is less direct than a true water bath.
Choose the traditional bath when you have heavy-duty foil and a roasting pan that fits safely. Choose the separate-pan option if foil leaks have frustrated you before, then pay close attention to the center wobble rather than the clock alone.
Warning: Never carry a filled roasting pan across the kitchen after the cheesecake is already inside it. Slide the oven rack out, place the pan on the rack, and pour hot water carefully into the roasting pan there.
These cheesecake tips prevent the problems bakers mention most often.
Room-temperature ingredients prevent a lumpy filling.
Cold cream cheese resists mixing and invites overbeating while you chase lumps. Give the blocks time to soften, and let the eggs and sour cream lose their chill as well.
A small center wobble means the cheesecake is done.
A cheesecake that looks fully solid in the oven is commonly overbaked. The edges should be set, the center should move together in a small area, and the cake will firm during its slow cool and refrigerator time.
Cracks happen when the batter has too much air or cools too fast.
Use low speed after the sugar goes in, avoid opening the oven repeatedly, and use the one-hour oven cool. A crack does not harm the flavor, and a ganache or whipped-cream topping can cover it if presentation matters.
A soft center usually needs more chilling before it needs more baking.
Do not judge the set while the cake is warm. If it baked to the edge-set, center-wobble stage, refrigerate it overnight before deciding it is too soft; chilling gives the proteins and fat time to firm the slice.
If the center is loose after an overnight chill, the cake was likely underbaked. Return it to a 325°F oven only if it has not yet been topped, and bake in short intervals until the outer portion is set and the center has the small wobble described above.
A soggy crust points to water-bath leakage or trapped moisture.
Use two layers of broad foil with the seams facing different directions, and check that the foil reaches higher than the water line. After baking, remove the foil promptly so condensation does not gather against the crust.
A sunken top usually follows too much air or a sharp temperature change.
Mix only to combine, keep the water bath gentle, and allow the cheesecake to sit in the switched-off oven. A slight dip is normal and makes a nice place for ganache, cookie crumbs, or whipped cream.
You can finish, vary, and store this homemade Oreo cheesecake easily.
For a classic finish, spoon on whipped cream and scatter extra cookie pieces just before serving. For a chocolate-forward version, use the ganache from the ingredient list, then add the cookie garnish after the ganache has set.
Use another chocolate sandwich cookie flavor in the crust and filling if you want a different twist. A gluten-free version works with gluten-free chocolate sandwich cookies, provided every ingredient label suits the dietary need.
Keep the cheesecake covered in the refrigerator and serve it within 4 days for the freshest texture. For longer storage, freeze individual slices on a tray until firm, wrap them well, and thaw them overnight in the refrigerator.
This is also a reliable make-ahead dessert: bake it the day before, chill it overnight, and add whipped cream or cookie crumbs shortly before serving. Hold back the final cookie garnish because it stays crisper when it is not refrigerated for hours.
These cookies and cream cheesecake questions have quick answers.
What are some tips for making Oreo cheesecake?
Use room-temperature full-fat block cream cheese, mix eggs on low speed only until combined, bake with gentle moisture from a water bath or a pan of hot water, and chill the cake for at least 6 hours before slicing.
What are some common cheesecake mistakes?
Common mistakes include using cold cream cheese, whipping too much air into the batter, baking until the entire center is firm, cooling the cake too quickly, and letting water leak into the springform pan.
What is the secret to a creamy cheesecake?
The secret is softened full-fat dairy, gentle mixing after the eggs are added, baking only until the center has a small wobble, and a long refrigerated chill so the filling can set cleanly.
This cookies and cream cheesecake recipe rewards patience with clean, creamy slices.
Make the Oreo crust firm, keep the filling gently mixed, and stop baking while the center still gives a small wobble. Once the cheesecake has cooled gradually and chilled fully, it is ready for ganache, whipped cream, and a confident first slice.