
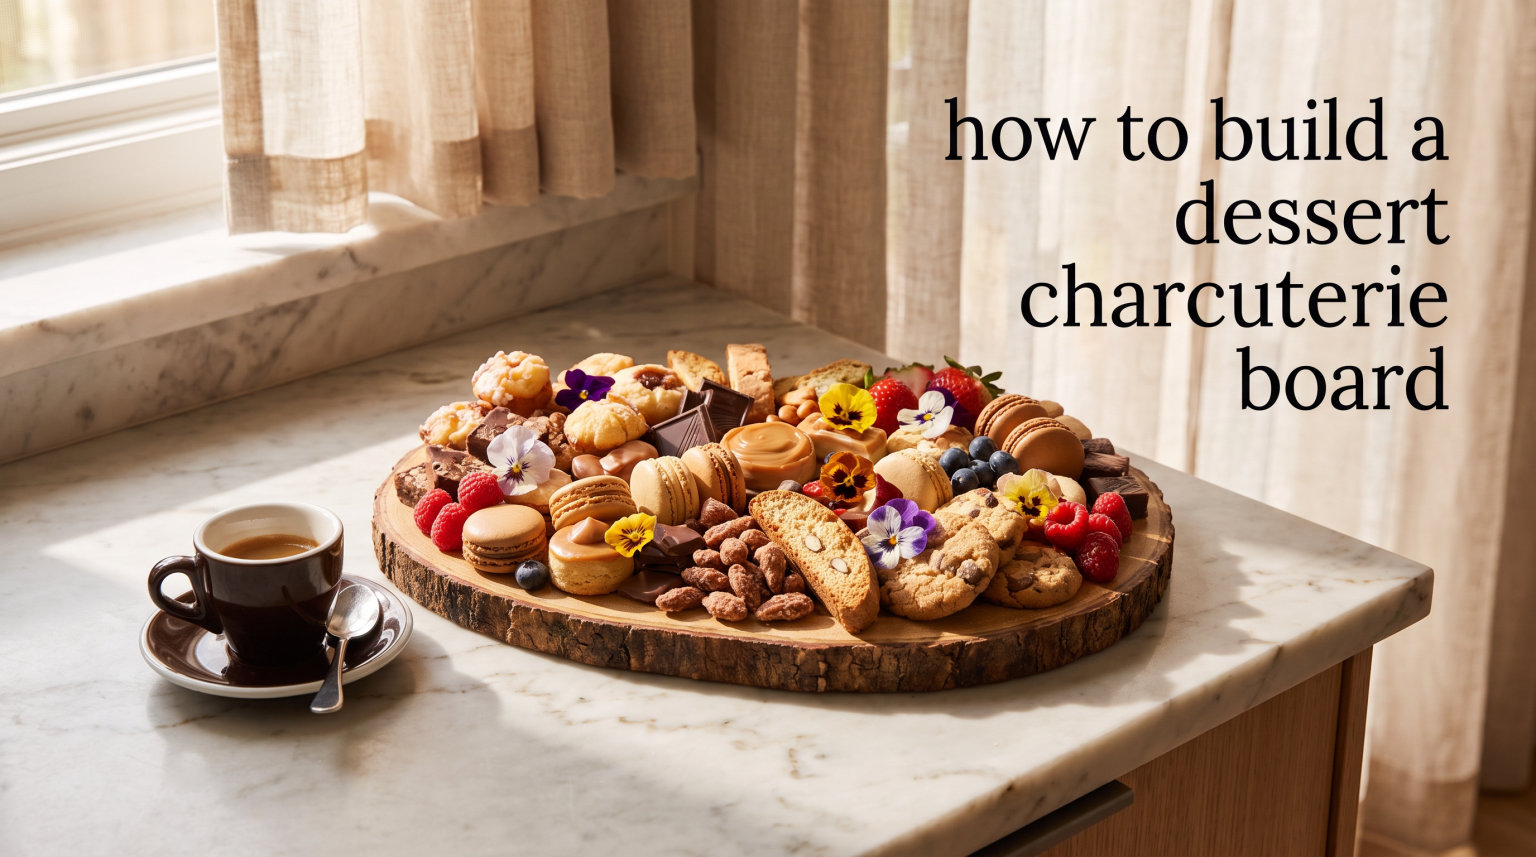
A dessert charcuterie board turns your favorite sweets into a stunning spread that looks as good as it tastes. Whether you are hosting a birthday party, a holiday gathering, or a casual weekend get-together, learning how to build a dessert charcuterie board gives you a show-stopping centerpiece with surprisingly little effort.
At 7ate9 Bakery, we have built hundreds of dessert boards for events of every size. We have learned what flavors work together, what textures keep guests coming back, and what mistakes make a board look flat instead of fabulous. This guide shares everything we have figured out so your next board turns out picture-perfect.
You will learn exactly what to put on your board, step-by-step assembly instructions, professional arrangement techniques, seasonal theme ideas, and the common mistakes to avoid. By the end, you will be ready to create a dessert grazing board that rivals anything you have seen on social media.
Table of Contents
What Is a Dessert Charcuterie Board?
A dessert charcuterie board is a shared platter of sweet treats arranged for visual impact and easy grazing. It borrows the presentation style of traditional savory charcuterie but swaps meats and cheeses for cookies, chocolates, fresh fruit, brownies, truffles, and dips.
The concept originated from the classic French charcuterie tradition of curing and presenting meats. Over the past few years, home entertainers and bakeries adapted the format for sweets. The result is a dessert experience that encourages sampling, sharing, and conversation.
What makes a dessert charcuterie board special is the combination of variety and accessibility. Guests can try small portions of many different treats rather than committing to one large dessert. This makes it perfect for parties where people have different preferences and dietary needs.
You do not need professional training or expensive equipment to create one. A wooden cutting board, a thoughtful selection of treats, and a few arrangement tricks are all it takes. The rest is about balancing colors, textures, and flavors in a way that feels abundant and inviting.
What to Put on Your Dessert Charcuterie Board
Learning how to build a dessert charcuterie board starts with choosing the right components. A great board balances five categories: fresh fruit, store-bought sweets, homemade baked goods, dips, and crunchy garnishes. Each category adds a different texture, color, and flavor dimension.
Fresh Fruits and Berries
Fresh fruit adds natural sweetness, bright color, and a refreshing contrast to rich desserts. Strawberries, raspberries, blackberries, and blueberries are classic choices that pair beautifully with chocolate and creamy dips. Arrange them in small clusters rather than scattering them randomly.
When berries are out of season during winter months, swap in alternatives that hold their own on a board. Pomegranate arils add jewel-like color and a satisfying crunch. Sliced persimmons, citrus segments, and sliced pears bring seasonal variety. Dried fruit like apricots, figs, and dates also work well when fresh options are limited.
This seasonal approach is something we emphasize at our bakery. Fresh figs in autumn and blood oranges in winter keep your boards feeling intentional rather than generic. Our customers love how a simple fruit swap transforms the entire look and taste of a spread.
Store-Bought Sweets and Treats
Store-bought treats are the backbone of an easy dessert board, and there is no shame in using them. Chocolate truffles, macarons, fudge squares, and chocolate-covered pretzels all add professional polish without requiring a single turn of the oven. Many party hosts on forums swear by Trader Joe’s for affordable board ingredients that look anything but cheap.
Look for variety in shape, size, and color when selecting packaged sweets. Round truffles, square fudge pieces, and elongated biscotti create visual interest through contrast. Aim for three to five different types of store-bought items so guests have plenty to choose from.
Choose items that hold their shape at room temperature. Avoid anything with a soft filling that might melt or weep after an hour on the board. Chocolate-dipped items should be set firmly before placing them alongside other treats.
Homemade Baked Goods
Homemade treats add a personal touch and a bakery-quality feel that store-bought items cannot match. Brownies cut into bite-sized squares, blondies, mini cheesecake bites, and small cookies all work beautifully. Cut everything into one or two bite portions so guests can sample multiple items without filling up on one thing.
As a bakery, we recommend focusing on just one or two homemade items rather than trying to make everything from scratch. This keeps preparation manageable while still giving your board that special handmade quality. Our most requested items for boards are bite-sized brownies and shortbread cookies because they hold their shape and stay fresh for hours.
If you are short on time, consider semi-homemade options. Dip store-bought pretzel rods in melted chocolate and sprinkle with crushed nuts or sea salt. Thread marshmallows and brownie chunks onto small skewers. These small touches make a big visual impact with minimal effort.
Dips, Spreads, and Sauces
Dips create a focal point on your board and give guests something to interact with. Chocolate ganache, caramel sauce, fruit compote, and cookie butter are all popular options. Place each dip in a small bowl to contain it and prevent it from spreading into neighboring treats.
Forum users consistently recommend using small ramekins or decorative bowls for dips because they make arrangement easier and cleaner. Three to four small bowls of different dips give guests options without overwhelming the board. Consider a sweet cream cheese dip, a warm chocolate sauce, and a fruit-based option for variety.
Position dips strategically rather than clustering them together. Spreading them across the board encourages guests to move around and creates natural sections. Place dippable items like strawberries, pretzels, and biscotti near each bowl so the pairing is obvious.
Crunchy Elements, Nuts, and Garnishes
Crunchy elements provide textural contrast that keeps each bite interesting. Roasted almonds, candied pecans, chocolate-covered espresso beans, and caramel popcorn all add satisfying crunch. Scatter nuts in the gaps between larger items to fill space and add visual texture.
Garnishes are the finishing touch that elevates a board from good to gorgeous. Fresh mint sprigs, edible flowers, and a light dusting of powdered sugar add color and sophistication. A sprinkle of flaky sea salt over chocolate items enhances their flavor and adds a professional bakery touch.
Do not overlook the power of a simple drizzle. A zigzag of melted chocolate over a section of the board, or a honey drizzle over fruit and nuts, creates visual movement and ties different elements together.
How to Build a Dessert Charcuterie Board (Step by Step)
Now that you have your ingredients selected, it is time to assemble. Follow these five steps to build a dessert charcuterie board that looks professionally arranged. The process works whether you are using a small board for four people or a large platter for twenty.
Step 1: Choose and Prep Your Board
Start by selecting a board that fits your gathering size. A 20 to 22 inch wooden board works well for 8 to 12 guests. For smaller groups, a 12 to 15 inch board is plenty. You can also use a marble slab, a large serving platter, or even a rimmed baking sheet covered with parchment paper.
Clean and completely dry your board before starting. Any moisture will cause cookies to soften and chocolate to bloom. If your board has a strong wood grain, a light wipe with food-safe mineral oil the day before keeps it looking its best.
Step 2: Place Your Anchor Items and Bowls
Begin with the largest items and small bowls of dip. Place three to four bowls at different points across the board, spacing them so they are not clustered in one area. These bowls act as anchors that divide the board into sections and create natural boundaries.
If you have a tall item like a small vase of flowers or a stack of macarons on a tier, place it now. Height variation is what separates a flat-looking board from a dynamic one. Odd-numbered groupings of three or five items tend to look more natural than even numbers.
Step 3: Add Larger Treats and Fruits
Fill in around your anchors with the largest treats first. Clusters of strawberries, rows of brownie bites, and groups of macarons should go in next. Place each type of item in its own zone rather than scattering everything randomly. Grouping by type makes the board look organized and intentional.
Create small piles and overlapping layers rather than placing items in flat rows. Brownie squares stacked slightly on top of each other look abundant and inviting. Fan out cookie slices or arrange truffles in a curved line that leads the eye across the board.
Step 4: Fill Gaps with Medium and Small Items
With large items in place, fill the remaining gaps with medium and small treats. Chocolate-covered pretzels, truffles, and cookie bites fit naturally into the spaces between larger items. This is also where you tuck in clusters of berries and small piles of nuts.
The goal is to eliminate empty space without overcrowding. A board that looks slightly overflowing feels generous and abundant. If you can see large patches of bare board, add more items or use garnishes like mint sprigs to fill the visual gaps.
Step 5: Add Garnishes and Final Touches
Finish with garnishes that add color and polish. Tuck fresh mint leaves between fruit clusters. Scatter edible flowers across the board. Dust powdered sugar over brownies and cookies just before serving. Add a final drizzle of chocolate or caramel over one section for visual movement.
Step back and look at the board from a distance. Check for color balance, making sure no single color dominates one side. Adjust any items that look out of place. Your dessert charcuterie board is now ready to serve.
Arrangement and Presentation Tips
The difference between an average board and a stunning one comes down to arrangement technique. These professional tips will help you create visual flow, balance, and abundance every single time.
Create Visual Flow with S-Curves
An S-curve is an arrangement technique where items follow a gentle curved path across the board rather than straight lines. This creates a natural visual flow that guides the eye from one end to the other. You can create an S-curve with a row of strawberries, a line of macarons, or a ribbon of chocolate-dipped treats.
The curve does not need to be perfect. Even a slight arc or diagonal placement breaks up the grid-like feel that makes boards look stiff. Trust your eye and adjust items until the arrangement feels organic.
Use Height Variation and Layering
Flat boards look lifeless. Build height by stacking items, using small bowls of different sizes, and placing some treats on small pedestals or overturned cups hidden beneath other items. A tiered serving piece in the center adds instant dimension.
Layering also creates depth. Place smaller items slightly overlapping larger ones. Let a few strawberry tops peek out from behind a row of brownies. This overlapping technique mimics how food naturally falls and makes the board feel abundant rather than rigidly arranged.
Balance Colors Across the Board
Color balance is what makes a board photogenic. Distribute bright colors like red strawberries, green mint, and purple blackberries evenly rather than clustering them in one corner. If one side feels heavy on brown and beige items, add a pop of fresh fruit or a sprinkle of colorful candies.
A good rule of thumb is to step back every few minutes during assembly and scan for color gaps. Your eye will catch imbalances faster than you think. This is a technique our bakery team uses on every single board we build for events.
The 3-3-3 Rule for Charcuterie Boards
The 3-3-3 rule is a simple formula that guarantees a balanced board. Choose three types of meat or savory items, three types of cheese, and three types of accompaniments like fruit, nuts, or crackers. For a dessert board, adapt the rule to three types of chocolate, three types of baked goods, and three types of fresh fruit.
This formula ensures variety without overwhelming you with choices. It also creates natural pairing opportunities. A guest can grab a brownie, a strawberry, and a truffle and have a perfectly balanced three-bite tasting experience.
Fill Every Gap Generously
A sparse board is the most common mistake beginners make. Every visible patch of bare board should be filled with something. Use small items like nuts, dried fruit, or chocolate-covered espresso beans to fill tight spaces between larger treats.
The psychological effect of a full board is powerful. Guests perceive abundance and generosity, which makes the spread feel more special. When in doubt, add more rather than less.
Dessert Board Theme Ideas for Every Occasion
Themed dessert boards are one of the most popular requests we get at the bakery. A theme gives your board a cohesive look and makes it feel purpose-built for the occasion. Here are some of our favorite theme ideas for 2026 and beyond.
Valentine’s Day Love Board
A Valentine’s dessert board centers on red and pink tones. Use strawberries, raspberry macarons, red velvet brownies, and white chocolate-dipped treats with pink sprinkles. A small bowl of chocolate ganache in the center ties everything together for dipping.
Christmas Holiday Board
Christmas boards lean into red, green, and white. Think peppermint bark, green pistachio cookies, white chocolate pretzels, and fresh cranberries scattered as garnish. A dusting of powdered sugar over the whole board creates a snowy effect that looks magical.
S’mores Board
S’mores boards are a forum favorite and a year-round crowd pleaser. Arrange graham crackers, marshmallows, chocolate bars, and chocolate-dipped treats in sections. Add small jars of Nutella or peanut butter for extra dipping options. This board pairs perfectly with an outdoor fire pit.
Seasonal Autumn Board
Autumn boards embrace warm spices and earthy colors. Pumpkin spice cookies, apple slices with caramel dip, maple pecans, and chocolate-covered pretzel rods fit the season beautifully. Fresh figs and pomegranate arils add color that feels right for the harvest season.
Elegant New Year’s Eve Board
For New Year’s Eve, go glamorous with gold and black accents. Chocolate truffles, gold-dusted macarons, blackberry clusters, and champagne-flavored candies create a sophisticated palette. Edible gold leaf on a few key items adds a luxurious touch.
Common Mistakes to Avoid
Even experienced hosts make mistakes when building dessert boards. Here are the five most common errors and how to prevent them.
First, avoid building your board too far in advance. Moisture from fresh fruit will make cookies and brownies soggy within a few hours. Assemble your board no more than two hours before serving, and add delicate items like fresh berries and powdered sugar at the very last minute.
Second, do not overcrowd the board so much that guests cannot easily pick up items. Leave enough space between treats for fingers or tongs to reach in without disturbing the arrangement. Function matters as much as appearance.
Third, avoid using only one color or texture. A board of all brown items looks flat no matter how well arranged. Always include contrasting colors and at least one crunchy element to break up soft textures.
Fourth, do not forget to provide serving utensils and small plates nearby. Guests need a way to serve themselves without using their hands directly on shared food.
Fifth, never place temperature-sensitive items like chocolate near a heat source or in direct sunlight. Chocolate blooms and softens quickly, which ruins both appearance and taste.
FAQs
What is the 3-3-3 rule for charcuterie boards?
The 3-3-3 rule means choosing three types of one category, three of another, and three of a third. For a dessert board, this translates to three types of chocolate, three types of baked goods, and three types of fresh fruit. This formula guarantees variety and balanced pairings without overwhelming your board.
What to include on a dessert charcuterie board?
Include a mix of fresh fruit (strawberries, berries, grapes), store-bought sweets (truffles, macarons, fudge), homemade baked goods (brownies, cookies, blondies), dips (chocolate ganache, caramel, fruit compote), and crunchy garnishes (nuts, chocolate-covered pretzels, edible flowers). Aim for five categories with three to five items in each.
How to make a dessert grazing board?
Start by placing small bowls of dip at different points on a clean wooden board. Add large anchor items like clusters of fruit and stacks of brownies. Fill gaps with medium treats like truffles and chocolate-covered pretzels. Add nuts and small items to fill remaining spaces. Finish with fresh mint and a dusting of powdered sugar. Serve within two hours of assembly.
What are 5 things to avoid on a charcuterie board?
Avoid these five things: items that melt or weep at room temperature, strongly flavored foods that overpower sweets, overcrowding that prevents easy serving, assembling the board too far in advance which causes sogginess, and placing all items flat without height variation or layering.
Can I make a dessert charcuterie board ahead of time?
You can prep ingredients ahead of time but should assemble the board no more than two hours before serving. Cut fruits and bake goods in advance and store them separately in airtight containers. Add fresh berries, dips, and garnishes right before guests arrive to prevent sogginess and keep everything looking fresh.
Wrapping Up
Knowing how to build a dessert charcuterie board gives you a go-to dessert solution for any gathering. Choose five categories of treats, follow the five-step assembly process, use S-curves and height variation for visual flow, and add garnishes for that bakery-quality finish.
The best part is that no two boards ever look the same. Experiment with seasonal fruits, different themes, and your favorite homemade treats. Each board you build will look better than the last, and your guests will never stop being impressed.