
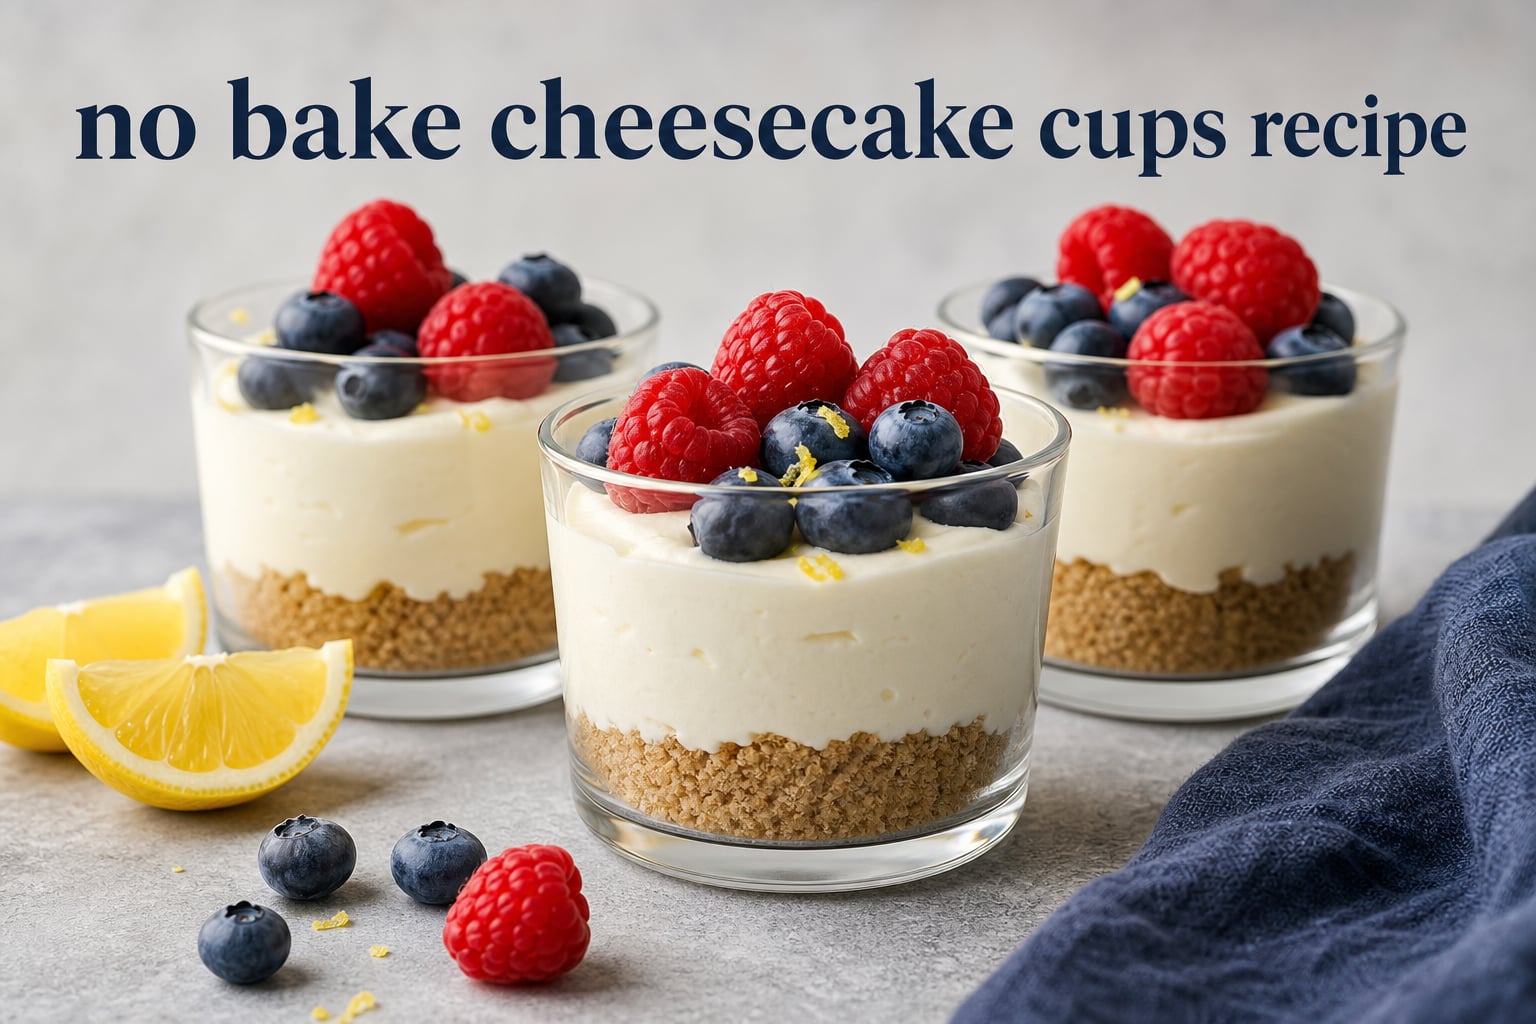
This no bake cheesecake cups recipe makes individual desserts with a buttery graham cracker crust and a light, tangy cream cheese filling. They are an easy no bake dessert for warm days, potlucks, birthdays, or any gathering when slicing a full cheesecake sounds like one job too many.
Each cup chills in the refrigerator instead of baking, so the filling becomes a spoonable cheesecake mousse rather than a dense baked cake. I like the built-in portion control: guests can take a cup, choose a topping, and go back for another only if they want one.
The method below explains the ingredients, the mixing order that helps the filling set, and the fixes for the two problems people mention most often: a runny filling and a soggy crust. Plan on at least 3 hours of chilling, or make the cups the day before serving.
Table of Contents
No Bake Cheesecake Cups Recipe: A Cold, Whipped Filling Sets Without an Oven
No bake cheesecake cups are individual desserts made from crumbs, a cream cheese filling, and toppings, all chilled until firm. The key is not a mystery ingredient; it is the contrast between softened cream cheese and very cold heavy whipping cream whipped to stiff peaks.
Full-fat, brick-style cream cheese supplies structure because it contains less water than spreadable cream cheese from a tub. Powdered sugar dissolves smoothly, vanilla and lemon add flavor, and folded whipped cream gives the filling its fluffy body.
Quick answer: For a filling that holds its shape, beat room-temperature cream cheese until smooth, whip cold cream to stiff peaks in a separate bowl, then fold the two mixtures together gently. Refrigeration firms the mixture after assembly.
Measured Ingredients Make 10 Individual Cheesecake Cups
This recipe makes about 10 small dessert cups, depending on whether you use 4-ounce or 5-ounce cups and how high you pipe the filling. A clear cup shows the crumb layer nicely, but any food-safe individual cup with a lid works for transport.
Fine Graham Cracker Crumbs Create the Best No-Bake Crust
- 1 1/2 cups graham cracker crumbs
- 2 tablespoons granulated sugar
- 6 tablespoons unsalted butter, melted and cooled slightly
- 1 small pinch of fine salt
Digestive biscuits and Biscoff cookies are practical alternatives when graham crackers are unavailable. For a gluten-free crust, choose gluten-free graham-style crumbs or certified gluten-free cookies, then use the same amount of melted butter.
Full-Fat Cream Cheese and Cold Cream Make a Stable Filling
- 16 ounces full-fat brick-style cream cheese, softened at room temperature
- 3/4 cup powdered sugar, sifted if lumpy
- 1 teaspoon vanilla extract
- 1 tablespoon fresh lemon juice
- 1 1/4 cups cold heavy whipping cream
Use freshly opened heavy whipping cream if possible; it must be cold enough to whip well. Lemon juice should brighten rather than dominate the flavor, so add it with the vanilla before you taste the smooth cream cheese base.
Fresh Toppings Keep the Finished Cups Bright and Customizable
- Fresh berries, sliced peaches, or chopped mango
- Berry sauce, lemon curd, or chocolate ganache
- Chocolate shavings, toasted coconut, or crushed cookies
- Whipped cream and a little lemon zest
Keep wet toppings separate until close to serving. That one small habit preserves a distinct graham cracker crust instead of letting fruit juices soften it.
How to Make No Bake Cheesecake Cups from Scratch in Five Steps
The process is simple: make and chill the crust, mix the cream cheese base, whip the cream, fold, then portion and chill. Work with two bowls so the whipped cream stays airy until it joins the filling.
Fine, Even Crumbs Make a Firm Crust
Step 1: Stir the graham cracker crumbs, granulated sugar, salt, and melted butter until every crumb looks evenly moistened, like damp sand. Divide the mixture among 10 dessert cups and press it down with the bottom of a small glass or spoon.
Press firmly enough to make a level layer, but do not compact it into a hard block. Refrigerate the cups while preparing the filling so the butter can firm up.
A Smooth Cream Cheese Base Prevents Lumps
Step 2: Beat the softened cream cheese by itself until it looks completely smooth. Add powdered sugar, vanilla, and lemon juice, then beat again until the mixture is creamy and no dry sugar remains around the bowl.
Room-temperature ingredients matter here. Cold cream cheese can stay lumpy even after a long mixing time, and those small lumps will show in every individual cheesecake cup.
Stiff Peaks Give the Filling Its Structure
Step 3: In a separate chilled bowl, whip the cold heavy whipping cream until stiff peaks form. When you lift the whisk, the peak should stand upright or bend only slightly at the tip.
Stop once the cream is at stiff peaks. Underwhipped cream gives a loose filling; overwhipped cream can turn grainy and start moving toward butter.
Gentle Folding Keeps the Cheesecake Mousse Light
Step 4: Fold about one-third of the whipped cream into the cream cheese mixture to loosen it. Fold in the remaining whipped cream with a spatula, scraping from the bottom and turning the mixture over until no white streaks remain.
Do not beat after the whipped cream goes in. Folding protects the air that gives whipped cream cheesecake its soft, mousse-like texture.
Chilling Turns the Filled Cups into a Spoonable Dessert
Step 5: Spoon or pipe the filling over the chilled crusts, leaving a little room for toppings. Cover the cups and refrigerate for at least 3 hours, then add dry or fresh toppings shortly before serving.
Warning: Do not try to speed up the set by freezing freshly assembled cups for a short burst. Uneven freezing can make the filling icy at the edges while the center remains soft; steady refrigerator chilling gives a better texture.
Three Hours Is the Minimum Chilling Time for No Bake Cheesecake Cups
No bake cheesecake cups need at least 3 hours in the refrigerator to set, while an overnight chill gives the neatest spoonful and the most dependable result for a party. The filling is safe to make ahead because its structure comes from cold whipped cream and chilled cream cheese, not from baking.
If the cups are in wider, shallower containers, they may feel firm earlier than deep cups, but 3 hours remains the sensible minimum. Cover them during chilling so they do not pick up refrigerator odors or dry out on top.
For a dinner party, make the crust and filling the day before, fill the cups, and hold the garnishes separately. Add berries, sauces, and crunchy cookie pieces when you are ready to put them on the table.
Fresh Fruit, Sauces, and Crunchy Finishes Work Best as Cheesecake Cup Toppings
The best toppings for no bake cheesecake cups balance the rich cream cheese filling with fruit, tartness, chocolate, or crunch. Set out a few choices and these party dessert cups can suit several tastes without making separate desserts.
Summer Berries Add a Tart, Fresh Contrast
Strawberries, blueberries, raspberries, and blackberries pair naturally with a summer cheesecake. Use whole small berries or sliced larger berries, and pat washed fruit dry before adding it so excess water does not run into the filling.
Stone Fruit and Tropical Fruit Add a Softer Finish
In warmer months, diced peaches, nectarines, mango, or pineapple add color and sweetness. A small amount of lemon zest makes these fruit toppings taste fresher without adding more liquid to the cup.
Chocolate and Cookie Toppings Add a Richer Dessert Note
For a chocolate version, drizzle cooled ganache over fully chilled cups, then finish with chocolate shavings or cookie crumbs. Toasted coconut, crushed Biscoff, and a small spoonful of berry sauce are other simple ways to change the flavor profile.
Serving tip: Keep a few cups untopped for guests who prefer a less-sweet dessert. The lemony cream cheese filling and graham cracker crust are satisfying on their own.
Common No Bake Cheesecake Cup Problems Have Simple Fixes
A Runny Filling Usually Needs Better Whipping or More Chilling
If your no bake cheesecake is runny, check the two structural ingredients first: use brick-style full-fat cream cheese and whip cold heavy cream to stiff peaks. A soft tub-style cream cheese or cream stopped at soft peaks adds too much looseness to hold the filling up.
If the mixture was made correctly but still feels soft, cover and refrigerate it longer before serving. Do not add extra powdered sugar as a rescue; it makes the dessert sweeter without reliably giving it the chilled structure it needs.
A Lumpy Filling Means the Cream Cheese Was Too Cold
Let the cream cheese sit at room temperature until it yields slightly to a finger press, then beat it smooth before adding other ingredients. If you notice small lumps early, keep mixing the cream cheese base before folding in whipped cream.
A Soggy Crust Needs Drier Toppings and Firmer Pressing
Mix every crumb with butter, press the layer evenly, and chill it before filling. Add fruit and loose sauce just before serving, especially if the cups will sit overnight.
A Too-Sweet Cup Benefits from a Tart or Plain Finish
Use the lemon juice in the filling and choose raspberries, blackberries, or unsweetened fruit as a topping. You can also skip sweet sauces and use a little zest, a few toasted nuts, or plain whipped cream.
Refrigeration, Freezing, and Lidded Cups Keep Cheesecake Cups Ready to Serve
Store covered no bake cheesecake cups in the refrigerator and serve them cold. For the best crust texture, add fresh fruit, sauces, and crunchy decorations on the day you plan to serve the cups.
You can freeze no bake cheesecake cups without fresh toppings. Cover each cup tightly, freeze until firm, and thaw it overnight in the refrigerator; the texture may be a little softer after thawing, but the dessert will still be enjoyable.
For transport, use cups with snug lids and keep them in a cooler with cold packs. Carry sauces and berries in separate containers, then top the cups at the destination to protect both the appearance and the crust.
No Bake Cheesecake Cups Recipe FAQs Give the Short Answers
How do you make no bake cheesecake cups from scratch?
Mix graham cracker crumbs with melted butter and press them into individual cups. Beat softened brick-style cream cheese with powdered sugar, vanilla, and lemon juice, fold in heavy cream whipped to stiff peaks, fill the cups, and chill for at least 3 hours.
What is the best no bake cheesecake filling?
A stable no bake cheesecake filling uses full-fat brick-style cream cheese, powdered sugar, flavorings, and cold heavy cream whipped to stiff peaks. Folding the whipped cream into a smooth cream cheese base creates a light filling that firms when refrigerated.
Can you freeze no bake cheesecake cups?
Yes. Freeze the cups without fresh fruit or sauces, covered tightly, then thaw them overnight in the refrigerator. The filling may soften slightly after thawing, so add toppings only after the cups are thawed.
How long do no bake cheesecakes take to set?
Individual no bake cheesecake cups need at least 3 hours in the refrigerator to set. For the firmest filling and easiest make-ahead serving, chill them overnight.
What toppings go well with no bake cheesecake?
Fresh berries, peaches, mango, berry sauce, lemon curd, chocolate ganache, toasted coconut, chocolate shavings, and crushed cookies all pair well with no bake cheesecake. Add wet fruit and sauces near serving time so the crust stays crisp.
Can you use cool whip instead of whipped cream in no bake cheesecake?
Yes, a whipped topping can replace freshly whipped heavy cream, though the flavor and texture will be different. If you use it, fold it into the cream cheese base gently and keep the cups chilled until serving.
No Bake Cheesecake Cups Are a Flexible Make-Ahead Dessert
This no bake cheesecake cups recipe gives you a crisp crumb base, a creamy filling, and plenty of room to match the topping to the occasion. Start with cold heavy cream, softened brick-style cream cheese, and enough refrigerator time, and the process stays pleasantly simple.
Make the cups the day before when you need a low-stress dessert, then finish them with fruit or chocolate just before serving. With individual portions, a make-ahead plan, and no oven time, they fit everything from a quiet dinner to a larger celebration.