
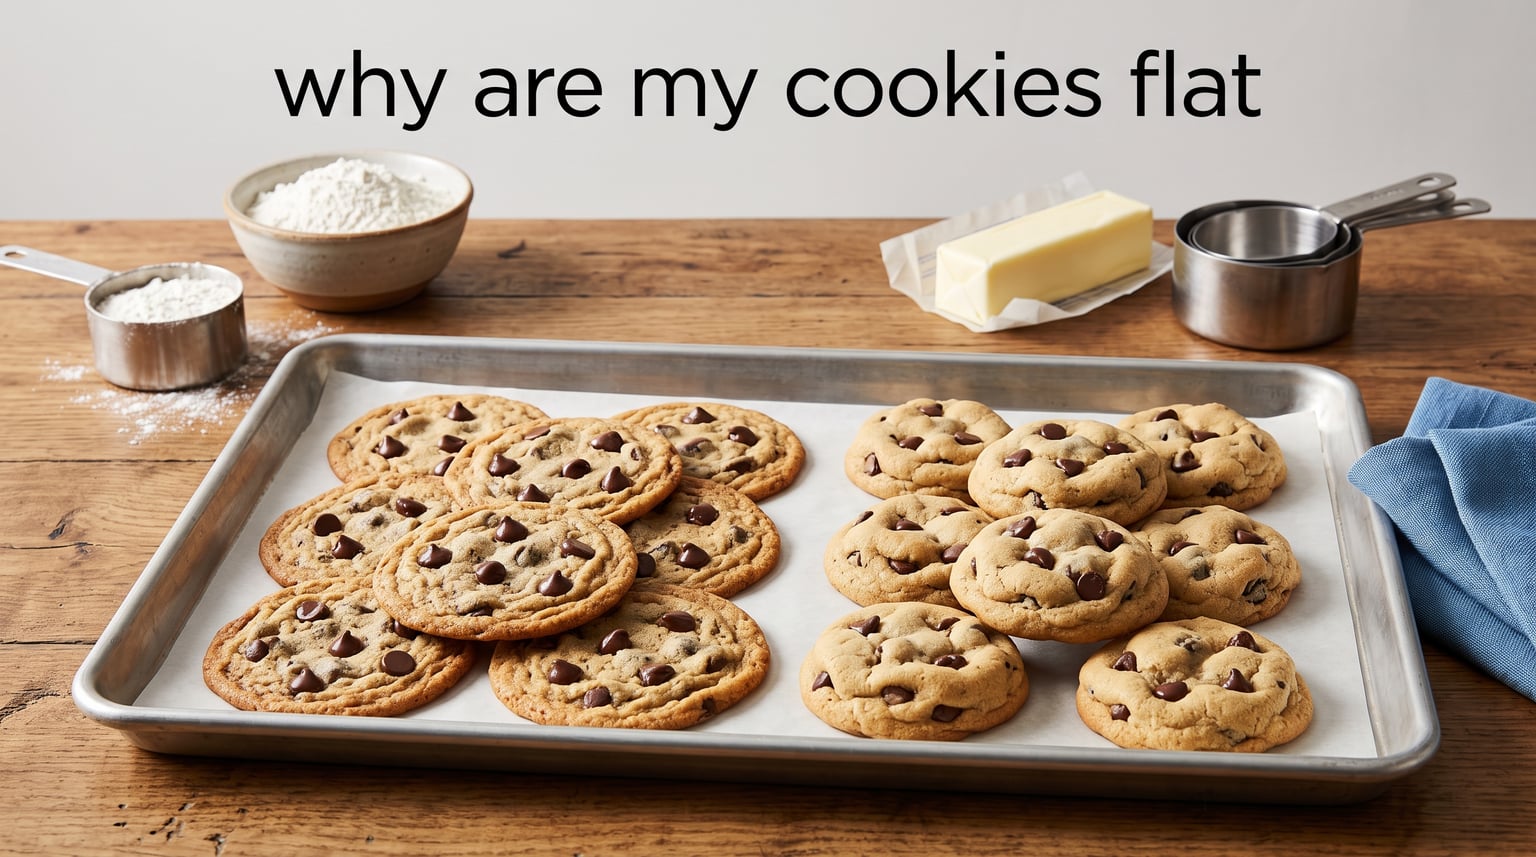
You pulled your cookies from the oven expecting thick, chewy rounds. Instead, you got flat, crispy disks that spread across the entire baking sheet. I have been there, and it is frustrating. If you are wondering why are my cookies flat, you are not alone. This guide will walk you through the seven most common reasons your cookies spread too much and exactly how to fix each one.
Flat cookies happen when the fat in your dough melts before the structure sets. Butter, flour, chilling time, and even your kitchen temperature all play a role. Let’s break down each cause so you can diagnose what went wrong and bake thicker, fluffier cookies next time.
Table of Contents
The 7 Main Reasons Why Are My Cookies Flat
Most flat cookies trace back to one of these seven causes:
Your butter was too warm – Melted or overly soft butter causes cookies to spread rapidly.
You measured flour incorrectly – Too little flour means there’s not enough structure to hold the cookie’s shape.
You skipped chilling the dough – Warm dough spreads before the edges set.
Your leavening agents expired – Old baking soda or powder won’t help cookies rise.
You overmixed the dough – Overmixing develops gluten and over-creams butter and sugar.
Your kitchen was too warm – A hot kitchen warms the dough before baking.
The recipe ratios were off – Too much sugar or butter, or too little flour, causes spreading.
Let’s examine each of these issues in detail so you can identify exactly what happened with your batch.
Butter Temperature for Perfect Cookies
Butter temperature is the number one reason cookies turn out flat. When butter melts in the oven, it releases steam and creates spread. If that butter is already too warm when it hits the pan, it melts almost immediately, causing cookies to spread before the structure can set.
What Is the Ideal Butter Temperature?
The sweet spot for butter is 65-68°F. At this temperature, butter is soft enough to cream with sugar but still holds its shape. You should be able to press your finger into the butter and leave an indentation, but the butter shouldn’t be squishy or greasy.
Here’s how to test butter temperature:
Press your finger into the butter. It should give slightly but not feel mushy.
If the butter leaves a greasy residue on your finger, it’s too warm.
If your finger bounces off and can’t make an indentation, it’s too cold.
Use an instant-read thermometer for precision – aim for 65-68°F.
What Happens When Butter Is Too Warm?
When butter is too warm – above 70°F – it becomes greasy and starts to separate. This means the fat is already breaking down before you even put the cookies in the oven. Once that warm dough hits the heat, the butter melts almost instantly, causing cookies to spread across the sheet like pancake batter.
Melted butter creates an entirely different cookie texture. Some recipes call for melted butter intentionally, but those recipes adjust the flour and sugar ratios accordingly. If a recipe calls for room temperature butter and you use melted butter, your cookies will spread too much.
What Happens When Butter Is Too Cold?
Cold butter creates the opposite problem. Butter that’s straight from the refrigerator (around 35-40°F) won’t cream properly with sugar. You’ll end up with chunks of cold butter in your dough that don’t incorporate evenly. This can cause cookies to have pockets of dense, greasy spots or to not spread enough.
To bring butter to room temperature quickly, cut it into tablespoons and let it sit on the counter for 30-60 minutes. Don’t microwave it – that creates hot spots and partial melting.
How to Measure Flour Correctly
Flour measurement is the second most common reason for flat cookies. If you scoop flour directly from the bag with your measuring cup, you’re probably adding too much flour – or worse, too little. The amount of flour in a cup can vary by up to 50% depending on how you fill it.
The Fluff, Spoon, and Level Method
Here’s the proper way to measure flour without a scale:
Fluff the flour – Use a spoon or fork to stir the flour in its container. Flour settles and compacts over time, so fluffing aerates it.
Spoon it into the cup – Don’t scoop. Use a spoon to gently fill your measuring cup. Overfill slightly.
Level it off – Use the straight edge of a knife to level the flour with the rim of the cup. Don’t shake or tap.
This method gives you about 4.5 ounces of flour per cup, which is what most recipes expect.
Why a Kitchen Scale Is Better
If you bake often, a kitchen scale is worth the investment. Weighing flour eliminates guesswork. Most professional recipes list flour by weight (usually 120-130 grams per cup of all-purpose flour). With a scale, you get the same amount every single time, no matter how packed or fluffy your flour is.
Too little flour means there’s not enough structure to hold the cookie’s shape. The cookie spreads before it sets. Too much flour makes cookies cakey and dry instead of chewy.
Why Chilling Cookie Dough Matters
Chilling cookie dough does more than just firm up the butter. It allows the flour to fully hydrate, the flavors to meld, and the fat to solidify so cookies don’t spread as much in the oven. If you skip chilling, you’re much more likely to end up with flat cookies.
How Long Should You Chill Cookie Dough?
The minimum chill time is 30 minutes. This gives the butter time to firm up enough to slow spreading. However, for the best results, chill your dough for at least 1-2 hours or even overnight.
Here’s what different chill times do:
30 minutes – Butter firms up slightly, basic spread control.
1-2 hours – Butter solidifies, flour hydrates, better texture.
24 hours – Flavors develop, texture improves significantly.
48-72 hours – Maximum flavor development, thick and chewy texture.
The Freezer Shortcut
If you forgot to chill your dough and need to bake soon, pop the dough in the freezer for 15-20 minutes. This isn’t ideal, but it helps more than skipping chilling entirely. The butter needs time to solidify before the heat hits it.
Some bakers even freeze individual cookie dough balls for 10 minutes right before baking. This quick blast of cold helps cookies hold their shape even when the butter is soft.
Leavening Agents and Why They Matter
Baking soda and baking powder are what help cookies rise and develop their texture. But these ingredients lose their potency over time. If your leavening agents are expired, your cookies won’t rise – they’ll spread flat instead.
How to Tell If Baking Soda Is Fresh
Baking soda typically lasts 6 months to a year after opening. Test it by adding a spoonful to a small bowl of vinegar or lemon juice. If it fizzes vigorously, it’s still active. If there’s little to no reaction, replace it.
How to Tell If Baking Powder Is Fresh
Baking powder loses effectiveness after about 6-12 months. Test it by adding a teaspoon to a small bowl of hot water. If it bubbles actively, it’s still good. If the reaction is weak or nonexistent, buy a fresh container.
Even if your baking soda and powder haven’t technically expired, they may have absorbed moisture from the air and lost potency. Store them in airtight containers in a cool, dry place.
How Leavening Works in Cookies
Baking soda reacts with acidic ingredients like brown sugar, molasses, or chocolate. This reaction creates carbon dioxide bubbles that help cookies rise and develop a lighter texture.
Baking powder contains both an acid and a base, so it reacts with liquid and heat. Double-acting baking powder works twice – once when mixed with liquid and again when heated in the oven.
If a recipe calls for both, don’t substitute one for the other. The ratio is calculated for proper rise and spread.
Avoiding Overmixing and Gluten Development
Overmixing cookie dough develops gluten. While gluten is great for bread, it makes cookies tough and encourages spreading. Over-creaming butter and sugar is one of the most common mistakes home bakers make.
What Happens When You Overmix?
When you beat butter and sugar too long, you incorporate too much air. This makes the dough fluffy and light, which sounds good – but that aeration causes cookies to spread in the oven. The air bubbles expand with heat, pushing the dough outward before the structure sets.
Signs of overmixed dough include:
Dough looks whipped or mousse-like instead of creamy.
Dough is very sticky and soft even after chilling.
Cookies spread thin and have a crisp, dry texture.
Proper Mixing Technique
Cream butter and sugar just until combined and slightly fluffy – usually 2-3 minutes on medium speed. Stop as soon as the mixture is pale and the sugar is incorporated.
When you add flour, mix just until the flour disappears. Do not keep mixing. The less you work the flour, the more tender your cookies will be.
Quick Fixes for Flat Cookies
If your cookies are spreading and you need to rescue the remaining dough, try these quick adjustments:
The Test Cookie Method
Before baking an entire sheet, bake one test cookie. This shows you how the dough will behave without ruining a whole batch. If that cookie spreads too much, you can adjust the remaining dough before baking.
Add More Flour
If your dough is sticky, soft, and spreading too much, add flour 1 tablespoon at a time until the dough holds its shape better. Be careful not to add too much, or your cookies will become dry and cakey.
Lower the Oven Temperature
A lower oven temperature gives cookies more time to set before the butter melts completely. Try baking at 325°F instead of 350°F or 375°F. The cookies will take a few minutes longer, but they’ll spread less and develop a thicker texture.
Chill Longer or Freeze Before Baking
If you chilled for 30 minutes and cookies still spread, try chilling for another hour. Or freeze individual dough balls for 10 minutes before putting them in the oven. The colder the fat, the less spreading you’ll get.
What to Do With Flat Cookies
Already baked flat cookies? Don’t throw them out. Use them for ice cream sandwiches, crumble them over yogurt, or use them as a pie crust. Flat cookies are still delicious – they just have a different texture than you intended.
Additional Factors That Affect Cookie Spread
Beyond butter, flour, and chilling, several other factors influence how much your cookies spread:
Baking Sheet Preparation
Greased baking sheets encourage spreading. The slick surface lets dough slide outward as the butter melts. Use parchment paper or a silicone mat instead. These create a slight barrier that helps cookies hold their shape.
Cookie Spacing
Cookies need room to spread, but placing them too close together can cause them to merge. Leave at least 2 inches between dough balls. If cookies are touching, they’ll bake together into one giant, thin cookie.
Oven Temperature
An oven that runs too hot causes butter to melt too quickly. Use an oven thermometer to verify your oven’s actual temperature. Many ovens are off by 25-50°F from the dial setting.
Also, let your oven fully preheat. Putting cookies in before the oven reaches temperature means they’ll bake at a lower heat longer, which encourages spreading.
Sugar Ratios
Too much sugar causes spreading because sugar liquefies in the oven. Brown sugar contains more moisture than white sugar, so recipes high in brown sugar tend to produce chewier, thicker cookies. If your cookies spread too much, try reducing the sugar slightly or increasing the brown sugar ratio.
Cookie Scoop Size
Larger cookie dough balls spread more because they have more mass and take longer to set. Smaller scoops (about 1.5 tablespoons) bake faster and hold their shape better. If you’re struggling with flat cookies, try using a smaller scoop.
Altitude Adjustments
At high altitudes (above 3,500 feet), lower air pressure affects how cookies bake. Liquids evaporate faster, and leavening agents work more quickly. For high-altitude baking, reduce sugar slightly, increase flour by a tablespoon per cup, and raise the oven temperature by 15-25°F.
FAQs
How do I keep my cookies from being flat?
To prevent flat cookies: (1) Use butter at 65-68°F, not melted. (2) Measure flour correctly with the fluff, spoon, and level method. (3) Chill dough for at least 30 minutes. (4) Check that baking soda and baking powder are fresh. (5) Don’t overmix the dough. (6) Use parchment paper instead of greased pans. (7) Bake at the correct oven temperature.
What to do with cookies that are flat?
Flat cookies still taste great. Use them for ice cream sandwiches, crumble them as a topping for yogurt or pudding, crush them into a pie crust, or layer them in a trifle. You can also sandwich them with frosting or ganache for a layered cookie treat.
What makes cookies fluffy instead of flat?
Thick, fluffy cookies come from: (1) Room temperature butter (65-68°F). (2) Proper flour measurement using a scale or fluff-spoon-level. (3) Chilling dough to firm up the fat. (4) Fresh leavening agents. (5) Minimal mixing to avoid over-creaming. (6) Lower oven temperature (325°F) for slower baking. (7) Cold dough balls going into a fully preheated oven.
How to get cookies to rise more?
For more rise in cookies: (1) Make sure baking soda and baking powder are fresh – test them if unsure. (2) Use the correct amount of leavening as specified in the recipe. (3) Don’t overmix, which collapses air bubbles. (4) Chill dough so butter melts slower, giving leavening time to work. (5) Bake at the right temperature – too low means slow spread, too hot means quick spread before rise sets.
Conclusion
Flat cookies happen to every baker at some point. Now you understand why are my cookies flat – it usually comes down to butter temperature, flour measurement, chilling time, or expired leavening agents. The good news is each of these problems has a simple fix.
Start by checking your butter temperature with the finger test. Measure flour with the fluff, spoon, and level method. Chill your dough for at least 30 minutes. Test your baking soda and powder for freshness. And mix just until combined – no more.
Next time you bake, try the test cookie method. Bake one cookie first to see how the dough behaves. If it spreads too much, adjust before baking the whole batch. With these tips, you’ll bake thick, chewy cookies every time.