
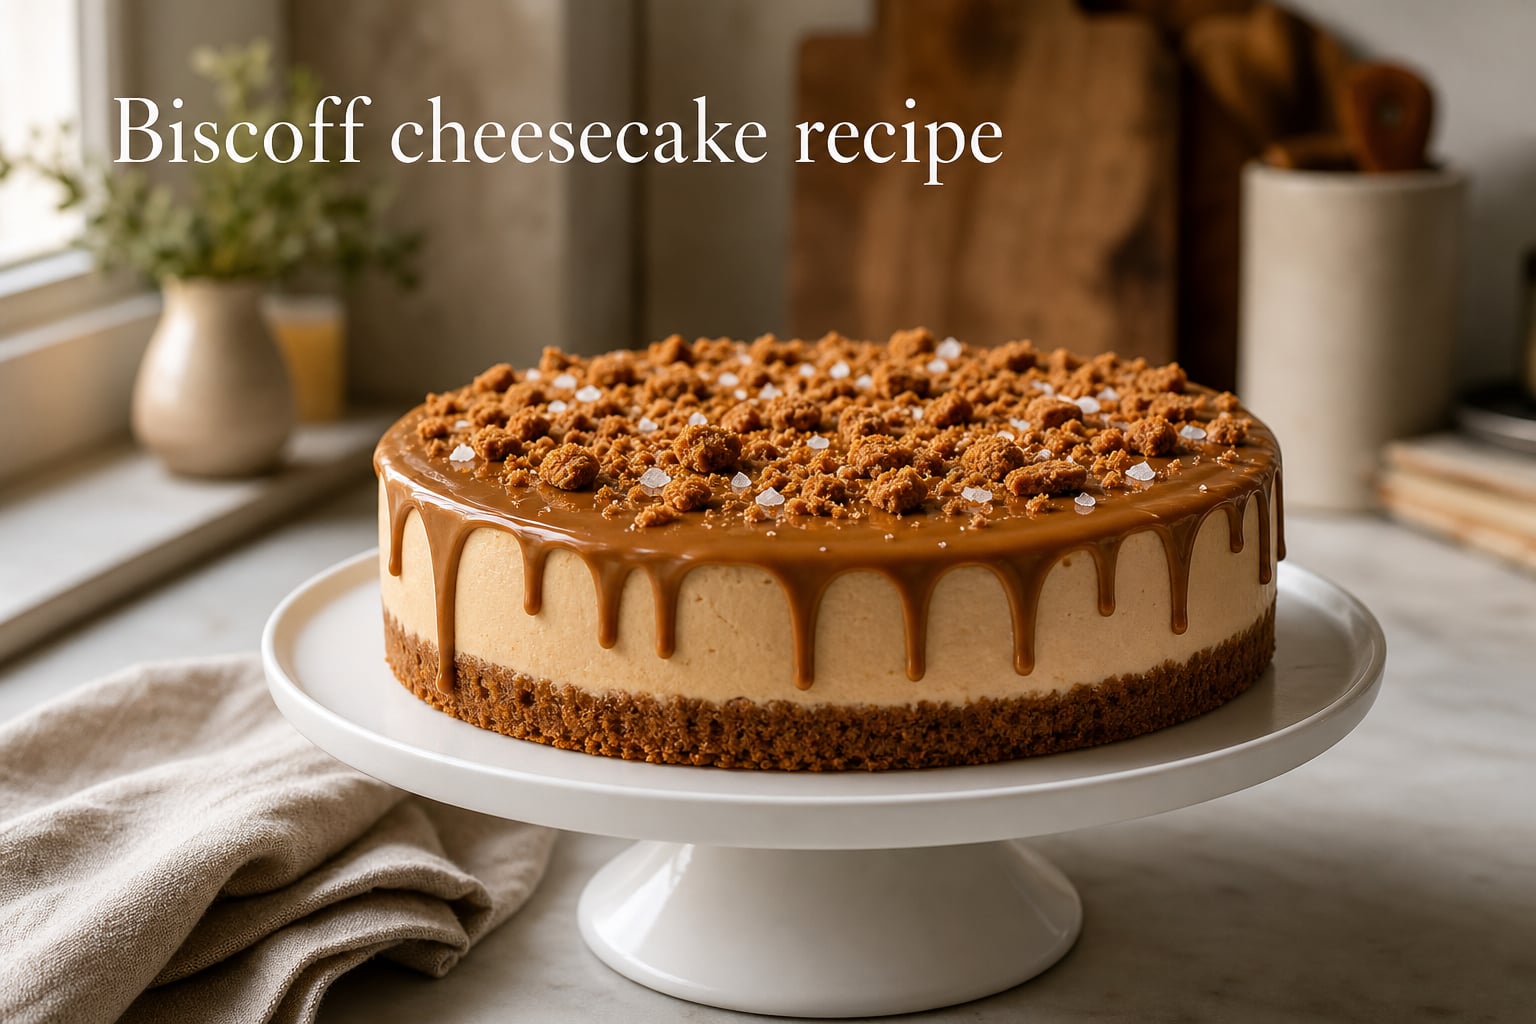
If you have ever wanted a show-stopping dessert that tastes as good as it looks, this Biscoff cheesecake recipe is it. I have baked and tested this version more than a dozen times in my home kitchen, tweaking the crust, filling, and topping until every slice came out creamy, crack-free, and packed with that warm speculoos flavor.
Below I will walk you through every step, from crushing the cookies for the crust to swirling melted Biscoff spread over the top. You will also get my troubleshooting tips, storage advice, and a clear comparison of baked versus no-bake methods so you can pick the version that fits your schedule.
Table of Contents
What Is Biscoff and Why It Works in Cheesecake
Lotus Biscoff is a caramelized Belgian speculoos biscuit with a deep, slightly spiced flavor. The cookies get crushed into a buttery crust, and the cookie butter spread gets folded into the filling and drizzled on top.
Biscoff cheesecake leans on three core elements: crushed Biscoff cookies, Biscoff spread (sometimes labeled cookie butter), and full-fat cream cheese. The brown-sugar warmth of the cookies balances the tangy cream cheese, giving every bite a toffee-like richness you do not get from a graham cracker version.
Why You Will Love This Biscoff Cheesecake Recipe
Every time I bring this cheesecake to a potluck or family dinner, it disappears within an hour. Here is why it works so well.
- The crust holds together cleanly, so each slice lifts off the pan without crumbling.
- The filling bakes up silky and crack-free when you follow the temperature tips.
- You can make it the day before, which is a lifesaver when entertaining.
- No fancy equipment is required beyond a springform pan and a hand mixer.
- It tastes even better on day two after the Biscoff flavors have had time to settle.
If you are a Biscoff lover, this is the dessert that converts cheesecake skeptics. If you are new to Biscoff, this is the recipe that turns you into a fan.
Biscoff Cheesecake Ingredients
Here is everything you need for a 9-inch Biscoff cheesecake that serves 10 to 12 people. Use full-fat brick cream cheese, not the spreadable tub kind, for the creamiest result.
For the Biscoff Cookie Crust
- 250 g (about 2 cups) Biscoff cookies, finely crushed
- 85 g (6 tablespoons) unsalted butter, melted
- 1 tablespoon granulated sugar (optional, for a sweeter crust)
For the Cheesecake Filling
- 680 g (3 blocks) full-fat cream cheese, softened to room temperature
- 200 g (about 3/4 cup) Biscoff spread, plus 2 tablespoons for swirling
- 150 g (3/4 cup) granulated sugar
- 3 large eggs, room temperature
- 120 ml (1/2 cup) sour cream, room temperature
- 1 tablespoon vanilla bean paste or pure vanilla extract
- 1/4 teaspoon fine sea salt
For the Topping
- 120 g (1/2 cup) Biscoff spread, gently melted
- 4 to 6 whole Biscoff cookies, roughly crushed
- Flaky sea salt, for finishing (optional)
Equipment You Will Need
Before you start, gather your tools so the process moves smoothly.
- 9-inch (23 cm) springform pan
- Food processor or rolling pin and zip-top bag for crushing cookies
- Stand mixer or hand mixer
- Large mixing bowl and a medium bowl
- Rubber spatula and offset spatula
- Aluminum foil (if using a water bath)
- Roasting pan large enough to hold the springform
How to Make Biscoff Cheesecake (Step-by-Step)
Follow these steps in order. I have included time estimates and tips I learned the hard way after several test bakes.
Step 1: Prep the Pan and Oven
Preheat your oven to 325 degrees F (160 degrees C). Wrap the outside of the springform pan tightly with two layers of aluminum foil to keep water out if you plan to use a water bath. Lightly grease the inside with butter or nonstick spray.
Step 2: Make the Biscoff Cookie Crust
Pulse the Biscoff cookies in a food processor until you have fine crumbs, or place them in a zip-top bag and crush with a rolling pin. Stir the crumbs together with the melted butter and sugar until the mixture looks like wet sand.
Press the crumbs firmly into the bottom of the pan and slightly up the sides. I use the flat bottom of a measuring cup to get an even, compact layer. Bake the crust for 10 minutes, then set aside to cool while you make the filling.
Step 3: Beat the Cream Cheese
In a large bowl, beat the softened cream cheese on medium speed for about 3 minutes until it is completely smooth and free of lumps. Scrape down the sides of the bowl often. If you see lumps, keep beating; lumps at this stage mean lumps in the final cheesecake.
Step 4: Add Biscoff Spread and Sugar
Add the 200 g of Biscoff spread and the sugar to the cream cheese. Beat on medium for another 2 minutes until fully combined and silky. Scrape the bowl again. The mixture should look pale caramel in color with no streaks.
Step 5: Mix in Eggs, Sour Cream, Vanilla, and Salt
Add the eggs one at a time, beating on low just until each yolk disappears. Over-beating after the eggs go in is the fastest way to invite cracks, so go gentle here. Stir in the sour cream, vanilla, and salt on low speed until the batter is smooth.
Step 6: Bake in a Water Bath
Pour the filling over the cooled crust and smooth the top with an offset spatula. Place the springform inside a roasting pan and pour hot water into the roasting pan until it reaches about 1 inch up the sides of the springform. Bake for 55 to 65 minutes.
The cheesecake is done when the edges are set but the center 2 inches still wobble slightly like Jell-O. Turn off the oven, crack the door open with a wooden spoon, and let the cheesecake cool inside for 1 hour. This slow cooling is the secret to a crack-free top.
Step 7: Chill Overnight
Remove the cheesecake from the water bath, run a thin knife around the edge, and refrigerate uncovered for at least 8 hours, ideally overnight. Cover loosely with foil after the first 2 hours so the top does not pick up fridge odors.
Step 8: Decorate and Serve
Just before serving, warm the 120 g of Biscoff spread in the microwave in 15-second bursts until it is pourable but not hot. Drizzle it over the chilled cheesecake and let it drip naturally down the sides. Sprinkle with crushed Biscoff cookies and a pinch of flaky sea salt. Slice with a knife dipped in hot water and wiped dry between cuts.
Baked vs No-Bake Biscoff Cheesecake
Both methods are delicious, but they give you different results. Pick the one that matches the time and texture you want.
Baked Biscoff cheesecake has a denser, richer, custard-like texture. The eggs and gentle oven heat set the filling into something you can slice cleanly with a fork. It is the best choice when you want a classic, New York-style slice that holds its shape on a plate.
No-bake Biscoff cheesecake swaps the eggs for whipped heavy cream. The filling is lighter, mousse-like, and almost ice-cream-soft when chilled. It comes together in about 20 minutes plus chilling time, which makes it perfect for summer or last-minute dinners. The trade-off is that slices are softer and the crust needs extra butter to stay crisp underneath.
My quick rule: bake when you want a celebration centerpiece, no-bake when you want a stress-free weeknight treat.
Troubleshooting Common Biscoff Cheesecake Problems
Even seasoned bakers hit bumps. Here is how to fix the issues I see most often in reader messages.
Why is my Biscoff cheesecake runny? If the center is still liquid after the recommended bake time, your oven may run cool or the springform may be sitting too high in the water bath. Use an oven thermometer next time and check at the 55-minute mark. For a no-bake version, runny filling usually means the heavy cream was under-whipped or the cream cheese was too warm and soft.
Why did my cheesecake crack on top? Cracks come from over-beating after the eggs are added, baking too hot, or cooling too fast. Beat on low, bake at 325 degrees F, and cool the cheesecake in the oven with the door cracked for at least an hour.
Why is the texture grainy? Grainy filling usually means the cream cheese was too cold when you started, so it never smoothed out. Always soften cream cheese on the counter for 2 to 3 hours before mixing.
Why did my crust crumble? The crust needs enough melted butter to bind. If your cookies were very dry, add another tablespoon of butter. Press the crumbs firmly with the flat bottom of a glass before baking.
Why is my Biscoff spread too thick to drizzle? Heat it in short microwave bursts and stir until it is just pourable. If it seizes up and turns clumpy, your microwave may have been too hot. Start with 10 seconds and stir, then add more time as needed.
Storage and Freezing Instructions
Cover the cheesecake loosely with foil or store it in a cake dome in the refrigerator for up to 5 days. The flavor actually deepens by day two, so I usually bake it the day before I plan to serve it.
For freezing, wrap individual slices or the whole cheesecake (without the topping) tightly in plastic wrap, then in a layer of foil. Freeze for up to 2 months. Thaw overnight in the refrigerator and add the fresh Biscoff topping just before serving for the best texture.
If you are planning for a party, bake the cheesecake 24 to 48 hours in advance, keep it refrigerated, and decorate within an hour of serving. This is my go-to schedule for birthdays and holidays.
Frequently Asked Questions
How do you make a simple Biscoff cheesecake?
Crush 250 g Biscoff cookies and mix with 85 g melted butter, then press into a 9-inch springform pan. Beat 680 g cream cheese with 200 g Biscoff spread and 150 g sugar until smooth, add 3 eggs, 120 ml sour cream, 1 tablespoon vanilla, and 1/4 teaspoon salt. Pour over the crust, bake at 325 degrees F in a water bath for 55 to 65 minutes, cool in the oven for 1 hour, then chill overnight before topping with melted Biscoff spread.
What are the 5 ingredients in no-bake Biscoff cheesecake?
The classic 5-ingredient no-bake version uses Biscoff cookies (for the crust), butter, full-fat cream cheese, Biscoff spread, and heavy (double) cream. Whip the cream, fold it into the cream cheese and Biscoff spread mixture, pour over the cookie crust, and chill for at least 6 hours.
Is baked or no-bake Biscoff cheesecake better?
Baked Biscoff cheesecake has a denser, custard-like texture and holds clean slices, making it ideal for special occasions. No-bake Biscoff cheesecake is lighter, mousse-like, and ready with just chilling time, which is great for quick prep. Pick baked for a classic celebration cake and no-bake for an easy weeknight dessert.
Can I use smooth and crunchy Biscoff spread?
Yes. Smooth Biscoff spread gives you a silky filling and a glossy drizzle on top. Crunchy Biscoff spread adds small cookie bits that show through the filling and give a subtle bite. Both work with the same measurements.
How long does Biscoff cheesecake last in the fridge?
Stored loosely covered in the refrigerator, Biscoff cheesecake stays fresh for up to 5 days. Keep it in a cake dome or loosely tented with foil so it does not absorb fridge odors.
Can you freeze Biscoff cheesecake?
Yes. Wrap the cheesecake tightly in plastic wrap and then in foil and freeze for up to 2 months. Thaw overnight in the refrigerator and add the Biscoff topping right before serving for the best look and texture.
Do I really need a water bath for cheesecake?
A water bath is the most reliable way to prevent cracks because it keeps the oven moist and the temperature gentle. If you skip it, lower the oven to 300 degrees F, place a pan of hot water on the rack below, and avoid opening the oven door during baking.
What cream cheese works best for Biscoff cheesecake?
Full-fat block cream cheese like Philadelphia gives the creamiest, most stable filling. Avoid whipped, spreadable, or low-fat versions because they contain extra water and air that lead to a softer set and grainier texture.
Final Thoughts
This Biscoff cheesecake recipe has become one of the most requested desserts in my kitchen, and I think you will understand why the moment you cut into that first slice. The cookie crust is buttery, the filling is silky, and the warm drizzle on top pulls everything together.
If you try this Biscoff cheesecake recipe, make it a day ahead so the overnight chill can do its job, and serve it cold with a hot cup of coffee. Bookmark this page, share it with a fellow cheesecake lover, and let me know how your version turns out.