
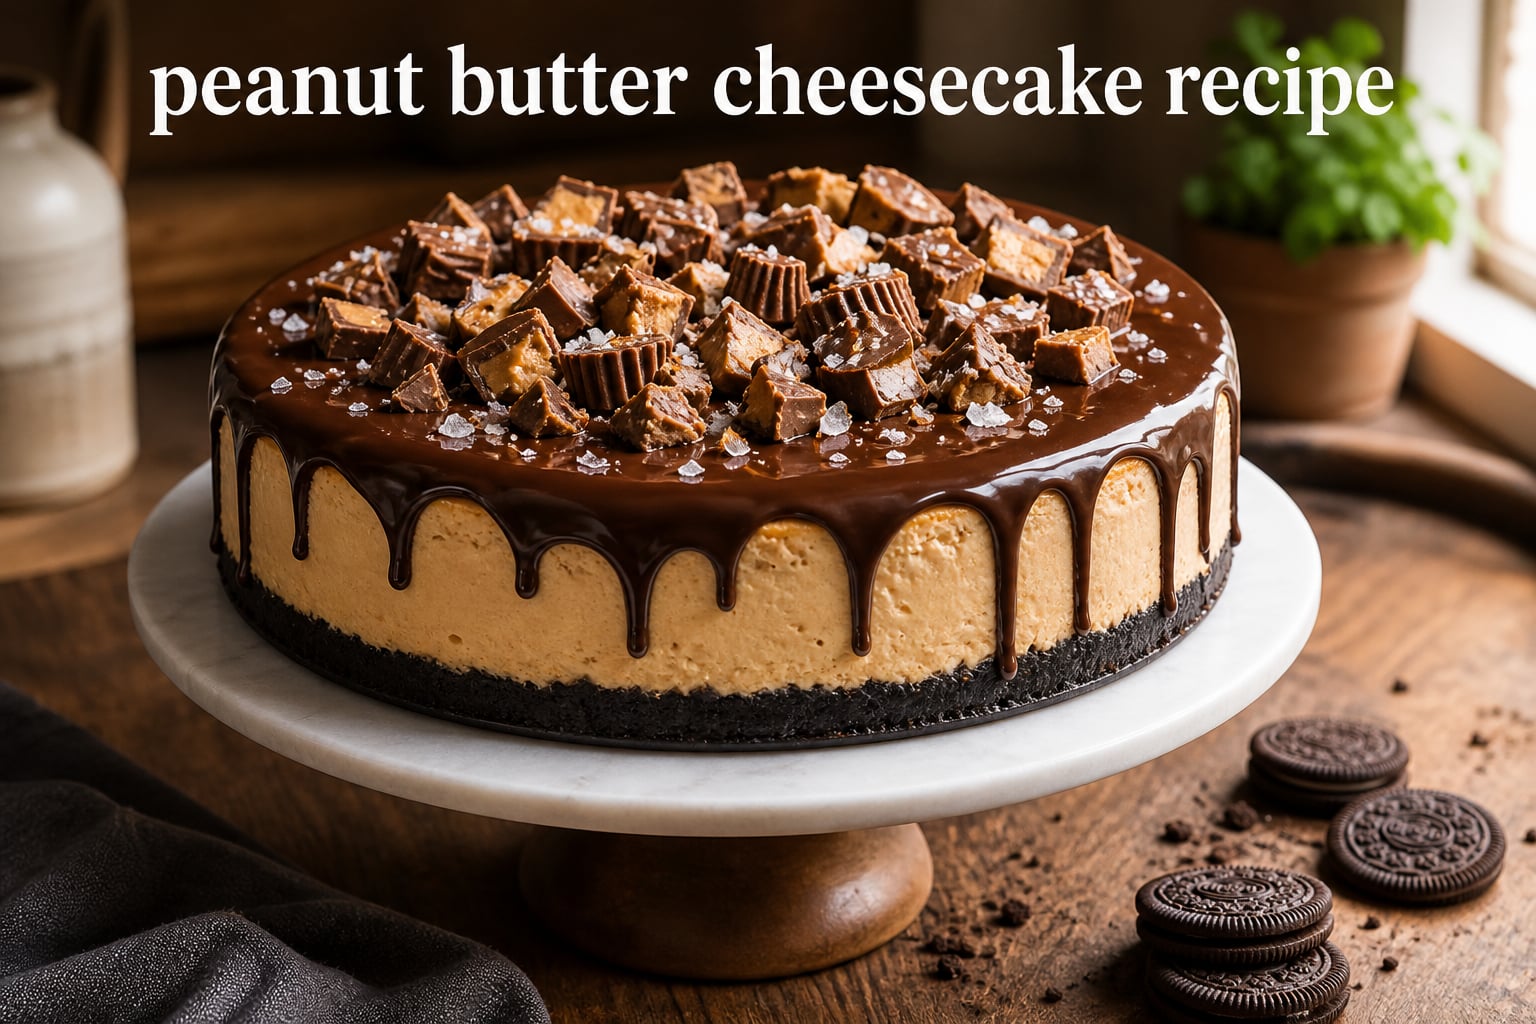
If you’ve ever wanted to capture the exact flavor of a Reese’s Peanut Butter Cup in cheesecake form, this peanut butter cheesecake recipe is for you. I’ve tested this recipe more times than I can count, tweaking everything from the peanut butter ratio to the slow cooling process, and the result is a thick, creamy, crack-free cheesecake that tastes like a chocolate-covered peanut butter cup crossed with a classic New York style cheesecake. The crust is a buttery Oreo base, the filling is rich with real peanut butter, and the chocolate ganache on top is the kind of finish that makes people go quiet after the first bite.
What I love most about this recipe is that you can make it without a water bath. I’ve spent years wrestling with foil-wrapped pans and still managing to leak water into my crust, and I eventually figured out a slower bake at a slightly lower temperature that gives the same silky texture without the stress. The prep takes about 20 minutes, the bake runs roughly 55 to 65 minutes, and then the cheesecake needs at least 4 hours (preferably overnight) to chill in the fridge. Total time from start to chilled slice is about 6 hours, but the active hands-on work is closer to 30 minutes.
This peanut butter cheesecake recipe makes 12 generous slices and serves 10 to 12 people easily. It’s the dessert I bring to every family birthday, every Friendsgiving, and every potluck where I want to be remembered.
Table of Contents
Why This Peanut Butter Cheesecake Recipe Works
I developed this recipe after about a dozen test batches. Each round taught me something different. The first version cracked because I baked it too hot. The second version was too dense because I over-mixed the eggs. The third had a soggy crust because I added too much butter to the Oreo crumbs. Every failure got me closer to what I’d call a truly foolproof peanut butter cheesecake, and what you’ll find below is the version that finally nails it.
The three things that make this peanut butter cheesecake recipe stand out are the heavy cream in the filling, the small amount of flour, and the slow oven temperature. Heavy cream adds a silkiness you don’t get from sour cream alone. The flour (just two tablespoons) gives the filling structure and helps prevent cracks. And baking at 325 degrees Fahrenheit instead of 350 gives the inside time to set gently without browning the top too quickly.
I also call for a springform pan rather than a regular cake pan because the removable sides let you release the cheesecake without flipping it. A 9-inch springform pan is the standard size and what I use here, but you can also use a 10-inch pan if you prefer a slightly thinner cheesecake (just reduce the bake time by about 5 minutes).
What You’ll Need for This Peanut Butter Cheesecake
Before you start, take your cream cheese, eggs, and sour cream out of the fridge at least 1 to 2 hours ahead. Cold ingredients are the number one reason cheesecake batters end up lumpy, and lumpy batter doesn’t bake into a smooth filling. Everything else can stay in the pantry.
For the Oreo Crust
- 24 Oreo cookies (regular, not double-stuff), finely crushed into crumbs
- 5 tablespoons unsalted butter, melted
- 1 tablespoon granulated sugar (optional, helps with crispness)
You can crush the Oreos in a food processor in about 30 seconds, or place them in a zip-top bag and roll them with a rolling pin. I prefer the food processor because the crumbs come out more uniform, which means a more even crust. If you want a chocolate-on-chocolate experience, leave the creme filling in the cookies. If you want a more balanced sweet-salty vibe, scrape out the creme first.
For the Peanut Butter Cheesecake Filling
- 24 ounces (3 blocks) full-fat cream cheese, softened to room temperature
- 1 cup creamy peanut butter (I use Jif or Skippy, not natural)
- 1 cup granulated sugar
- 1 cup sour cream, room temperature
- 1/4 cup heavy cream
- 2 tablespoons all-purpose flour
- 1 teaspoon vanilla extract
- 1/2 teaspoon salt
- 4 large eggs, room temperature
Use full-fat block cream cheese, not the spreadable kind in tubs. The spreadable version has more air and stabilizers and it will not set up the same way. Philadelphia is the brand I trust most. For the peanut butter, commercial creamy varieties like Jif or Skippy give the best texture because their emulsified oils blend smoothly into the batter. Natural peanut butter separates and tends to make the filling greasy or grainy, so save that for toast.
For the Chocolate Ganache Topping
- 1 cup semi-sweet chocolate chips (or chopped chocolate bar)
- 1/2 cup heavy cream
- 1 tablespoon unsalted butter
- 1 teaspoon vanilla extract
- Optional: flaky sea salt, chopped peanut butter cups, or Reese’s Pieces for garnish
The ganache is the finishing move that turns a peanut butter cheesecake into a chocolate peanut butter cup experience. Using chocolate chips instead of a chopped bar works fine here because chips are designed to melt smoothly. If you want an extra glossy finish, add the tablespoon of butter at the end of the ganache.
How to Make Peanut Butter Cheesecake Step by Step
The order of operations matters with cheesecake. You’ll want to make the crust first, then the filling while the crust bakes briefly, then the long slow bake and chill. Here’s exactly how I do it in my kitchen.
Step 1: Make the Oreo Crust
Preheat your oven to 325 degrees Fahrenheit. Lightly grease a 9-inch springform pan with butter or nonstick spray, then line the bottom with a round of parchment paper for extra insurance against sticking.
In a medium bowl, stir together the Oreo crumbs, melted butter, and sugar until the mixture looks like wet sand and holds together when you press a small handful between your fingers. If it falls apart, add another tablespoon of melted butter. If it feels greasy, add another spoonful of crumbs.
Press the mixture firmly into the bottom of your springform pan and about 1 inch up the sides. I use the flat bottom of a measuring cup to pack it down evenly. Bake the crust for 10 minutes, then set it aside to cool while you make the filling.
Step 2: Mix the Peanut Butter Cheesecake Filling
In a large bowl or the bowl of a stand mixer fitted with the paddle attachment, beat the softened cream cheese on medium-low speed for about 2 minutes until completely smooth and lump-free. Stop and scrape down the sides of the bowl. This step matters more than people realize; if the cream cheese isn’t perfectly smooth here, the final cheesecake will have lumps no matter how long you beat later.
Add the peanut butter and beat for another minute until fully combined. Add the sugar and beat on low for 30 seconds, then the sour cream, heavy cream, flour, vanilla, and salt. Beat on low just until everything is incorporated. Over-mixing at this stage is the fastest path to a cracked cheesecake, so resist the urge to crank up the speed.
Add the eggs one at a time, beating on low for just 15 to 20 seconds after each addition and scraping down the bowl between eggs. The batter should look smooth, thick, and creamy. If you see streaks or lumps, give it a few more slow passes with the paddle.
Step 3: Bake the Cheesecake
Pour the filling over the cooled crust and smooth the top with a spatula. Tap the pan firmly on the counter 5 to 6 times to release any air bubbles that could cause cracks later.
Bake at 325 degrees Fahrenheit for 55 to 65 minutes. The cheesecake is done when the edges look set and slightly puffed but the center (about a 2-inch circle in the middle) still has a gentle jiggle when you nudge the pan. It will continue cooking from residual heat as it cools, so a slightly underdone center is exactly what you want.
If the top is browning too quickly before the center sets, loosely tent a piece of foil over the pan. Don’t open the oven door more than you have to in the first 45 minutes, because sudden temperature drops are another crack trigger.
Step 4: Cool the Cheesecake Slowly
Turn off the oven and crack the door open 1 inch with a wooden spoon. Let the cheesecake cool inside the oven for 1 hour. This gradual temperature drop is the single most important step for preventing cracks.
After an hour, remove the cheesecake from the oven and run a thin knife around the inside edge of the pan to loosen the sides. This stops the cheesecake from pulling away from the pan as it shrinks during chilling, which is another common crack cause. Let it cool to room temperature on the counter, about 1 more hour.
Cover the pan loosely with plastic wrap and refrigerate for at least 4 hours, ideally overnight. I know it’s tempting to cut into it right away, but cheesecake needs that chill time to fully set. Plan ahead.
Step 5: Make the Chocolate Ganache
Place the chocolate chips in a heatproof bowl. Heat the heavy cream in a small saucepan over medium heat just until it starts to simmer and bubble at the edges. Do not let it come to a rolling boil. Pour the hot cream over the chocolate and let it sit undisturbed for 2 to 3 minutes to soften the chocolate.
Whisk gently from the center outward in small circles until the mixture is completely smooth and glossy. Stir in the butter and vanilla. If the ganache looks grainy, let it cool for 5 minutes and whisk again.
Step 6: Assemble and Chill
Remove the cheesecake from the fridge. Pour the slightly cooled ganache over the top and use an offset spatula to spread it to the edges, letting some drip naturally down the sides. Sprinkle with flaky sea salt, chopped peanut butter cups, or Reese’s Pieces if you want to lean all the way into the candy-bar flavor.
Return the cheesecake to the fridge for at least 30 minutes to set the ganache before slicing. To get clean slices, run a large sharp knife under hot water, dry it off, and cut in one firm stroke. Wipe the blade between each slice.
Tips for the Perfect Peanut Butter Cheesecake Every Time
I’ve made this peanut butter cheesecake recipe enough times to know which small details make the biggest difference. These are the tips I’d give a friend who’s about to bake their first cheesecake.
First, your cream cheese must be at true room temperature, not just slightly soft on the edges. I leave mine out for 2 hours before I start. If you’re in a hurry, you can cut the blocks into cubes and spread them on a plate; they soften in about 20 minutes that way. Cold cream cheese is the leading cause of lumpy cheesecake batter.
Second, mix everything on low speed once the eggs go in. Speed incorporates air, and air bubbles expand in the oven and then collapse when the cheesecake cools, which is exactly how cracks form. Slow and patient mixing gives you a dense, creamy filling without air pockets.
Third, do not open the oven door during the first 45 minutes of baking. Every time the door opens, the temperature drops, and the uneven baking can cause the top to crack. Trust the timeline and resist the urge to peek.
Fourth, let the cheesecake cool in the oven with the door cracked. I’ve skipped this step in a hurry, and the result is always the same: a cheesecake with a giant crack down the middle. The slow cool-down keeps the structure stable.
Fifth, use a hot wet knife to slice. The clean cuts make the cheesecake look bakery-quality and also keep the ganache from cracking or pulling. I keep a tall glass of hot water next to the pan and dip the knife between every cut.
Troubleshooting Common Peanut Butter Cheesecake Problems
Even with a great recipe, things sometimes go sideways. Here’s how to fix the most common issues before they ruin your dessert.
Why did my cheesecake crack?
The most common crack causes are over-mixing (which adds air), baking too hot, opening the oven door early, and cooling too fast. The flour in this recipe helps minimize cracks, but the cooling step is the one that matters most. Always cool in the oven with the door cracked for an hour before moving to the counter. If a crack does appear, the ganache topping covers it beautifully, so don’t panic.
Why did my cheesecake sink?
Sinking usually means the cheesecake wasn’t fully set when you took it out of the oven, or it cooled too fast. You want the center to still have a slight wobble when you pull it, but the outer 3 inches should look fully set. If it sinks in the middle after chilling, scoop that section into individual glasses and call it a peanut butter cheesecake trifle. Nobody will complain.
Why is my cheesecake lumpy or dense?
Lumps almost always come from cold cream cheese that didn’t blend smoothly. If your batter looks lumpy before baking, push it through a fine-mesh sieve. Dense texture usually means over-mixing after the eggs were added, which incorporates too much air that escapes during baking. Mix on the lowest speed your mixer has once the eggs go in.
Can I use natural peanut butter?
You can, but the texture and flavor will be different. Natural peanut butter has more oil separation and tends to make the filling slightly grainy or greasy. If that’s all you have, stir it thoroughly first and consider reducing the amount to 3/4 cup to compensate for the stronger peanut flavor. Many bakers substitute almond butter or sunflower seed butter for similar reasons.
How to Store and Freeze Peanut Butter Cheesecake
This peanut butter cheesecake recipe is excellent for making ahead, which is one of the reasons I rely on it for holidays. Once the cheesecake is fully chilled and topped, cover the springform pan tightly with plastic wrap or transfer the cheesecake to an airtight container. It keeps in the fridge for up to 5 days.
For longer storage, freeze individual slices or the whole cheesecake (without the ganache topping, ideally). Wrap tightly in plastic wrap, then in a layer of aluminum foil. Freeze for up to 3 months. Thaw overnight in the refrigerator. If you froze it without ganache, add the ganache after thawing for the freshest texture.
Leftover slices can sit at room temperature for up to 2 hours when serving. If your kitchen runs warm, return leftovers to the fridge after 1 hour.
Easy Variations to Try
Once you’ve made the classic version, it’s fun to riff on it. Here are the variations my family asks for most often.
Swap the Oreo crust for a Nutter Butter crust if you want to dial the peanut butter flavor up to maximum. Use the same method as the Oreos: pulse about 25 cookies into crumbs, mix with 5 tablespoons melted butter, and press into the pan. Bake the crust for 8 minutes since Nutter Butters brown faster.
For a no-bake peanut butter cheesecake, skip the eggs and use 2 cups of whipped heavy cream folded into the cream cheese mixture instead. Pour into the crust and chill for at least 6 hours, preferably overnight, until firm. This is a popular shortcut for hot summer days when you don’t want to turn on the oven. The texture will be lighter and mousse-like rather than dense and New York style.
To make mini peanut butter cheesecakes, line a standard muffin tin with paper liners. Press about 1 tablespoon of crust into each liner, then add about 1/4 cup of filling on top. Bake at 325 degrees for about 18 to 22 minutes. This recipe makes about 18 mini cheesecakes. They’re perfect for parties because everyone gets their own.
For a graham cracker crust, swap the Oreos for 1.5 cups of graham cracker crumbs mixed with 6 tablespoons melted butter and 2 tablespoons sugar. Press and bake the same way. The graham version is more neutral and lets the peanut butter flavor shine a bit more.
For a Reese’s-style topping, chop 8 to 10 mini Reese’s Peanut Butter Cups and scatter them over the ganache while it’s still tacky. The Reese’s Pieces scatter on top makes the presentation look like a candy explosion.
Frequently Asked Questions About Peanut Butter Cheesecake
How do I know when peanut butter cheesecake is done?
The cheesecake is done when the outer 3 inches look set and slightly puffed while the center still has a soft, jiggly wobble about the size of a silver dollar. The internal temperature should read 145 to 150 degrees Fahrenheit if you use an instant-read thermometer. It will continue to set as it cools, so pulling it slightly underdone is exactly right.
Can I use natural peanut butter instead of regular?
You can, but the texture and flavor will change. Commercial creamy peanut butter like Jif or Skippy blends smoothly and gives a predictable result. Natural peanut butter has more oil separation and tends to make the filling slightly grainy or oily. If you only have natural, stir it thoroughly first and reduce the amount to 3/4 cup to compensate for the stronger peanut flavor.
What can I substitute for sour cream?
Plain full-fat Greek yogurt is the best 1:1 substitute for sour cream in this peanut butter cheesecake recipe. It has the same tang and fat content. You can also use full-fat regular yogurt (strain it through cheesecloth for 30 minutes first to thicken) or an equal amount of additional heavy cream for a milder flavor.
Can I make mini peanut butter cheesecakes?
Yes. Line a standard muffin tin with paper liners and add about 1 tablespoon of crust and 1/4 cup of filling per cup. Bake at 325 degrees for 18 to 22 minutes. This recipe makes about 18 mini peanut butter cheesecakes, which are perfect for parties and gift giving.
Why did my peanut butter cheesecake crack?
Cracks usually come from over-mixing the batter, baking at too high a temperature, opening the oven door during baking, or cooling the cheesecake too quickly. Mix on low speed once the eggs go in, bake at 325 degrees, don’t open the oven for the first 45 minutes, and always cool the cheesecake in the oven with the door cracked for 1 hour before moving to the counter. If a crack appears, the ganache topping will hide it.
Final Thoughts on This Peanut Butter Cheesecake Recipe
This peanut butter cheesecake recipe is the one I keep coming back to because it delivers on every front: a real Oreo crust, a filling that’s genuinely packed with peanut butter flavor, a crack-free top thanks to the slow oven cool-down, and a glossy ganache that makes the whole thing feel like a candy bar from a fancy bakery. Whether you make it for a birthday, a holiday table, or just a Sunday because you deserve it, the leftovers keep for days in the fridge and the slices freeze beautifully.
If you try this recipe, I’d love to hear how it turned out. Leave a comment below with your favorite topping combo, your crust of choice, or any questions that came up while you made it. The best part of sharing recipes is hearing how other bakers make them their own.