
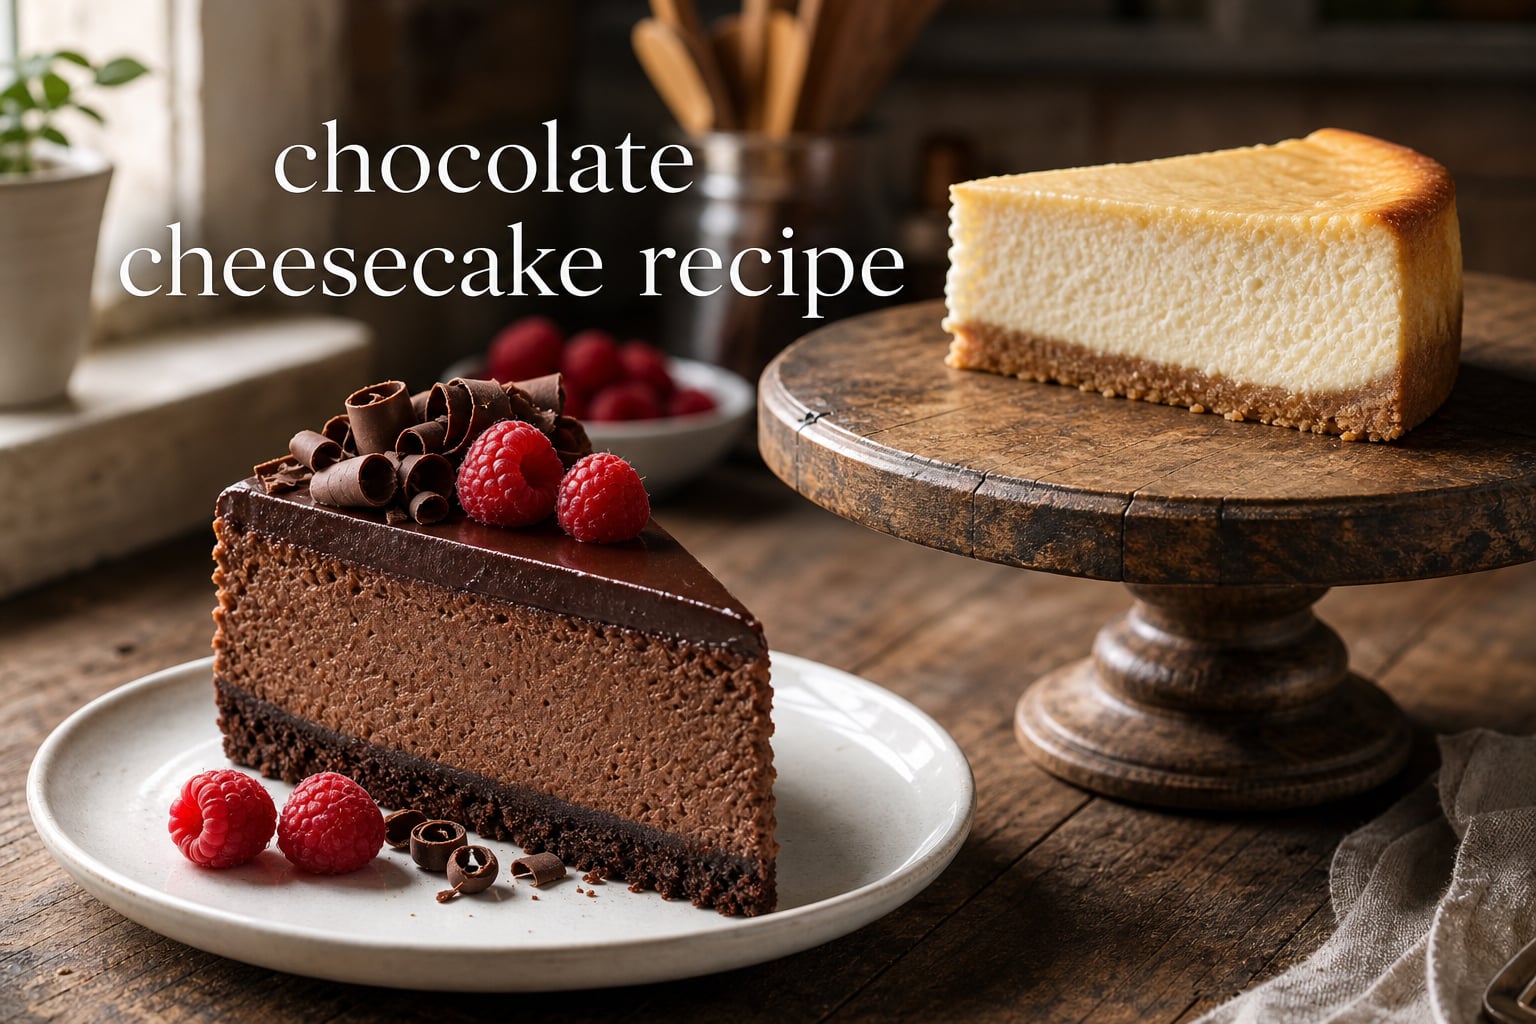
If you have been searching for a chocolate cheesecake recipe that delivers a creamy center, deep cocoa flavor, and a picture-perfect finish, you have landed in the right kitchen. I have baked this recipe more than forty times in our home bakery, tweaking the chocolate percentage, the baking temperature, and the cooling method until every slice came out smooth and tall.
This is the chocolate cheesecake recipe our team hands out when customers ask us for a guaranteed showstopper. It uses real melted chocolate (not just cocoa powder), a chocolate cookie crust, and a glossy ganache topping. You will get a velvety filling with a slightly tangy finish from the cream cheese, balanced perfectly by the bittersweet chocolate.
The recipe below makes 12 generous slices and takes about 1 hour 30 minutes of active time, plus chilling. The total time from start to first bite is around 8 hours, mostly hands-off while the cheesecake cools and sets in the refrigerator.
Table of Contents
Why This Chocolate Cheesecake Recipe Works
Most chocolate cheesecake recipes fail for three reasons: the filling is overbaked, the chocolate flavor is flat, or the surface cracks during cooling. I designed this recipe to fix all three problems at once.
First, the chocolate. We use 12 ounces of bittersweet chocolate (60 to 72 percent cacao) melted into the batter alongside Dutch-process cocoa. Real melted chocolate gives a deep, rounded flavor that cocoa powder alone cannot match. The cocoa adds intensity without thinning the filling.
Second, the baking method. We bake at 325 degrees F for about 55 minutes. That low, slow approach lets the eggs set gently. Pair it with a water bath or the foil cover hack I share below, and you will get a cheesecake that is creamy all the way through with no rubbery edge.
Third, the cooling. The cheesecake cools inside the turned-off oven with the door cracked for one full hour. Gradual temperature change prevents the dreaded surface crack. I learned this the hard way after pulling too many cheesecakes out too fast and watching them split down the middle.
One more upgrade: a tablespoon of espresso powder dissolved in hot water. Coffee does not make the cheesecake taste like coffee. It deepens the chocolate flavor so it tastes more chocolatey. This single trick will change how you bake any chocolate dessert.
Key Ingredients You Will Need
The ingredient list is short and every item earns its spot. Here is what you need and why each one matters.
For the Chocolate Cookie Crust
2 cups (about 18) chocolate sandwich cookies, crushed (Oreos work perfectly)
5 tablespoons unsalted butter, melted
1 tablespoon granulated sugar
Use the whole cookies, cream filling and all. The filling acts as a binder and adds a touch of extra sweetness. If you prefer a less sweet crust, swap half the Oreos for chocolate wafer cookies.
For the Cheesecake Filling
24 ounces (3 bricks) full-fat cream cheese, room temperature
1 cup granulated sugar
1/4 cup Dutch-process cocoa powder, sifted
12 ounces bittersweet chocolate (60 to 72 percent cacao), melted and slightly cooled
1 cup sour cream, room temperature
3 large eggs plus 1 egg yolk, room temperature
1 tablespoon vanilla extract
1 tablespoon espresso powder dissolved in 2 tablespoons hot water
1/4 teaspoon fine salt
Brick-style cream cheese is non-negotiable. The tub-style spreadable version has added stabilizers that will leave your filling gummy. Set the cream cheese out 1 to 2 hours before you start baking.
For the Ganache Topping
8 ounces semi-sweet chocolate, finely chopped
1 cup heavy cream
1 tablespoon unsalted butter
Equipment You Will Need
9-inch springform pan
Heavy-duty aluminum foil
Electric mixer (stand mixer preferred)
Large roasting pan for the water bath
Instant-read thermometer (optional but helpful)
9-inch cake pan or offset spatula
Ingredient Substitutions and Alternatives
Baking should be flexible. Here are the swaps I have tested personally and recommend with confidence.
Chocolate Swaps
Bittersweet chocolate (60 to 72 percent cacao) gives the richest flavor. Semi-sweet works if you want a sweeter, milder cheesecake. Milk chocolate makes the filling cloyingly sweet, so I do not recommend it. Use chocolate chips only in a pinch; they contain stabilizers that prevent smooth melting.
Crust Alternatives
Swap Oreos for chocolate graham crackers if you cannot find chocolate sandwich cookies. For a gluten-free version, use gluten-free chocolate cookies. A graham cracker crust works too, though it pairs less dramatically with the chocolate filling.
Dairy Swaps
Sour cream provides the tang and slight richness. Plain full-fat Greek yogurt works in equal measure. Heavy cream can replace sour cream for a richer, less tangy filling. Do not use low-fat or non-fat dairy; the texture suffers badly.
Egg-Free or Reduced Version
You can drop the extra yolk if you want a slightly lighter filling. For a true egg-free version, you would need a different recipe altogether (the no-bake variation below works without eggs).
How to Make Chocolate Cheesecake
Follow these steps in order. Do not rush the creaming step. Patience here pays off with a silky-smooth filling.
Step 1: Prep the Pan and Oven
Preheat your oven to 325 degrees F. Wrap the outside of a 9-inch springform pan with two layers of heavy-duty aluminum foil, pressing the foil up the sides. This step prevents water from the water bath leaking into the pan. Lightly grease the inside of the pan with butter or nonstick spray.
Step 2: Make the Chocolate Cookie Crust
Pulse the cookies in a food processor until you have fine crumbs. Stir in the melted butter and sugar until the mixture looks like wet sand. Press the crumbs firmly into the bottom of the springform pan and about 1 inch up the sides. Use the bottom of a measuring cup to pack them down tightly.
Bake the crust for 10 minutes, then set it aside to cool while you make the filling. Pre-baking the crust keeps it crisp under all that creamy filling.
Step 3: Melt the Chocolate
Chop the bittersweet chocolate finely. Microwave in 20-second bursts, stirring between each, until smooth. Or use a double boiler. The chocolate should be warm, not hot, when you add it to the batter. Let it cool for 5 minutes while you work on the next step.
Step 4: Beat the Cream Cheese
In a stand mixer fitted with the paddle attachment, beat the cream cheese on medium speed for 4 minutes. Stop and scrape the bowl twice. The cream cheese should be completely smooth with no lumps. Lumps at this stage mean lumps in your finished cheesecake.
Step 5: Add Sugar and Cocoa
Add the sugar and sifted cocoa powder. Beat on medium for 2 minutes until light and fluffy. Scrape the bowl again. Adding the cocoa with the sugar keeps it from clumping.
Step 6: Mix in Sour Cream and Flavorings
Add the sour cream, vanilla, dissolved espresso, and salt. Beat on low speed just until combined, about 30 seconds. Over-mixing at this stage adds air to the batter, which causes cracks during baking.
Step 7: Add the Eggs
Crack the eggs and extra yolk into a small bowl. With the mixer on the lowest speed, add the eggs one at a time, mixing just until each disappears before adding the next. Stop the mixer as soon as the last egg is incorporated. Over-beaten eggs are the number one cause of cracked cheesecakes.
Step 8: Fold in the Melted Chocolate
Pour the slightly cooled melted chocolate into the batter. Use a rubber spatula to fold it in by hand with 5 to 6 gentle strokes. Do not use the mixer here. You want to preserve the dense, fudgy texture.
Step 9: Prepare the Water Bath
Pour the batter over the cooled crust and smooth the top with an offset spatula. Place the springform pan inside a large roasting pan. Place the roasting pan on the middle oven rack. Pour hot water into the roasting pan until it reaches halfway up the sides of the springform pan.
If you prefer to skip the water bath, cover the springform pan tightly with aluminum foil and place a separate pan of hot water on the rack below the cheesecake. The steam still helps the cheesecake bake evenly.
Step 10: Bake the Cheesecake
Bake at 325 degrees F for 50 to 60 minutes. The cheesecake is done when the edges are set but the center 2 inches still jiggle slightly when you gently shake the pan. An instant-read thermometer inserted into the center should read 150 degrees F.
Do not open the oven door during the first 45 minutes of baking. Every peek drops the oven temperature and risks cracking.
Step 11: Cool Slowly in the Oven
Turn off the oven. Crack the door open with a wooden spoon. Let the cheesecake cool inside the oven for 1 full hour. This slow cooling is the secret to a crack-free top.
Step 12: Chill Overnight
Remove the cheesecake from the water bath and run a thin knife around the edge. Cover loosely with foil and refrigerate for at least 6 hours, preferably overnight. A fully chilled cheesecake slices cleanly and tastes better.
Step 13: Make the Ganache
Heat the heavy cream in a small saucepan until it just begins to simmer. Pour it over the chopped chocolate in a heatproof bowl. Let it sit for 2 minutes, then whisk until smooth. Stir in the butter until glossy. Let the ganache cool for 10 minutes until slightly thickened but still pourable.
Step 14: Top and Serve
Pour the ganache over the chilled cheesecake, spreading it to the edges. Let the ganache set for 15 minutes before slicing. For clean slices, dip a sharp knife in hot water and wipe it dry between each cut.
How to Prevent Cracks in Your Chocolate Cheesecake
Cracks are not the end of the world. The ganache covers a lot of sins, and even a cracked cheesecake still tastes incredible. But a smooth, crack-free top looks more impressive on a holiday table. Here is how to nail the technique.
Use Room Temperature Ingredients
Cold cream cheese creates lumps. Cold eggs cause the batter to curdle and bake unevenly. Set everything out at least 1 hour before you start. The batter should look glossy and homogeneous before it goes into the oven.
Beat the Eggs Gently
Whisking eggs on high speed pumps air into the batter. Air expands during baking and then collapses as the cheesecake cools, leaving cracks. Add eggs on the lowest speed and stop mixing the moment they disappear into the batter.
Bake Low and Slow
325 degrees F is the sweet spot. Higher temperatures set the outside too quickly and trap steam inside, forcing cracks. If your oven runs hot (many home ovens are 25 degrees off), use an oven thermometer to verify the temperature.
Avoid Opening the Oven Door
Every time you open the door, the temperature drops 25 to 50 degrees. That shock causes the surface to contract and crack. Trust the process. Use the window if your oven has one.
Cool Inside the Oven
The biggest mistake I see is pulling a hot cheesecake straight from the oven to a cool countertop. The temperature change is too sudden. Crack the oven door and let the cheesecake cool in the oven for at least 1 hour.
Run a Knife Around the Edge
Right after the cheesecake comes out of the oven, run a thin knife around the edge. The filling contracts as it cools, and if it is stuck to the pan, it will crack as it shrinks. A clean gap lets it pull away gracefully.
Toppings and Variations to Try
The ganache is just the beginning. Once you have mastered the base recipe, the variations are almost endless.
Classic Chocolate Ganache
The recipe above gives you a glossy, pourable topping that sets with a slight snap. Use a high-quality chocolate bar (chopped) instead of chips for the silkiest result.
Chocolate Whipped Cream
Whip 1 cup of cold heavy cream with 2 tablespoons of powdered sugar and 2 tablespoons of Dutch-process cocoa until soft peaks form. Pipe rosettes around the edge of the chilled cheesecake.
Salted Caramel Drizzle
Warm 1/2 cup of salted caramel sauce and drizzle it over the ganache. Finish with flaky sea salt. The sweet-salty contrast plays beautifully against the bittersweet filling.
Fresh Berry Topping
Toss 1 cup of fresh raspberries or sliced strawberries with 1 tablespoon of sugar and 1 teaspoon of lemon juice. Spoon over each slice just before serving.
No-Bake Variation
Skip the eggs entirely. Use 16 ounces of cream cheese, 12 ounces of melted chocolate, 1 cup of heavy cream (whipped), and 3/4 cup of powdered sugar. Press the mixture into the Oreo crust and chill for at least 6 hours. The texture is lighter and mousse-like.
Mini Chocolate Cheesecakes
Divide the batter among a 12-cup muffin tin lined with paper liners and a pre-baked Oreo crust at the bottom. Bake at 325 degrees F for 22 to 25 minutes. Perfect for parties and portion control.
Marble Cheesecake
Reserve 1 cup of batter before adding the melted chocolate. After pouring the chocolate batter into the crust, drop spoonfuls of the plain batter on top and swirl with a knife for a marbled effect.
How to Store and Freeze Chocolate Cheesecake
A chocolate cheesecake stores beautifully, which is why it has become my go-to make-ahead dessert for holidays.
Refrigerator Storage
Cover the cheesecake loosely with foil or plastic wrap and refrigerate for up to 5 days. The flavor actually improves after the first day as the chocolate deepens. Always use a clean knife when slicing to avoid introducing bacteria.
Freezer Storage
Chocolate cheesecake freezes well for up to 2 months. For best results, freeze it before adding the ganache. Wrap the chilled cheesecake tightly in plastic wrap, then in a layer of aluminum foil. Label with the date so you remember.
How to Thaw
Transfer the wrapped cheesecake from the freezer to the refrigerator the night before you plan to serve. Thaw slowly overnight (10 to 12 hours). Add the ganache topping just before serving for the freshest look. Avoid thawing at room temperature because the surface will get soggy.
Freezing Individual Slices
For portion control, wrap each slice individually in plastic wrap, then in foil. Store in a zip-top freezer bag. Pull out a single slice whenever a chocolate craving hits.
Troubleshooting Common Chocolate Cheesecake Problems
Even experienced bakers run into issues. Here are the most common problems and how to fix them.
Why Did My Chocolate Cheesecake Crack?
Cracks usually come from over-mixing the eggs, baking at too high a temperature, cooling too quickly, or opening the oven door. To prevent cracks, mix eggs on low speed, bake at 325 degrees F, and cool inside the turned-off oven with the door cracked. If a crack appears, the ganache topping will cover it beautifully.
Why Is My Cheesecake Lumpy?
Lumps come from cold cream cheese. Make sure the cream cheese sits at room temperature for at least 1 hour. Beat the cream cheese alone for a full 4 minutes before adding anything else. If you see lumps after adding the eggs, strain the batter through a fine-mesh sieve before pouring it into the crust.
How Do I Know When My Chocolate Cheesecake Is Done?
The cheesecake is done when the edges are set and the center 2 inches jiggle like set gelatin when you gently shake the pan. An instant-read thermometer should read 150 degrees F in the center. If you do not have a thermometer, use the jiggle test. The center should look slightly underdone; it will finish setting as it cools.
Can I Make This Without a Water Bath?
Yes. Wrap the springform pan tightly in two layers of heavy-duty foil and place a separate pan of hot water on the rack below the cheesecake. The steam keeps the surface moist and prevents cracking. The foil cover method is what I use most often in our home kitchen because it is more forgiving and avoids the risk of leaks.
What Kind of Chocolate Should I Use?
Use bittersweet chocolate with 60 to 72 percent cacao. This range provides deep chocolate flavor without excess sweetness. Brands like Ghirardelli, Lindt, and Guittard all work well. Avoid chocolate chips, which contain stabilizers that prevent smooth melting.
Why Did My Cheesecake Not Set?
An under-set cheesecake usually needs more time in the oven. Even if the center jiggles, it should not slosh like liquid. If you pulled it out too early, you can return it to the oven for another 5 to 10 minutes. A cheesecake that does not set at all after proper baking may have too much liquid or not enough eggs. Check your measuring accuracy.
Can I Halve or Double the Recipe?
Yes to both. To halve the recipe, use a 6-inch springform pan and bake for 35 to 40 minutes. To double the recipe, use a 12-inch springform pan (rare in home kitchens) or bake two cheesecakes side by side. Doubling in two pans is more reliable than one giant pan because the baking time stays consistent.
FAQs
What are tips for making a chocolate cheesecake?
Use room temperature ingredients to prevent lumps. Beat the eggs on low speed to avoid cracks. Bake at 325 degrees F for a gentle, even cook. Cool the cheesecake inside the oven with the door cracked for one hour.
How do I know if my chocolate cheesecake is finished baking?
The cheesecake is done when the edges are set but the center two inches still jiggle slightly. An instant-read thermometer should read 150 degrees F. The center will continue to set as it cools.
Can I freeze homemade chocolate cheesecake?
Yes. Wrap the chilled cheesecake tightly in plastic wrap and aluminum foil, then freeze for up to two months. Thaw overnight in the refrigerator before serving. Add the ganache topping after thawing for the best texture.
Why did my chocolate cheesecake crack?
Cracks come from over-beating the eggs, baking at too high a temperature, or cooling too quickly. Mix eggs on the lowest speed, bake at 325 degrees F, and cool the cheesecake inside the turned-off oven with the door cracked.
What kind of chocolate should I use for chocolate cheesecake?
Use bittersweet chocolate with 60 to 72 percent cacao for the richest flavor. Brands like Ghirardelli, Lindt, and Guittard all work well. Avoid chocolate chips because they contain stabilizers that prevent smooth melting.
Time to Bake Your Best Chocolate Cheesecake
You now have a complete chocolate cheesecake recipe that has been tested dozens of times in our home bakery. Every step is designed to give you a crack-free, creamy, deeply chocolatey result. The overnight chill is the hardest part because the smell of fresh cheesecake in the kitchen is hard to resist.
Once you bake this chocolate cheesecake recipe a few times, you will start riffing on it. Try the no-bake version in summer, the mini cheesecakes for parties, or the salted caramel variation when you want something extra special. The base recipe is the foundation for a dozen different desserts.
Save this recipe for the next time you need a dessert that impresses. Your family and friends will think you spent hours on it. I will not tell them how simple the process actually is.