
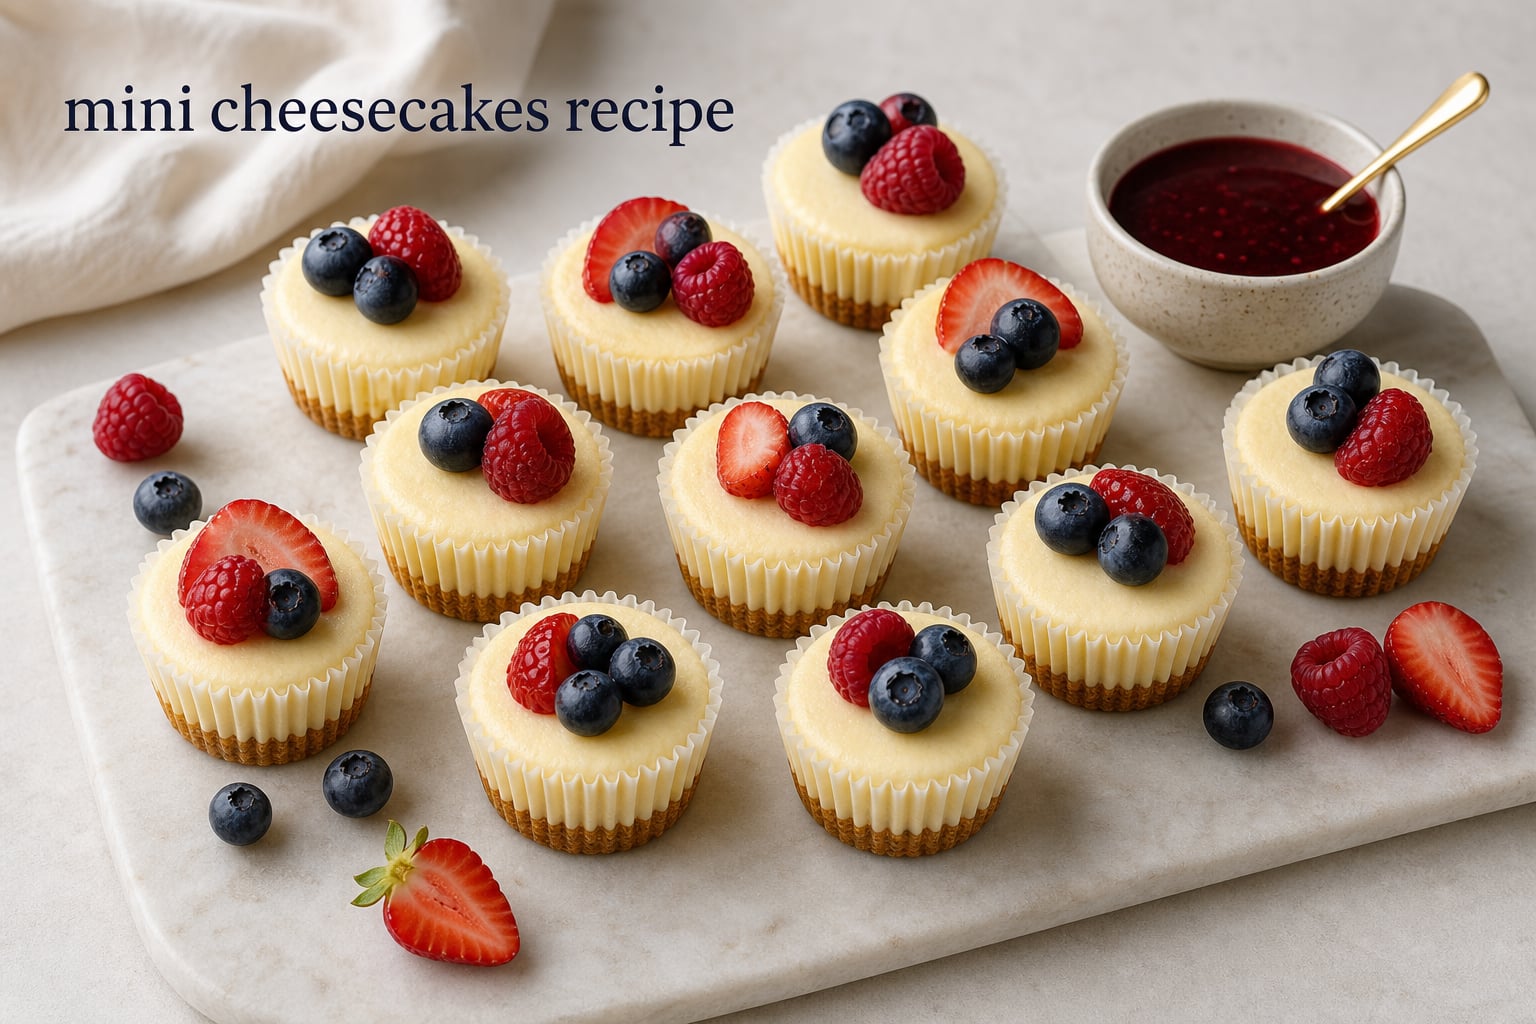
This mini cheesecakes recipe makes creamy, individual cheesecakes in a standard muffin pan, with a buttery graham cracker crust and a smooth vanilla filling. They are a practical party dessert because every serving is already portioned, and they also work well as a make-ahead dessert.
The method is simpler than a full-size cheesecake: press crumbs into lined cups, mix the filling gently, bake until the centers still have a small wobble, then cool and chill. You do not need a water bath for this batch, although gradual cooling and room-temperature ingredients make a noticeable difference.
We built this guide around the questions bakers ask most often: when the centers are done, why cracks form, whether Greek yogurt can replace sour cream, and how to freeze the finished cakes. Read through the cooling step before you start; cheesecake gets its texture after chilling, not right out of the oven.
At a glance: This recipe yields 12 mini cheesecakes in a standard 12-cup muffin pan. Plan for about 20 minutes of preparation, 17 to 20 minutes of baking, 1 hour of cooling, and at least 4 hours of chilling.
Table of Contents
This mini cheesecakes recipe makes 12 creamy individual desserts.
Mini cheesecakes are individual-sized cheesecakes baked in muffin cups with a crumb crust and a cream cheese filling. Their smaller size gives you tidy servings for a birthday treat, potluck dessert, or a small crowd without slicing a whole cake.
For the cleanest flavor and texture, use block, or brick-style, full-fat cream cheese rather than spreadable cream cheese from a tub. The block style is firmer and is designed for baking, while the spreadable kind can make the filling too soft.
You need a standard muffin pan, liners, and basic mixing tools.
Set out a standard 12-cup muffin pan, 12 cupcake liners, a bowl for the crust, a large bowl for the filling, a hand mixer or stand mixer, a rubber spatula, and a measuring cup with a flat bottom. A food processor makes fast crumbs, but a sealed bag and rolling pin work just as well.
Take the cream cheese, sour cream, and eggs from the refrigerator 30 to 60 minutes before mixing. Softened ingredients blend into a smoother cream cheese filling, so you are less likely to keep beating the batter just to remove lumps.
You need graham crumbs, cream cheese, and a short list of filling ingredients.
- For the crust: 1 cup graham cracker crumbs, 2 tablespoons granulated sugar, and 4 tablespoons unsalted butter, melted.
- For the filling: 16 ounces full-fat block cream cheese, softened; 1/2 cup granulated sugar; 1/4 cup sour cream; 2 teaspoons vanilla extract; 1 tablespoon fresh lemon juice; 2 large eggs; and a small pinch of salt.
- For serving: Choose fruit, jam, whipped cream, chocolate, caramel, cookie crumbs, or another topping after the cheesecakes have chilled.
The lemon juice does not make these lemon cheesecakes; it gives the sweet filling a little tang. If you prefer, plain full-fat Greek yogurt can stand in for the sour cream in the same amount, a swap many home bakers report using successfully.
Tip: Measure the graham cracker crumbs after crushing them. Large, uneven pieces do not pack as closely and can leave a crust that crumbles when you peel away the liner.
You make mini cheesecakes by baking the crust first and mixing the filling gently.
The numbered process below answers how to make mini cheesecakes from scratch in a standard muffin pan. Each step is short, but the pauses for cooling and chilling are part of the recipe rather than optional waiting time.
Step 1: Heat the oven and line the pan.
Position an oven rack in the center and heat the oven to 325°F. Put one liner in each cup of the 12-cup muffin pan, pressing the liners open so the crust can reach the corners.
Paper liners are easy to find and work well when the cheesecakes are fully chilled. If presentation matters, choose sturdy paper or foil liners with a light coating; very thin paper can show butter spots and may cling more tightly to a warm cheesecake.
Step 2: Mix and pre-bake the graham cracker crust.
Stir the graham crumbs, sugar, and melted butter until every crumb looks lightly moistened. Divide the mixture among the cups, using about 1 tablespoon plus 1 teaspoon per liner.
Press each portion firmly and evenly with the flat bottom of a measuring cup or a small glass. The pressure matters more than making a thick crust: a compact, level layer holds together and creates a clean base for the individual cheesecakes.
Bake the crusts for 5 minutes, then leave the pan on a rack while you make the filling. Pre-baking dries and sets the butter-and-crumb layer, so it is less likely to mix into the filling.
Step 3: Beat the cream cheese and sugar until smooth.
Beat the softened cream cheese by itself on medium-low speed until it is smooth, scraping the bowl and beaters once. Add the sugar and salt, then beat only until the mixture looks creamy and no dry sugar remains around the bowl.
Add the sour cream, vanilla, and lemon juice, and mix on low speed until combined. Scrape the bowl again, especially the bottom, where a small pocket of unmixed cream cheese can hide.
Step 4: Add eggs at low speed to limit air bubbles.
Add the eggs one at a time on low speed, stopping as soon as each egg disappears into the batter. Overmixing after the eggs go in whips in excess air, which can puff the cakes in the oven and leave them more likely to crack or sink while cooling.
Finish with a rubber spatula if you see a few streaks rather than running the mixer longer. The finished batter should be thick, glossy, and smooth, not foamy.
Warning: Do not use cold, lumpy cream cheese and then compensate by mixing at high speed for a long time. Warm ingredients and brief, low-speed mixing solve the problem before extra air gets into the batter.
Step 5: Fill the cups evenly without overfilling them.
Divide the filling over the cooled crusts, filling each liner nearly to the top. A small cookie scoop, a measuring cup with a spout, or a piping bag makes portioning cleaner, but a spoon works if you move slowly.
Tap the pan very gently on the counter once or twice to settle the batter. Do not repeatedly bang it; the goal is to level the tops, not to force every bubble out of a thick filling.
Step 6: Bake until the edges are set and the centers jiggle slightly.
Bake for 17 to 20 minutes at 325°F. Start checking at 17 minutes because metal pan color, liner thickness, and individual oven behavior can shift the timing by a few minutes.
The outer ring should look set, while the center of each mini cheesecake should quiver gently when you nudge the pan. It should not look liquid or slosh across the surface; a little movement in a small center is the sign that the residual heat can finish the job without drying it out.
Step 7: Cool gradually, then chill until fully firm.
Turn off the oven, crack the door open, and let the pan sit inside for 10 minutes. Then transfer the pan to a wire rack and cool the cheesecakes to room temperature, about 45 minutes to 1 hour.
Cover the pan loosely and refrigerate for at least 4 hours, or overnight for the firmest texture and easiest liner removal. Add wet toppings only after chilling so their liquid does not run over soft tops.
You bake mini cheesecakes at 325°F for 17 to 20 minutes.
The direct answer to how long to bake mini cheesecakes is 17 to 20 minutes at 325°F in a standard muffin pan. They are done when their edges are set and their centers have a slight jiggle, not when the entire top looks hard and motionless.
Cheesecake continues setting as it cools, so an overbaked cake is more likely to be dry or cracked. If you use a dark metal pan, begin checking at the early end of the range; dark pans can transfer heat more aggressively than lighter-colored metal.
The slight-jiggle test is more dependable than a clean toothpick.
A toothpick test is useful for cakes, but it is not the best test here because cheesecake is meant to remain creamy. Instead, slide the oven rack out partway and gently nudge the pan: the center should wobble as one soft area, while the edges stay in place.
If the entire top ripples like liquid, bake for 2 more minutes and check again. If only a coin-sized center moves, take the pan out; refrigeration will give the filling its final sliceable texture.
You prevent most cracks with room-temperature ingredients, low-speed mixing, and slow cooling.
Mini cheesecakes crack when the filling rises quickly, dries at the surface, or contracts abruptly as it cools. The usual sources are cold ingredients, too much air from overmixing, baking too long, or moving a hot pan straight into a cold refrigerator.
Use the gradual cooling routine in Step 7, and do not open the oven door repeatedly during the first part of baking. A small crack does not change the flavor, and toppings make it easy to cover, but these habits reduce the chance of one forming.
A water bath is optional for mini cheesecakes.
A water bath, also called a bain-marie, surrounds a pan with hot water to add gentle moisture and moderate the heat. It can help with cracking, but a standard lined muffin pan makes a traditional full-pan water bath awkward and unnecessary for this recipe.
If you want the extra buffer, place a separate pan of hot water on the rack below the muffin pan rather than placing the lined muffin pan directly in water. This adds humidity to the oven without risking soggy liners or water seeping into the crusts.
A sunken center usually points to air or an under-set filling.
A shallow dip after cooling is common and gives toppings a useful place to sit. A deep sink often means the filling was beaten too long, baked before the edges had set, or cooled too quickly after a large rise.
For the next batch, mix eggs only to combine, use the 17-minute check, and let the cakes rest in the switched-off oven for 10 minutes. If you have a dip now, spoon fruit or whipped cream into it and serve with confidence.
A crumbly crust needs enough butter and firm pressure.
If the base falls apart, check that the crumbs were measured after crushing and mixed until the butter reached all of them. Pressing firmly is just as important as the butter ratio, and the 5-minute pre-bake gives the crust a head start on setting.
Let the mini cheesecakes chill completely before peeling off the liners. A warm crust is naturally more fragile, while a cold, set cheesecake releases with much less pulling.
You can finish these mini cheesecakes with fruit, chocolate, or cookie toppings.
Keep the base recipe vanilla and choose toppings to match the occasion. Topping after chilling lets every guest choose a favorite and keeps the graham cracker crust from getting damp.
- Fresh berries: Add sliced strawberries, raspberries, blueberries, or a mixed berry pile just before serving.
- Berry sauce: Spoon a thick, cooled strawberry, blueberry, raspberry, or cherry sauce over each cake.
- Whipped cream: Pipe a small swirl and finish with a berry, citrus zest, or chocolate shaving.
- Chocolate: Drizzle cooled chocolate ganache or add crushed chocolate cookies for a rich contrast.
- Salted caramel: Use a small spoonful of caramel and a few flakes of salt to balance the sweet filling.
- Lemon curd: Add a bright spoonful of lemon curd and a little finely grated lemon zest.
- Cookie butter or jam: Swirl a teaspoon onto each chilled cheesecake for a quick, pantry-friendly finish.
You can turn the base into chocolate, lemon, or Oreo mini cheesecakes.
For a chocolate version, replace 2 tablespoons of graham crumbs with 2 tablespoons of unsweetened cocoa powder and use chocolate cookie crumbs for the crust. For lemon, add 1 tablespoon finely grated lemon zest with the sour cream; do not increase the lemon juice unless you are ready for a looser batter.
For an Oreo-style version, use finely crushed chocolate sandwich cookies for the crust and reduce the added butter if the crumbs already feel damp from their filling. For a vanilla-wafer crust, crush vanilla wafers to the same fine texture as graham crackers and use the same measured crumb amount.
You can make a gluten-free or lightly savory variation with deliberate swaps.
For a gluten-free adaptation, use certified gluten-free graham-style crumbs or gluten-free cookies, and check every topping label. The filling ingredients themselves are naturally simple, but cross-contact can matter for guests who must avoid gluten.
For a lightly savory direction, leave the sugar out of the crust, use plain cracker crumbs, and top a reduced-sugar cheesecake filling with herbs and roasted vegetables. Treat that as a separate appetizer recipe: it needs careful testing because the sweet vanilla base above is written for dessert.
Tip: For a party tray, top only half the batch before serving and put the rest of the toppings in small bowls. The plain chilled cakes stay neat longer, and guests can build their own bite-size cheesecakes.
You can refrigerate mini cheesecakes for four days or freeze them for longer storage.
Store fully chilled, untopped mini cheesecakes in an airtight container in the refrigerator for up to 4 days. Keep them in their liners until serving, which protects their sides and keeps refrigerator odors away from the delicate filling.
For a make-ahead party dessert, bake and chill them the day before, then add fruit, whipped cream, or sauces shortly before serving. That schedule also gives the filling enough time to become fully firm.
You freeze mini cheesecakes best before adding wet toppings.
Freeze the chilled, plain cheesecakes on a tray until firm, then wrap them individually or arrange them in an airtight freezer-safe container with parchment between layers. Freeze for up to 2 months for the best texture.
Thaw overnight in the refrigerator rather than on the counter. Add toppings after thawing, because fruit sauce and whipped cream can release moisture during freezing and make the surface messy.
You can halve the recipe for six cheesecakes or scale it for a crowd.
To make six, halve every ingredient and use a 6-cup muffin pan or fill six lined cups in a standard pan. Begin checking at 17 minutes anyway; fewer cheesecakes do not necessarily bake much faster when the cup size stays the same.
To double the recipe, use two standard pans and rotate their positions once near the end only if your oven bakes unevenly. Mixing two separate batches of filling is often easier than crowding one bowl and accidentally overmixing it.
You get the cleanest release from a metal pan with sturdy liners.
A light-colored metal muffin pan is the most predictable choice because it conducts heat steadily and supports paper liners well. Silicone pans can work, and bakers report good results when silicone cups are paired with parchment liners, but flexible sides make it harder to press an even crust and move filled cups safely.
Paper, foil, and parchment liners each solve a different problem.
Standard paper liners are convenient and fine for casual serving, especially after a full chill. Foil liners are sturdier and hold their shape better for transport, while parchment-style tulip liners look attractive but have taller sides that can change how you portion the filling.
Whichever liner you choose, do not peel it off until the cheesecake is cold. If sticking is a recurring issue, use a parchment liner or lightly coat a paper liner with baking spray before adding the crust.
A mini muffin pan makes smaller bite-size cheesecakes with a shorter bake.
A 24-cup mini muffin pan produces smaller, two-bite cheesecakes rather than the 12 standard individual portions in this recipe. Line the cups, add a thin layer of crust, and fill them nearly to the top, but begin checking early because their reduced size shortens the bake.
Use the same visual cue instead of copying the standard-pan time: set edges with a small, soft jiggle at the center. Small cakes can go from creamy to overbaked quickly, so stay near the oven during the first test.
These mini cheesecake answers cover the baking questions people ask most.
How do you make mini cheesecakes from scratch?
Make a crumb crust in lined muffin cups and bake it briefly. Mix softened block cream cheese with sugar, sour cream, vanilla, lemon juice, and eggs at low speed, fill the cups, bake at 325°F until the centers jiggle slightly, cool gradually, and chill for at least 4 hours.
What ingredients are needed for mini cheesecakes?
You need graham cracker crumbs, sugar, melted butter, full-fat block cream cheese, sour cream, vanilla extract, lemon juice, eggs, and a pinch of salt. Fruit, chocolate, caramel, whipped cream, or jam can be added after chilling.
How long do mini cheesecakes take to bake?
Standard muffin-pan mini cheesecakes take 17 to 20 minutes at 325°F. Remove them when the outer edges are set and only the centers still jiggle slightly.
Can you freeze mini cheesecakes?
Yes. Chill plain mini cheesecakes completely, freeze them firm on a tray, then wrap or store them airtight for up to 2 months. Thaw overnight in the refrigerator and add toppings after thawing.
Why do my mini cheesecakes crack?
Cracks usually come from overmixing air into the eggs, baking too long, using cold ingredients, or cooling too fast. Use room-temperature ingredients, mix eggs only until combined, take the cakes out while the centers still jiggle, and cool them gradually.
What is the best temperature to bake mini cheesecakes?
Bake standard muffin-pan mini cheesecakes at 325°F. This moderate oven temperature gives the filling time to set without pushing it to rise and dry too quickly.
How do you know when mini cheesecakes are done?
They are done when the edges look set and the center has a small, gentle wobble when you nudge the pan. A liquid-looking center needs more time, but a completely hard top often means the cheesecakes have baked too long.
Can you use vanilla wafers instead of graham crackers for mini cheesecakes?
Yes. Crush vanilla wafers finely and use the same measured amount as graham cracker crumbs, then combine them with sugar and melted butter. The crust will be sweeter and have a mild vanilla-cookie flavor.
This mini cheesecakes recipe gives you a reliable small-format dessert.
Use softened block cream cheese, a firmly pressed graham cracker crust, and low-speed mixing for a smooth, creamy batch. Bake only until the centers jiggle slightly, cool them in stages, and let the refrigerator finish setting the filling.
Once the mini cheesecakes are cold, keep them plain for flexible serving or finish them with your favorite topping. Make them a day ahead for a party, or freeze the untopped cakes so an individual dessert is ready when you need it.