
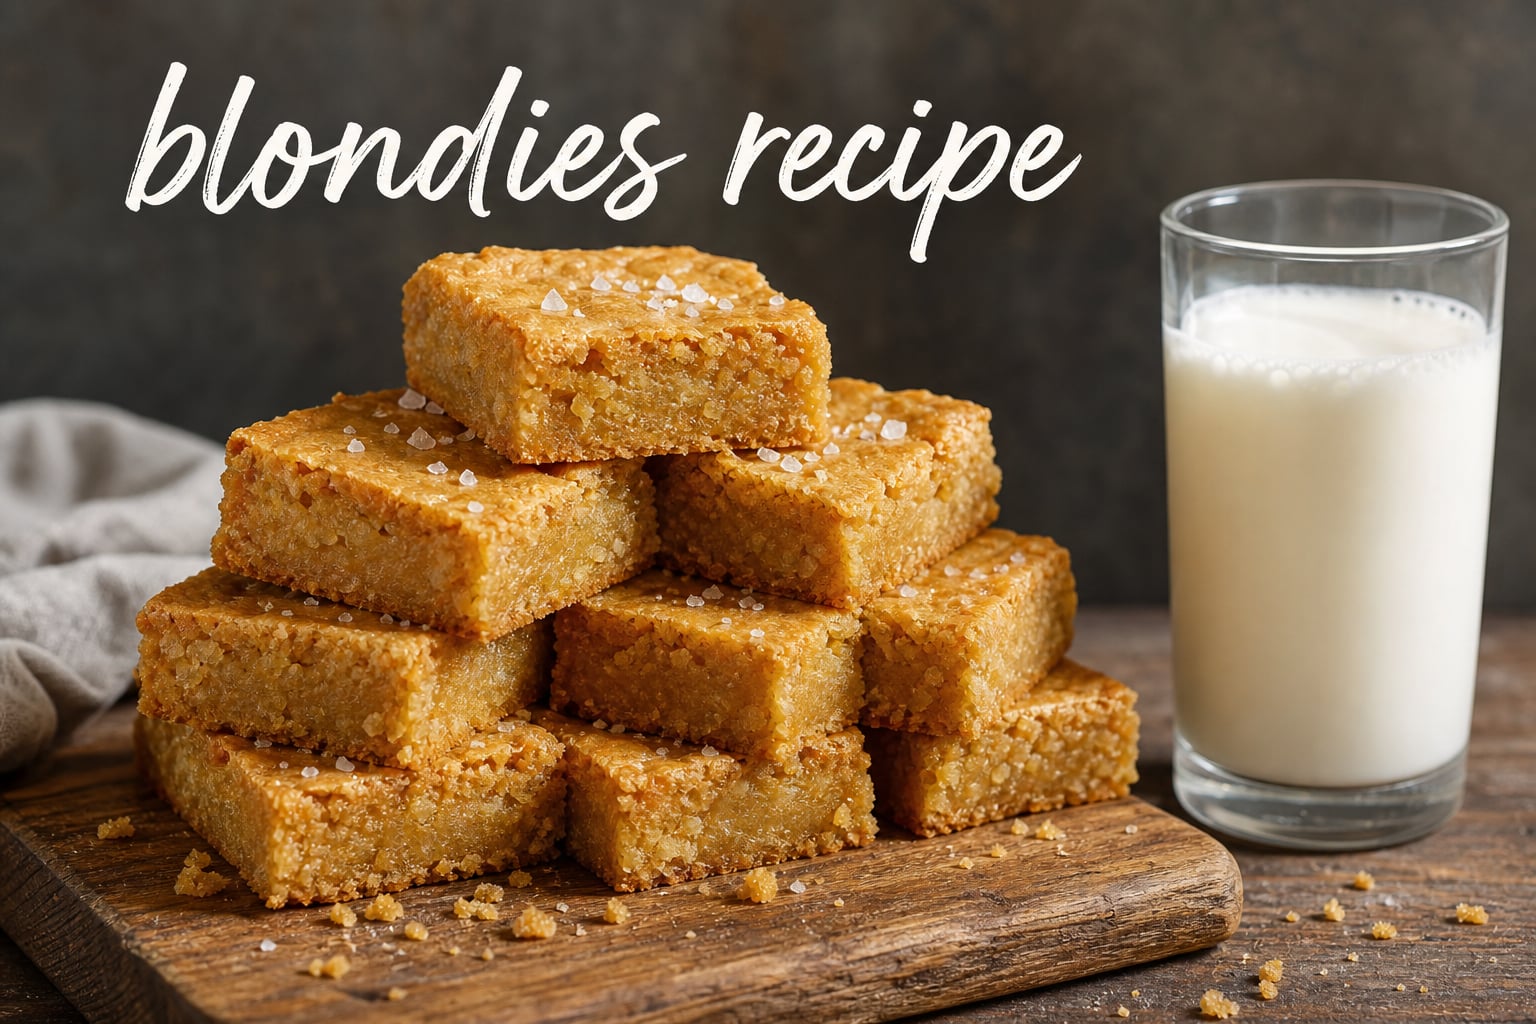
I have baked hundreds of batches of blondies in my kitchen, and I can tell you that most recipes get the texture wrong. They come out cakey, greasy, or oddly dry instead of dense, chewy, and buttery. This blondies recipe is the one I keep coming back to because it actually works every single time.
A great blondie should hit somewhere between a chocolate chip cookie and a fudgy brownie in texture. Think crisp edges, a gooey center, and deep butterscotch flavor from properly caramelized brown sugar. Once you understand the technique, you will never go back to boxed mixes.
In this guide, I walk you through every step of this blondies recipe. You get the full ingredients list, detailed instructions, pro tips I learned from years of testing, troubleshooting for common problems, and creative variations to try. Whether you are baking for a potluck or a Tuesday night craving, this recipe delivers.
Table of Contents
What Are Blondies? (And How They Differ From Brownies)
Blondies are buttery, chewy dessert bars made without cocoa powder, featuring brown sugar and vanilla for a rich butterscotch flavor. Think of them as brownies that swapped chocolate for caramelized sugar goodness. They have a dense, fudgy texture with crisp edges and a soft, almost gooey center.
The difference between blondies and brownies comes down to one main ingredient: chocolate. Brownies rely on cocoa powder or melted chocolate for their flavor and structure. Blondies skip the chocolate entirely and let brown sugar do the heavy lifting, which creates that signature caramel-butterscotch taste.
Texture is the other big difference. Brownies can be cakey, fudgy, or somewhere in between. Blondies should always be dense and chewy, closer to a thick cookie bar than a cake slice.
Here is a quick comparison I put together:
Flavor base: Brownies use cocoa or chocolate. Blondies use brown sugar and vanilla.
Texture: Brownies range from cakey to fudgy. Blondies are always dense and chewy.
Color: Brownies are dark brown. Blondies are golden to deep amber.
Mix-ins: Brownies pair with nuts and chunks. Blondies shine with white chocolate, toffee, and butterscotch chips.
One thing I see home bakers get wrong all the time is treating blondies like brownies. They use the same mixing method, the same baking time, and the same expectations. Blondies need gentler handling and a shorter bake to stay chewy rather than turning cakey.
Brown sugar is the real star of any blondies recipe. The molasses in brown sugar adds moisture, depth, and that caramel flavor you cannot get from white sugar. I use a blend of light and dark brown sugar in my recipe because the dark sugar adds extra molasses punch while the light sugar keeps things from getting too heavy.
The Best Blondies Recipe: Ingredients You Will Need
This blondies recipe uses simple pantry staples, but each one plays a specific role. Here is exactly what you need and why.
Dry ingredients:
2 cups (250g) all-purpose flour, spooned and leveled
1 teaspoon baking powder
1/2 teaspoon kosher salt, plus more for finishing
1 tablespoon cornstarch (this is my secret ingredient for tenderness)
Wet ingredients:
3/4 cup (170g) unsalted butter, melted and slightly cooled
1 1/2 cups (300g) packed brown sugar (I use a blend of light and dark)
1 large egg plus 1 extra egg yolk, room temperature
2 teaspoons pure vanilla extract (use the good stuff here)
Mix-ins (optional but recommended):
1 cup white chocolate chips or chunks
1/2 cup chopped walnuts or pecans (optional)
Flaky sea salt for finishing
Let me explain a few ingredient choices that make this recipe stand out from the rest.
The extra egg yolk is key. Egg yolks add fat and richness without adding the water that egg whites contribute. This gives blondies a denser, fudgier texture. I tested batches with and without the extra yolk, and the difference is noticeable.
Cornstarch is the ingredient most blondie recipes skip. Adding just one tablespoon softens the gluten in the flour, giving you a more tender bite. It prevents that tough, bready texture that ruins so many homemade blondies.
Brown sugar matters more than you think. Do not substitute white sugar here. The molasses in brown sugar is what creates the chewy texture and butterscotch flavor. If you only have light brown sugar, that works fine. If you want deeper flavor, use dark brown sugar.
Use pure vanilla extract, not imitation. The vanilla flavor is front and center in blondies since there is no chocolate to hide behind. A high-quality vanilla extract makes a real difference you can taste.
How to Make Blondies: Step-by-Step Instructions
Follow these steps and you will have perfectly chewy blondies every time. The whole process takes about 10 minutes of prep and 30 minutes of baking.
Step 1: Prep Your Pan and Oven
Preheat your oven to 350 degrees F (175 degrees C). Line a 9 by 13 inch metal baking pan with parchment paper, leaving an overhang on the long sides. This overhang acts as handles to lift the blondies out later.
Use a metal pan if you have one. Metal conducts heat evenly and helps create those crisp, caramelized edges that make blondies so good. I explain the pan material differences in detail in the tips section below.
Step 2: Whisk the Dry Ingredients
In a medium bowl, whisk together the flour, baking powder, cornstarch, and salt. Set this aside. Whisking the dry ingredients separately ensures even distribution of the leavening agent and cornstarch.
Step 3: Mix the Wet Ingredients
In a large bowl, whisk the melted butter and brown sugar together until smooth and well combined. The mixture should look glossy and smell like caramel. Make sure your butter has cooled slightly so it does not cook the eggs in the next step.
Step 4: Add Eggs and Vanilla
Whisk in the egg, the extra egg yolk, and the vanilla extract. Mix until fully incorporated but do not overbeat. A few gentle whisks are all you need here. Over-mixing at this stage can incorporate too much air and lead to cakey blondies.
Step 5: Combine Wet and Dry
Pour the dry ingredients into the wet mixture. Use a spatula to fold everything together gently. Stop mixing as soon as you no longer see dry flour streaks. This is where most people overmix, and it is the number one cause of tough blondies.
Fold in your mix-ins now if you are using them. White chocolate chips are my favorite, but this is where you can get creative.
Step 6: Spread and Bake
Transfer the batter to your prepared pan and spread it into an even layer with your spatula. The batter will be thick and sticky, which is exactly what you want.
Bake for 28 to 32 minutes. Start checking at 25 minutes. The edges should be golden brown and set, but the center should still look slightly underdone and gooey. Remember, the blondies continue cooking in the hot pan after you take them out.
Step 7: Cool Completely Before Cutting
This is the hardest step. Let the blondies cool in the pan for at least 1 hour before lifting them out using the parchment overhang. For the cleanest cuts, refrigerate for an additional 30 minutes.
Sprinkle with flaky sea salt right before serving. The salt cuts through the sweetness and makes the butterscotch flavor pop.
Pro Tips for Perfect Blondies Every Time
These are the tips I wish someone had told me when I first started baking blondies. Each one solves a real problem I have encountered through years of testing.
Measure Your Flour Correctly
Too much flour is the single biggest reason blondies turn out dry and cakey. Do not scoop your measuring cup directly into the flour bag. This packs the flour down and can add up to 25 percent extra flour to your recipe.
Instead, use the spoon and level method. Fluff the flour with a fork, spoon it into your measuring cup, and level it off with a knife. Better yet, use a kitchen scale for accuracy. Two cups by weight is 250 grams.
Choose the Right Pan
The pan you use has a bigger impact on your blondies than you might expect. I tested this recipe in metal, glass, and ceramic pans, and here is what I found.
Metal pans are the best choice for blondies. They heat up quickly and transfer heat evenly, which promotes even baking and crisp edges. If I could only own one pan for blondies, it would be a metal 9 by 13 inch baking pan.
Glass pans insulate the batter, causing slower, uneven baking. The edges often overcook before the center is done. If you must use glass, reduce your oven temperature by 25 degrees and add 5 to 10 minutes to the bake time.
Ceramic pans look beautiful but behave similarly to glass. They retain heat longer, which means your blondies keep cooking after you remove them from the oven. Use caution and check for doneness early.
Do Not Overmix the Batter
This cannot be stressed enough. Overmixing develops the gluten in the flour, which makes blondies tough and cakey. Once you add the dry ingredients to the wet, fold gently and stop the moment everything is combined.
You do not need a stand mixer or hand mixer for this recipe. A bowl and a whisk or spatula are all you need. In fact, mixing by hand helps prevent overmixing because you naturally stop sooner.
Underbake Slightly for Chewy Texture
The biggest mistake I see is overbaking. Blondies should come out of the oven when the center still looks slightly underdone. They firm up as they cool.
If you wait until a toothpick comes out completely clean, your blondies are already overbaked. The center should look glossy and set but still soft. A toothpick should come out with a few moist crumbs attached, not wet batter.
Let Them Cool Fully
Cutting warm blondies is tempting but the results are messy and the texture suffers. The cooling process allows the structure to set properly. I know it is hard to wait, but the patience pays off in clean cuts and perfect texture.
Finish With Flaky Sea Salt
This tip comes straight from the baking forums, and it transforms the flavor completely. A sprinkle of flaky sea salt on top of your blondies before serving balances the sweetness and enhances the butterscotch flavor. It sounds strange if you have never tried it, but one taste will make you a believer.
The Brown Butter Upgrade
If you want to take this blondies recipe to the next level, try browning your butter first. Brown butter, or beurre noisette, adds a deep, nutty, toasted flavor that pairs beautifully with brown sugar.
To brown butter, start by melting your butter in a light-colored saucepan over medium heat. A light-colored pan lets you see the color of the butter change. Stir constantly as the butter melts and begins to foam.
After about 5 to 7 minutes, you will see brown specks forming at the bottom of the pan and the butter will start to smell like toasted nuts. Remove it from the heat immediately and pour it into a heatproof bowl to stop the cooking process.
Let the browned butter cool until it is warm but not hot, then use it in place of the regular melted butter in the recipe. The result is blondies with an incredibly complex, nutty caramel flavor that tastes like something from a professional bakery.
One note: browning butter causes some water to evaporate, so your brown butter will weigh slightly less than the original amount. Add a tablespoon of water to compensate if you want to be precise.
Blondie Variations and Mix-Ins
One of the best things about this blondies recipe is how versatile it is. The base batter works as a blank canvas for all kinds of mix-ins and flavor combinations. Here are my favorite variations.
White Chocolate Blondies
White chocolate and blondies are a match made in heaven. The creamy sweetness of white chocolate chips melts into the buttery batter and creates pockets of gooey richness. Add 1 cup of white chocolate chips to the batter before baking.
Chocolate Chip Blondies
For a more classic cookie bar feel, use semi-sweet or dark chocolate chips. One baker on a forum I follow swears by using 70 percent dark chocolate chips for a sophisticated contrast to the sweet blondie base. I tried it, and they were right. The bitterness of the dark chocolate cuts through the sweetness beautifully.
Walnut or Pecan Blondies
Nuts add crunch and a toasty flavor that complements butterscotch. Walnuts are the traditional choice, but pecans work just as well. Toast the nuts in a dry skillet for a few minutes before adding them to intensify their flavor.
Dirty Blondies
A dirty blondie is a blondie that includes both white and dark chocolate, creating a marbled or speckled appearance. The combination of sweet white chocolate and slightly bitter dark chocolate in a buttery blondie base is irresistible. Add 1/2 cup each of white and dark chocolate chips.
Three-Ingredient Blondies (Quick Version)
If you are short on time or ingredients, you can make a simplified version with just three ingredients. Combine one box of yellow cake mix, two eggs, and one-third cup of melted butter. Spread in a pan and bake at 350 degrees F for 25 to 30 minutes. The texture is not the same as from-scratch blondies, but it satisfies the craving in a pinch.
Creative Variations From Real Bakers
I have gathered some inspired variations from baking forums that are worth trying. One baker makes brown butter blondies with crushed pretzels, oats, and cinnamon for a sweet and salty twist. Another tops their blondies with sliced pears, butter, brown sugar, and brandy, finished with a white chocolate drizzle.
Banana pudding blondies are another creative option that gets rave reviews online. The possibilities are endless once you master the base recipe.
Troubleshooting Common Blondie Problems
Even with a great recipe, things can go wrong. Here are the most common problems I hear about and how to fix them.
Why Are My Blondies Cakey?
Cakey blondies are usually caused by one of three things: too much flour, overmixing, or overbaking. Check your flour measurement first. If you scooped directly from the bag, you probably added too much. Switch to the spoon and level method or use a kitchen scale.
Overmixing incorporates air into the batter, which makes blondies rise like a cake instead of staying dense. Fold the dry ingredients in gently and stop as soon as they are incorporated. For overbaking, remember that blondies should look slightly underdone in the center when you remove them from the oven.
Why Are My Blondies Greasy?
Greasy blondies are a common complaint, especially with modern recipes that call for a lot of butter. The issue is usually that the butter has separated from the sugar during mixing. Make sure your butter has cooled slightly after melting so it emulsifies properly with the brown sugar.
Another cause is too much butter relative to the other ingredients. My recipe uses 3/4 cup of butter, which is enough for richness without greasiness. If you are adapting a recipe, be cautious about increasing the butter.
Why Are My Blondies Dry?
Dry blondies come from overbaking or using too much flour. Blondies continue to cook in the hot pan after you remove them, so pull them out when the center is still soft. Also, check your flour measurement as described in the tips section.
Using salted butter without adjusting the added salt can also make blondies taste dry and overly salty. Stick with unsalted butter so you can control the salt level yourself.
Why Did My Blondies Sink in the Middle?
A sunken center usually means the blondies were underbaked in the middle, or you opened the oven door too early in the baking process. Keep the oven door closed for at least the first 20 minutes of baking to avoid temperature drops.
If your oven runs cool, your blondies may need a few extra minutes. An oven thermometer is a cheap tool that can save you from a lot of baking frustration.
How to Store and Freeze Blondies
Proper storage keeps your blondies fresh and chewy for days. Here is how I store mine.
At room temperature: Store cooled blondies in an airtight container at room temperature for up to 5 days. Place a piece of bread in the container to keep them soft. The moisture from the bread transfers to the blondies and keeps them from drying out.
In the refrigerator: You can refrigerate blondies for up to a week, but I do not recommend it. Cold temperatures dry them out and change the texture. If you do refrigerate them, let them come to room temperature before serving.
Freezing blondies: Yes, you can absolutely freeze blondies. Wrap individual squares tightly in plastic wrap, then place them in a freezer bag. They will keep for up to 3 months. Thaw at room temperature for about an hour, or warm them in the microwave for 10 seconds for a fresh-baked taste.
You can also freeze the batter. Pour it into a freezer-safe container and freeze for up to 2 months. Thaw overnight in the refrigerator, then bake as directed.
FAQs
What’s the difference between a blondie and a brownie?
The main difference is chocolate. Brownies are made with cocoa powder or melted chocolate, while blondies use brown sugar and vanilla for a butterscotch-caramel flavor. Texture-wise, brownies can range from cakey to fudgy, but blondies should always be dense, chewy, and buttery.
What’s the secret ingredient for amazing blondies?
Cornstarch is my secret weapon for tender blondies. Adding one tablespoon of cornstarch to the dry ingredients softens the gluten in the flour and prevents the tough, bready texture that ruins so many homemade blondies. An extra egg yolk and a blend of light and dark brown sugar also make a big difference in richness and flavor.
What is a dirty blondie?
A dirty blondie is a blondie that contains both white chocolate and dark chocolate chips or chunks. The combination creates a speckled, marbled appearance and a flavor that blends sweet butterscotch with slightly bitter chocolate. It is one of the most popular blondie variations.
How do you make 3 ingredient blondie?
For a quick 3-ingredient version, combine one box of yellow cake mix, two large eggs, and one-third cup of melted butter. Mix until combined, spread in a greased pan, and bake at 350 degrees F for 25 to 30 minutes. The texture is softer and less dense than from-scratch blondies, but it satisfies the craving when you are short on time or ingredients.
Can you freeze blondies?
Yes, blondies freeze very well. Wrap individual squares tightly in plastic wrap and place them in a freezer-safe bag for up to 3 months. Thaw them at room temperature for about an hour, or warm them in the microwave for 10 seconds. You can also freeze the un baked batter for up to 2 months.
Why are my blondies cakey instead of chewy?
Cakey blondies are almost always caused by too much flour, overmixing the batter, or overbaking. Measure flour using the spoon and level method or a kitchen scale. Fold the dry ingredients in gently and stop as soon as they are combined. Pull the blondies from the oven when the center still looks slightly soft and glossy, as they continue to set as they cool.
Final Thoughts on This Blondies Recipe
This blondies recipe is the result of years of testing and tweaking in my kitchen. The combination of brown sugar, melted butter, an extra egg yolk, and that secret tablespoon of cornstarch creates blondies that are dense, chewy, and packed with butterscotch flavor.
Remember the three rules that make or break blondies: measure your flour carefully, do not overmix, and underbake slightly. Get those right and you will have perfect blondies every time.
Start with the base recipe, then experiment with the variations once you are comfortable. Try the brown butter upgrade for a special occasion, or throw in your favorite mix-ins for a weeknight treat. The best blondie recipe is the one you make your own.
Happy baking. I hope this becomes your go-to blondies recipe for 2026 and beyond.