
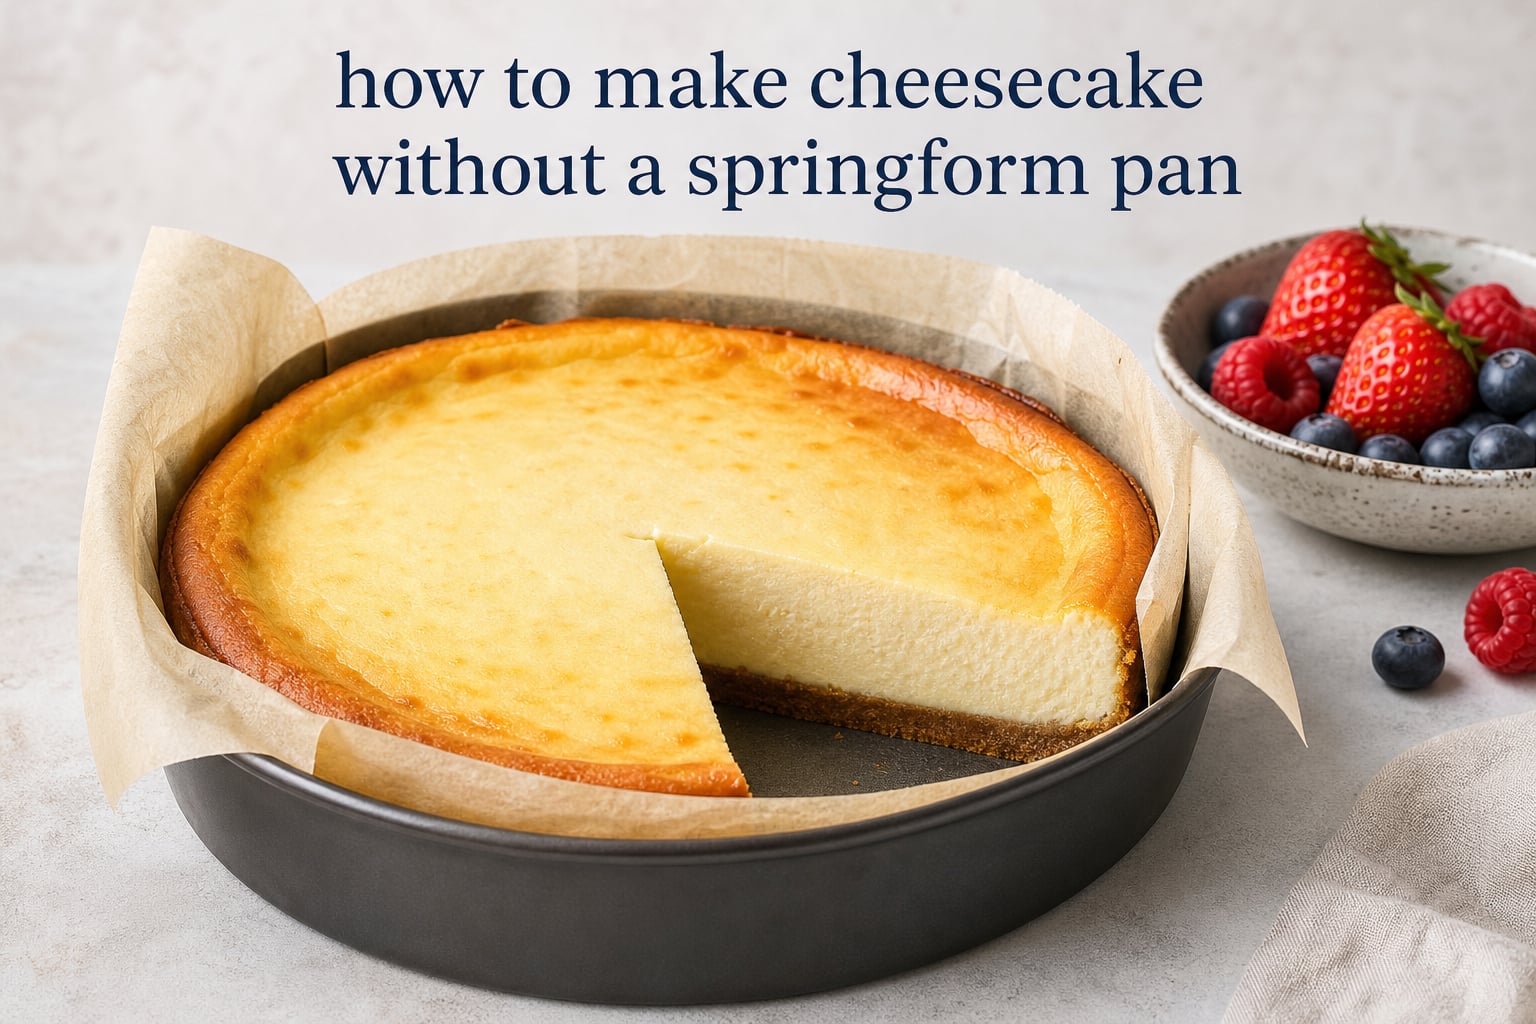
You can make cheesecake without a springform pan by using a regular cake pan, deep-dish pie plate, loaf pan, ramekins, or a muffin tin. The dependable trick is to line a pan with parchment paper that extends above the rim, bake the cheesecake gently, then chill it completely before lifting it out by the paper tabs.
A springform pan makes unmolding convenient, but it does not create creamy cheesecake. Careful pan preparation, moderate heat, and a long chill do that work, and they also spare you the worry of a springform latch leaking in a water bath.
This guide explains how to make cheesecake without a springform pan from pan choice through storage. It covers a classic baked, cream cheese cheesecake recipe method that fits a 9-inch round cake pan, plus practical alternatives for small batches, individual servings, no-bake filling, and a rustic Basque cheesecake.
Quick answer: A 9-inch round cake pan is the closest everyday substitute for a 9-inch springform pan. Line its base and sides with parchment, leave two long paper handles, and give the finished cheesecake at least 6 hours in the refrigerator before you try to lift it out.
Table of Contents
Yes: How to Make Cheesecake Without a Springform Pan
The process is simple: choose a pan with enough depth, line it when you want to remove the cake whole, bake at a low temperature, cool slowly, and chill thoroughly. A regular pan changes how you unmold or serve the cheesecake; it does not require a different kind of filling.
Choose the serving plan. Use a parchment-lined cake pan if you want a freestanding round cheesecake. Use a pie dish, ramekins, or a muffin tin if you are happy serving directly from the vessel.
Match the batter to the pan. Do not fill a pan above about three-quarters full, since cheesecake puffs slightly as it bakes.
Make a stable crust. Press crumbs firmly across the bottom, and slightly up the sides only when the pan and liner make that practical.
Mix gently. Beat room-temperature cream cheese smooth, then add the remaining ingredients at low speed so you do not trap excess air.
Bake gently. Remove the cake while the outer edge is set and the center still has a small wobble.
Cool and chill. Let the cheesecake come down from oven temperature gradually, then refrigerate until firm before slicing or lifting.
For a lift-out cheesecake, use parchment on the base and a collar on the sides. For a pie plate, no lining is required if presentation in the dish suits the occasion; a deep dish pie plate is especially useful when a birthday dessert needs to travel only as far as the table.
A regular cake pan is the closest springform pan substitute
A straight-sided 9-inch round cake pan is the best pan substitute for springform pan cheesecake when you want the familiar round shape. It has nearly the same diameter as a common 9-inch springform, but it needs parchment handles and patience because its fixed sides cannot open away from the cake.
9-inch round cake pan: Best for a full classic cheesecake. Choose a pan at least 2 inches deep, line it fully, and use a water bath only if you can set the cake pan inside a larger roasting pan.
Deep-dish pie plate: Best for the least stressful route. Bake and serve in the dish, so there is no unmolding moment; split excess batter between two dishes rather than overfilling one.
8- or 9-inch square pan: Best for cheesecake bars. Make a parchment sling with paper hanging over two opposing sides, then cut chilled squares.
Loaf pan: Best for a small cheesecake or neat slices. A parchment sling is easy to place in the long, straight shape, but use a reduced batch of filling.
Ramekins: Best for individual portions. Bake them on a sheet pan and serve from the ramekins, or use paper liners if they are straight-sided.
Muffin tin: Best for mini cheesecakes. Put paper cupcake liners in every well and reduce the baking time substantially.
A 9-inch pan holds a full recipe when it is at least 2 inches deep
Pan size is about volume as well as diameter. A shallow 9-inch pan may have the same width as a springform pan but not enough height for a thick crust and full batch of filling, so check depth before committing.
9-inch round, 2 inches deep
Use a standard full cheesecake batch; leave room at the top and line with a base round plus parchment collar.
8-inch round, 2 inches deep
Use a reduced batch, or reserve extra filling for a ramekin. The cheesecake will be taller and may take longer to bake.
9-inch deep-dish pie plate
Use a full batch only if the dish is deep enough; otherwise divide the filling between two pie plates or add a few ramekins.
8- or 9-inch square pan
Use a batch appropriate to the pan depth and cut bars after chilling. A square pan is forgiving because it is served in portions.
Standard muffin tin
Fill lined wells about three-quarters full. One full cheesecake batch makes far more than one tin, so bake in batches or halve the recipe.
When in doubt, set the empty pan on the counter and measure its depth with a ruler. The batter should sit below the rim with headroom, and any pan with less than 1 1/2 inches of usable depth is better for a thinner cheesecake or a partial batch.
Warning: Do not force a full 9-inch cheesecake recipe into a shallow pan. Batter that reaches the rim can spill, bake unevenly, and make it harder to judge when the center is done.
Parchment paper makes a regular pan easy to line and lift from
Parchment paper cheesecake lining has two jobs: it stops the crust from sticking and gives you a safe way to lift the chilled cake. A circle on the base helps with release, while a collar protects the sides and keeps the filling from touching bare metal.
A parchment base and two long handles give the most secure lift
First, trace the outside of the pan base onto parchment and cut just inside the line, so the circle lies flat on the interior bottom. Grease the pan lightly, press in the circle, then grease the parchment itself very lightly if the crust contains little butter.
For the handles, cut two parchment strips that are as wide as the inside of the pan and long enough to run across the base and extend 3 to 4 inches above each side. Lay one strip north to south and the other east to west, crossing them on the base like a plus sign.
Those strips form four tabs rather than only two. After chilling, hold opposite tabs together in each hand and lift slowly; the crossed strips support the center better than a single narrow sling.
A side collar should rise 2 inches above the rim
Cut a band of parchment long enough to wrap the inside circumference of the pan with a small overlap. Make it 2 inches taller than the pan wall, which gives room for a little rise and also keeps a water bath splash from reaching the filling.
Grease the pan sides so the collar will stay in place, press it against the wall, and overlap the ends. If the collar keeps springing inward, clip it at the rim with a clean metal binder clip, then remove the clip before the pan goes into the oven.
Do not use wax paper in place of parchment. Wax paper has a coating that is not meant for oven heat, while parchment is intended for baking.
Tip: Creasing the bottom edge of the side collar every inch or so lets it bend around a round pan without buckling. A few small folds are fine; a smooth, level base matters more than perfectly smooth sides.
This baked cheesecake method works in a lined 9-inch cake pan
This recipe framework makes a classic, creamy cheesecake with a graham cracker crust. It is written as a method rather than a promise about a particular brand of ingredient, so use the ingredient quantities from your trusted cream cheese cheesecake recipe and apply the pan, temperature, and cooling directions below.
Room-temperature ingredients make the filling smooth
Set blocks of cream cheese, eggs, and dairy on the counter long enough to lose their refrigerator chill before mixing. Cold cream cheese holds lumps, and aggressive beating to chase those lumps adds air that can later become cracks or an inflated, uneven top.
Graham cracker crumbs or another dry cookie crumb for the crust
Melted butter to bind the crumbs
Room-temperature full-fat cream cheese
Granulated sugar
Eggs at room temperature
Sour cream or heavy cream for a softer texture
Vanilla, a pinch of salt, and optional lemon zest
For a standard 9-inch cake pan, make the crust thick enough to cover the bottom evenly without building a tall wall of crumbs. Tall crust walls are more likely to crumble during lifting, especially in a pan lined with a paper collar.
Step 1: Bake the crust briefly before adding filling
Heat the oven to 325°F. Press the crumb mixture firmly over the parchment-covered base with the flat bottom of a measuring cup, then bake until the crust smells toasted and looks set, commonly 8 to 10 minutes.
Let the pan cool on a rack while you make the filling. A brief prebake keeps the bottom from becoming soggy after the wet filling goes in.
Step 2: Mix the filling at low speed after the cheese is smooth
Beat the cream cheese and sugar on low speed just until completely smooth, scraping the bowl and beater several times. Add sour cream or cream, flavorings, and salt, then add eggs one at a time on low speed and stop as soon as each egg disappears.
The target is a thick, glossy batter with very few visible bubbles. If you see bubbles on top after pouring, tap the pan once or twice gently on a folded towel and pop large bubbles with the point of a skewer.
Step 3: Bake until the edge is set and the center still moves
Pour the filling into the prepared pan and smooth the top. Bake at 325°F on the center rack, with or without a water bath as explained below, until the outer 2 to 3 inches look set and the middle 2 to 3 inches jiggle together when the pan is nudged.
A fully liquid center needs more time; a center that is puffed, dry-looking, and motionless has probably gone too far. If you use an instant-read thermometer, the center temperature should approach 160°F, but visual cues and slow cooling remain important because ovens and pan materials vary.
Step 4: Cool slowly before the refrigerator does its work
Turn off the oven, crack the door open, and leave the cheesecake inside for about 30 minutes if its top is delicate or the kitchen is cool. Then move it to a rack and let it cool until it is no longer warm before covering and refrigerating.
Chill the cheesecake at least 6 hours, and overnight is often better for clean slices and safe lifting. Cutting warm or barely chilled cheesecake is the main reason a correct bake can look loose and messy.
A water bath reduces cracking, but a pan of hot water also works
A cheesecake water bath surrounds the pan with gentle, humid heat, helping the filling bake more evenly and reducing the chance of a dry edge or a split top. A regular cake pan can go directly into a larger roasting pan with hot water because it has no removable bottom that could leak.
A direct water bath is safe when the cake pan fits inside a larger pan
Put the parchment-lined cake pan in a roasting pan, then place both pans in the oven. Carefully pour hot water into the roasting pan until it comes about halfway up the cake pan’s sides, taking care not to splash the parchment collar or filling.
Lift the roasting pan rather than the cake pan when moving it. The water adds weight and can slosh, so this method is easiest when the roasting pan has a stable, roomy base.
A separate pan of hot water gives a simpler no-water-bath option
If you do not own a roasting pan, put a pan of hot water on a lower oven rack and bake the cheesecake on the rack above it. This does not surround the cake with water, but it adds moisture to the oven and is less awkward than balancing a cake pan in a water bath.
A cheesecake recipe no water bath can still be excellent. Keep the oven moderate, avoid overmixing, stop baking when the center retains a small wobble, and cool gradually to limit the sudden temperature change that opens cracks.
Warning: Never pour water into a pan with a loose parchment base or carry a full water bath across the kitchen with one hand. Arrange the pans on the oven rack first, then add the hot water slowly.
A fully chilled parchment-lined cheesecake lifts out of a regular pan
The answer to how to get cheesecake out of a regular pan is time first and lifting second. Refrigerate until the filling is cold and firm, loosen only what needs loosening, and use the parchment handles rather than a knife as the primary removal tool.
Take the chilled cake pan from the refrigerator and set it on a flat work surface.
If the side collar is still present, peel it slowly downward and away from the cheesecake.
Place the pan on a sturdy can or jar that is narrower than the pan, if you want to release the cake by lowering the sides. Skip this approach when the pan has a fixed base.
For a fixed-base pan, gather two opposite parchment tabs in each hand and lift straight up with even pressure.
Set the cheesecake, still on its parchment base, onto a board or serving plate. Slide a thin spatula underneath only if you need to remove the base paper.
Do not attempt the lift if the middle still feels soft or the paper tears under a gentle test pull. Put the pan back in the refrigerator for another hour rather than trying to rescue a soft cake midair.
A pie dish needs no unmolding at all
For a deep-dish pie plate, chill the cheesecake and slice it directly in the dish with a thin knife. Dip the knife in hot water, wipe it dry, and repeat between cuts for cleaner wedges.
This is the least risky option when you are making cheesecake in a regular pan for the first time. The dessert can still look intentional with fruit, a sauce, or a ring of whipped cream around the edge.
An unlined cake pan requires gentle warming and a flip
If a cheesecake was baked in an unlined cake pan, run a thin knife around the inside edge after it has chilled. Warm the exterior of the pan briefly with a hot towel, invert it onto a plate, then turn it right-side up onto the final serving plate.
This method can disturb a crumb crust and carries more risk than parchment handles. Save it for a dense, thoroughly chilled cheesecake, and cover any small surface marks with a topping rather than repeatedly prying at the cake.
Most cheesecake cracks come from air, heat, or a rushed cooling period
Cracks are cosmetic rather than a sign of unsafe cheesecake, and they are easy to cover with fruit or a thin layer of sour cream topping. The useful response is to identify the cause before the next bake instead of turning up the oven or mixing longer.
Gentle mixing prevents the tall puff that collapses into cracks
High-speed beating puts air into the filling. In the oven, that air expands and raises the cheesecake; when it cools, the top sinks and can split.
Use low speed after the cream cheese is smooth, scrape often, and stop mixing as soon as the eggs are incorporated. Room-temperature ingredients help you reach a smooth batter without extra beating.
A small center wobble prevents an overbaked dry edge
A cheesecake continues to set from residual heat after it leaves the oven. Waiting until the center is entirely firm often dries the outer ring and makes the top more likely to crack as it contracts.
Start checking before the shortest baking time in your recipe. The right motion is a unified, gentle wobble in the center, not a ripple of raw batter across the whole surface.
Slow cooling protects the smooth center from a temperature shock
Moving a hot cheesecake straight from the oven to a cold counter or refrigerator makes the proteins contract quickly. The brief oven rest and room-temperature cooling phase are simple steps with a large effect on a no-cracks finish.
Keep the cheesecake away from an open window or strong fan as it cools. Once it reaches room temperature, cover it loosely enough that condensation does not drip back onto the top.
A no-bake, mini, or Basque-style cheesecake needs even less special equipment
No springform pan needed does not mean one single recipe path. Choose the variation that fits the pan you own and the look you want to serve.
No-bake cheesecake works best in a pie dish, square pan, or cups
A no-bake filling does not need oven-safe parchment, but it still needs support while it chills. Press the crust into a pie dish for simple slicing, make bars in a parchment-slung square pan, or spoon crust and filling into glasses for individual servings.
Because there is no baked egg structure, chill no-bake cheesecake until thoroughly firm before cutting. A pie dish or individual cup is more forgiving than trying to lift a very soft no-bake filling from a deep round pan.
Mini cheesecakes need liners and a short bake
Put paper liners in a muffin tin, add a small spoonful of crust, and divide filling evenly between wells. Mini cheesecakes bake much faster than a full cake, so check them early; the centers should look set with only a slight wobble.
Cool them in the tin, then chill before peeling off the liners. This is a practical small batch baking option when you need individual servings for a gathering and do not want to cut slices at the table.
A Basque cheesecake is meant to look dark and rustic
Basque cheesecake is a crustless style baked at a higher temperature so the top becomes deeply browned while the interior stays soft and creamy. A parchment-lined cake pan is well suited to it because the wrinkled paper and darker surface are part of the presentation.
Use a tall parchment collar that rises well above the pan, since this batter can puff. Unlike a classic New York style cheesecake, small cracks and an uneven top are normal here, so it is a forgiving choice when easy removal and a golden brown top matter more than a flawless finish.
Chilled cheesecake keeps well when it is covered and protected from odors
Refrigerate cheesecake covered once it has cooled completely. Keep it away from strong-smelling foods, since dairy-based desserts readily pick up refrigerator odors.
For the cleanest slices, keep the cheesecake chilled and bring only the portion you plan to serve toward room temperature for a short time. Return leftovers to the refrigerator promptly rather than leaving the full cake out through a long meal.
Freezing works best for firm, chilled slices
Chill the cheesecake first, then freeze individual slices on a lined sheet until firm. Wrap the slices well and thaw them in the refrigerator, where the texture changes less abruptly than it would on the counter.
Freeze toppings separately when possible. Fresh fruit and sauces can release water during thawing and make the top look wet.
Yes: Frequently asked questions about cheesecake without a springform pan
What can I use for cheesecake if I don’t have a springform pan?
Use a 9-inch round cake pan, a deep-dish pie plate, an 8- or 9-inch square pan, ramekins, or a muffin tin. Line a cake or square pan with parchment paper that extends above the rim when you want to lift out the chilled cheesecake; serve pie-dish and ramekin cheesecakes directly from their dishes.
Can I make cheesecake in a regular pan?
Yes. A regular cake pan works well when it is deep enough for the batter and fully lined with parchment on the base and sides. Bake gently, cool slowly, refrigerate until firm, then lift the cheesecake by parchment tabs or serve it from the pan.
Can I use a normal pan instead of a springform pan?
Yes. A normal cake pan is the closest substitute, while a deep pie plate, square pan, loaf pan, ramekins, and muffin tin also work. The main adjustment is removal: use parchment handles for lift-out cakes or select a serving dish that does not need unmolding.
How to get a cheesecake out of a regular pan?
Chill the cheesecake for at least 6 hours, peel away the side parchment, and lift straight up using two wide parchment-paper handles. If it was not lined, loosen the edge with a thin knife, warm the outside of the pan briefly with a hot towel, invert onto a plate, then turn it right-side up.
Yes: You can make cheesecake without a springform pan with a lined ordinary pan
How to make cheesecake without a springform pan comes down to one decision: line a deep cake or square pan when you want to lift the dessert out, or choose a pie dish, ramekin, or muffin tin when serving in the vessel is easier. Keep the batter below the rim, mix at low speed, bake until the center wobbles softly, and do not rush the chill.
Start with the pan already in your cupboard rather than postponing dessert. A few pieces of parchment paper and a slow cooling period are enough to produce a creamy cheesecake with clean slices and no special release mechanism.