
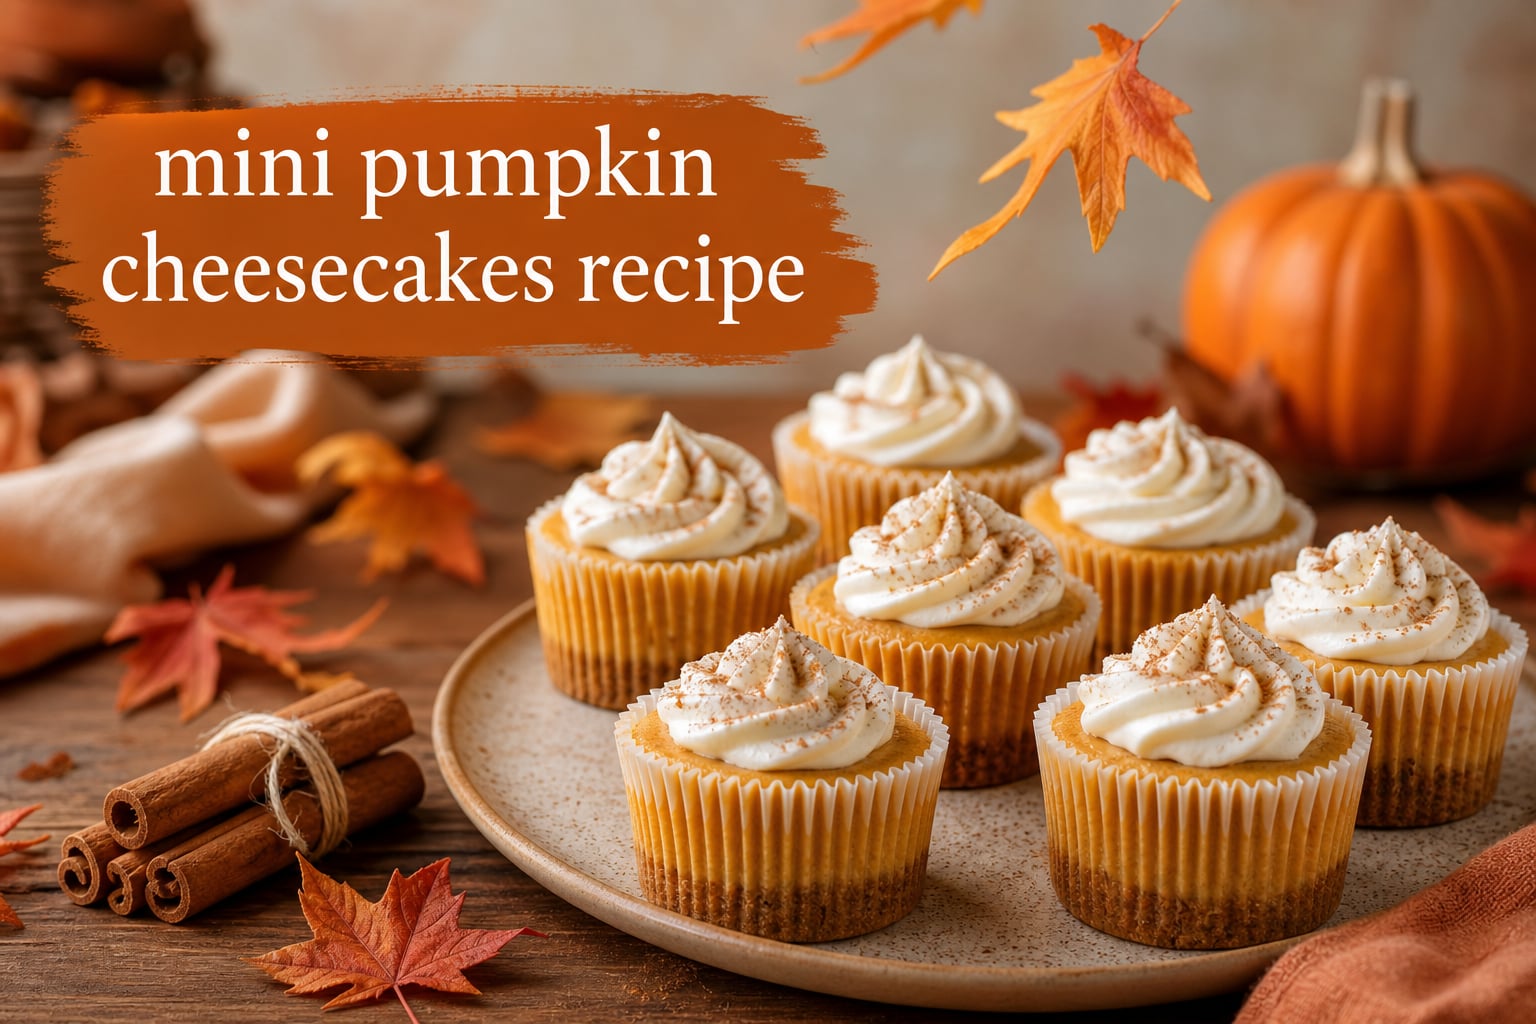
This mini pumpkin cheesecakes recipe makes creamy, warmly spiced individual desserts in a standard 12-cup muffin tin. Each cheesecake has a crisp graham cracker crust, a pumpkin-and-cream-cheese filling, and enough structure to chill, top, and carry to a fall gathering.
I like this format for a Thanksgiving dessert because every guest gets a finished serving and there is no full cake to slice. The method also skips a water bath: gentle mixing, a modest oven temperature, and a slow cool do the work.
Plan on about 30 minutes of hands-on preparation, 18 to 22 minutes in the oven, and at least 4 hours of chilling. Make them a day ahead when you can; cold cheesecake tastes more settled and slices more cleanly from its liner.
Table of Contents
You need a simple crust, pumpkin filling, and optional topping
These amounts make 12 mini cheesecakes in a regular muffin tin, not a 24-cup mini muffin tin. Set the cream cheese and eggs out about 30 minutes before mixing so the filling comes together without small lumps.
Use these ingredients for the graham cracker crust
- 1 cup fine graham cracker crumbs
- 2 tablespoons packed light brown sugar
- 4 tablespoons unsalted butter, melted
- Pinch of fine salt
Fine crumbs pack into a firm base more evenly than large pieces. Crush whole graham crackers in a bag with a rolling pin or pulse them until they resemble coarse sand.
Use these ingredients for the pumpkin cheesecake filling
- 16 ounces full-fat block cream cheese, softened
- 1/2 cup granulated sugar
- 1/2 cup pumpkin puree
- 2 large eggs, at room temperature
- 1/4 cup sour cream
- 1 teaspoon vanilla extract
- 1 1/2 teaspoons pumpkin pie spice
- 1/4 teaspoon fine salt
Buy plain pumpkin puree, not pumpkin pie filling. Pie filling is already sweetened and spiced, so it changes both the sweetness and the texture of this pumpkin cheesecake filling.
Use these ingredients if you want a whipped cream finish
- 3/4 cup cold heavy cream
- 2 tablespoons powdered sugar
- 1/2 teaspoon vanilla extract
- A little maple syrup or cinnamon, optional
Whip the cream only when the cheesecakes are fully cold. A small spoonful on each cake is enough, since the filling itself is rich.
Use a regular muffin tin with paper liners
A regular 12-cup muffin tin is the right pan for this recipe. Its wells are usually about 2 1/2 inches across, giving you individual servings that bake in roughly 18 to 22 minutes.
A 24-cup mini muffin tin will work only if you divide the crust and filling into about 24 portions and shorten the baking time. Start checking those smaller cheesecakes at 15 minutes because forum bakers repeatedly report that the mini-pan timing is much shorter than regular muffin-tin timing.
- Use 12 paper cupcake liners for a regular muffin tin.
- Use a measuring tablespoon to portion the crust consistently.
- Use a small cookie scoop or a 1/4-cup measure for the filling.
- Use an electric hand mixer or stand mixer, plus a rubber spatula.
The liners are not optional for convenience: they keep the buttery crust from sticking and let you lift the chilled cheesecakes out without scraping a pan. If your liners tend to cling, let the cheesecakes sit at room temperature for 5 minutes before peeling.
Make this mini pumpkin cheesecakes recipe in six clear steps
The method is short, but the order matters. Mix the cream cheese smooth before adding the other filling ingredients, then bake just until the centers have a small wobble.
Step 1: Heat the oven and line the pan
Position a rack in the center of the oven and heat it to 325°F. Line all 12 wells of a regular muffin tin with paper liners.
Set the prepared pan on a rimmed baking sheet if moving a filled muffin tin in and out of the oven feels awkward. The sheet is optional, but it gives you a steadier surface.
Step 2: Press the graham cracker crust into the liners
Stir the graham cracker crumbs, brown sugar, melted butter, and salt until every crumb looks moistened. Spoon about 1 heaping tablespoon into each liner.
Press the mixture firmly and evenly across the bottom with the flat base of a small glass, measuring spoon, or clean spice jar. A loose crust crumbles when the liner comes off, while an aggressively thick crust can leave too little room for filling.
Bake the crusts for 5 minutes, then leave the oven on. This brief bake helps the butter bind the crumbs and keeps the base from becoming soggy under the filling.
Step 3: Beat the cream cheese smooth before adding pumpkin
Beat the softened cream cheese and granulated sugar on medium-low speed for about 1 minute, scraping the bowl and beaters once. The goal is smooth and creamy, not fluffy.
Add the pumpkin puree, sour cream, vanilla, pumpkin pie spice, and salt. Beat on low just until the color is even, then scrape the bottom and sides of the bowl with a spatula.
Add the eggs one at a time on low speed, stopping as soon as each one disappears into the batter. Overmixing after the eggs go in adds extra air, which can make mini cheesecakes rise, fall, and crack.
Step 4: Portion the filling without overfilling
Divide the filling among the warm crusts, using about 1/4 cup per liner. The cups should be roughly three-quarters full, with a visible margin below the liner edge.
Tap the pan gently on the counter once or twice to release larger air bubbles. Do not keep tapping or shake the pan hard; the crust can shift up the sides.
Step 5: Bake until the edges are set and the centers barely jiggle
Bake for 18 to 22 minutes at 325°F. The outer ring should look set and slightly puffed, while a circle about the size of a quarter in the center should tremble when you nudge the pan.
Do not wait for the entire top to become firm like a cupcake. Cheesecake continues setting from residual heat, and a fully rigid center at oven removal usually means a drier result.
Step 6: Cool, chill, and top the cheesecakes
Turn off the oven, crack the door open, and let the pan rest inside for 10 minutes. Move the pan to a wire rack for 30 minutes, then refrigerate the cheesecakes in the pan for at least 4 hours.
Once cold, remove the liners and add whipped cream, a dusting of cinnamon, or a tiny drizzle of maple syrup. Keep any toppings separate until close to serving time if you need to transport them.
Bake until the centers barely jiggle, not until they look dry
Mini pumpkin cheesecakes are done when the edges are set, the tops no longer look wet, and the centers give a controlled, gentle jiggle. At 325°F in a regular muffin tin, that point usually arrives in 18 to 22 minutes.
Ovens differ, so begin checking at 18 minutes rather than relying on a timer alone. An instant-read thermometer can help: the center is generally in the right range around 150°F, but the visual jiggle test is enough for most home bakers.
- Regular 12-cup muffin tin: Bake 18 to 22 minutes.
- 24-cup mini muffin tin: Start checking at 15 minutes.
- Signs of overbaking: a dry, inflated top, deep cracks, or browned edges.
You do not need a water bath for these small cheesecakes. Their shallow depth lets them bake evenly, and the gradual oven cool protects them from the fast temperature swing that often opens cracks.
Cool the cheesecakes gradually to limit cracks
Cheesecake contracts as it cools, so a sharp shift from hot oven to cold counter can pull the surface apart. The 10-minute rest in the turned-off oven makes that transition gentler without adding much time.
After the counter cool, refrigerate the cakes uncovered until they are cold and firm. Cover them after they have chilled if they will stay in the refrigerator overnight; this keeps them from picking up refrigerator odors while avoiding condensation on warm tops.
Small surface cracks do not ruin mini cheesecakes. Cover them with a swirl of whipped cream, pecans, or a few gingersnap crumbs, and no one at the dessert table will mind.
Store and freeze mini pumpkin cheesecakes this way
Store cooled mini cheesecakes in an airtight container in the refrigerator for up to 4 days. They are a practical make-ahead dessert because the flavor and texture improve after several hours of chilling.
For freezing, first chill the cheesecakes fully and remove the liners if they are damp. Place the un-topped cakes on a tray until firm, then wrap each one or place them in a freezer-safe airtight container with parchment between layers.
Freeze for up to 2 months for the best texture. Thaw covered in the refrigerator overnight, then add whipped cream after thawing; people who have frozen them report that they freeze well when the topping is held back.
Make them ahead for a party without last-minute work
Bake the cheesecakes one or two days before a holiday gathering and refrigerate them plain. Whip the cream several hours before serving, or prepare it shortly before guests arrive for the lightest finish.
For a potluck, keep the cheesecakes in their liners inside a cold carrier and transport toppings separately. Individual servings remove the need for a knife, plates sized for cake slices, or a messy serving station.
Fix the common mini cheesecake problems before the next batch
Most trouble comes from pan-size confusion, cold cream cheese, or baking past the jiggle stage. These quick corrections address the questions that come up most often among home bakers.
Use room-temperature dairy when the filling looks lumpy
Cold cream cheese does not blend smoothly with pumpkin and can leave white specks in the finished cheesecake. Let the cream cheese soften at room temperature, cut it into cubes if needed, and beat it smooth before adding any other ingredient.
If the batter is already lumpy, stop adding air by beating harder. Press it through a fine-mesh sieve or let it sit for a few minutes, then stir gently with a spatula.
Stop mixing early when the cheesecakes crack
Cracks are commonly caused by too much air in the batter, too much heat, or a quick cool-down. Mix eggs on low only until combined, bake until the center barely jiggles, and use the short rest in the turned-off oven.
Do not worry about a hairline crack if the flavor is good. A cold topping covers it, and the small format makes cracks much less noticeable than they are on a full-size cheesecake.
Use canned puree when an orange pumpkin color matters
Fresh pumpkin can be used if it is cooked, puréed, and drained well, but it often has more water and can bake a browner color than canned puree. That color change is a normal result of the pumpkin and oven heat, not a sign that the cheesecake failed.
For a brighter, more predictable orange filling, use canned plain pumpkin puree. Avoid pumpkin pie filling because its added sugar and spices make the recipe hard to control.
Thin the swirl mixture when it will not move through the batter
A pumpkin swirl needs a softer consistency than thick cheesecake batter. Reserve about 1/3 cup of finished filling, stir in 1 additional tablespoon of pumpkin puree, and use that loosened portion for the swirl.
Dot the orange mixture over the filled cups, then drag a toothpick through each cup in two or three loose figure-eight motions. Too many passes blend the colors into brown instead of leaving distinct ribbons.
Match the crust and filling portions when the cups overflow
Use about 1 heaping tablespoon of crust and about 1/4 cup filling per regular muffin cup. A deeper crust steals filling space, while a fuller cup can overflow before the center has baked.
If you have a little filling left after portioning, do not crowd the cups. Bake the extra in one lined cup or save it rather than forcing every cheesecake to the rim.
Change the crust or flavor without changing the basic method
Once you have the regular muffin-tin proportions down, this recipe adapts well to different crumbs and toppings. Keep the crumb quantity and melted butter the same at first, then judge whether the new cookie needs an extra spoonful of butter to hold together.
Use gingersnaps, Biscoff, or gluten-free crumbs for the crust
Gingersnap crumbs make mini pumpkin cheesecakes with gingersnap crust that lean warmly spicy and pair naturally with the pumpkin. Biscoff cookies create a caramelized, cinnamon-like note and usually need less added brown sugar because the cookies are sweet.
For gluten-free mini pumpkin cheesecakes, use gluten-free graham-style crumbs and check the labels on pumpkin pie spice and vanilla. The filling has no flour, so the crust is the main adjustment.
Use fresh pumpkin only after draining it well
Fresh pumpkin puree needs to be thick enough to mound on a spoon, not loose like soup. Roast or steam the pumpkin, purée it, then drain it in a fine-mesh sieve or cheesecloth before measuring 1/2 cup.
Even after draining, expect a less consistent color and moisture level than canned puree. If the fresh puree is very wet, the cheesecakes may need a few additional minutes; rely on the jiggle test, not a fixed minute count.
Make a no-bake version by changing the filling, not the bake time
A true no-bake mini pumpkin cheesecake is a different formula, usually built with whipped cream or whipped topping and a set filling rather than eggs. Do not simply skip baking in this egg-based recipe, because the eggs require heat to become safe and set the filling.
You can still use the baked crust method here, or chill an unbaked crumb crust until firm. Choose a tested no-bake filling formula when that is the dessert you want.
Use a nine-inch pan only with a full-size formula
This batch is designed for 12 shallow muffin cups, so it will not fill a nine-inch springform pan to a traditional cheesecake depth. For a full-size pumpkin cheesecake, use a recipe written for that pan or scale the filling upward and expect a much longer bake.
That distinction matters because depth changes how heat reaches the center. A full cheesecake benefits from its own timing, cooling plan, and often a water bath, while these mini cheesecakes do not need one.
Serve the cheesecakes cold with a light topping
Serve mini pumpkin cheesecakes straight from the refrigerator or after 10 minutes at room temperature. Cold filling has the neatest texture, while a brief rest softens the creamy center slightly.
Whipped cream is the classic choice, but maple whipped cream, chopped toasted pecans, a pinch of cinnamon, or gingersnap crumbs all work well. For a holiday dessert tray, keep each garnish small so the pumpkin cheesecake remains easy to eat in a few bites.
These are especially useful for Thanksgiving, fall parties, and potlucks because the portions are already set. Put them on a chilled platter if they will sit out for a while, and return leftovers to the refrigerator promptly.
Get direct answers to mini pumpkin cheesecake questions
How do I know when mini pumpkin cheesecakes are done?
They are done when the edges are set and the center has a small, controlled jiggle. In a regular muffin tin at 325°F, start checking at 18 minutes; do not wait for the center to become completely firm.
Can I use fresh pumpkin instead of canned?
Yes, but cook, purée, and drain it well before measuring. Fresh pumpkin often has more moisture and may bake browner than canned puree; use plain pumpkin puree, never sweetened pumpkin pie filling.
Can I use a muffin pan instead of a mini cheesecake pan?
Yes. This recipe is written for a standard 12-cup muffin tin with paper liners. A 24-cup mini muffin tin makes smaller cakes and needs a shorter baking time, so begin checking at 15 minutes.
How long do mini pumpkin cheesecakes take to bake?
Bake them for 18 to 22 minutes at 325°F in a regular muffin tin. The exact time depends on your oven, so look for set edges and a center that barely jiggles.
Can I freeze mini pumpkin cheesecakes?
Yes. Chill them fully, freeze them plain in an airtight freezer-safe container for up to 2 months, and thaw them covered in the refrigerator overnight. Add whipped cream after thawing.
How do I prevent cracks in mini cheesecakes?
Use softened cream cheese, mix eggs only until combined, avoid overbaking, and cool the cakes gradually by resting them in the turned-off oven for 10 minutes. Small cracks can be covered with whipped cream.
What can I use instead of pumpkin pie spice?
Use 3/4 teaspoon cinnamon, 1/4 teaspoon ginger, 1/8 teaspoon nutmeg, and a pinch of cloves in place of 1 1/2 teaspoons pumpkin pie spice. Adjust cloves carefully because it can take over the filling.
Can I make mini pumpkin cheesecakes ahead of time?
Yes. Bake them one or two days ahead and refrigerate them plain in an airtight container. Add whipped cream or other toppings shortly before serving for the freshest presentation.
Make this mini pumpkin cheesecakes recipe once, then make it your own
This mini pumpkin cheesecakes recipe comes down to a firm crumb base, room-temperature cream cheese, a restrained mix, and a center that still barely jiggles when it leaves the oven. Chill the cakes fully before deciding on texture; that wait is part of what makes cheesecake taste like cheesecake.
For your first batch, keep the classic graham cracker crust and canned pumpkin puree. After that, try a gingersnap base, a maple whipped cream finish, or a simple pumpkin swirl while keeping the same careful bake and cool routine.